Generality in solutions; an example in HttpFile
A few (ok, ok, over a dozen) years ago, I came across a question by someone on stackoverflow who wanted to be able to unzip part of a ZIP file that was hosted on the web without having to download the entire file.
He had not found a Python library for doing this, so he modified the ZipFile library to create an HTTPZipFile class which knew about both ZIP files and also about HTTP requests. I posted a different approach. Over time, stackoverflow changed its goals and now that question and answer have been closed and marked off-topic for stackoverflow. I believe there's value in the question and answer, and I think a fuller treatment of the answer would be fruitful for others to learn from.
Seams and Layers
The idea is to think about the interfaces: the seams or layers in the code.
The ZipFile class expects a file object. The file in this case lives on a website, but we could create a file-like object that knows how to retrieve parts of a file over HTTP using Range GET requests, and behaves like a file in terms of being seekable.
Let's walk through this pedagogically:
We want to create a file-like object that takes a URL as its constructor.
So let's start with our demo script:
#!/usr/bin/env python3

from httpfile import HttpFile
# Try it
from zipfile import ZipFile
URL = "https://www.python.org/ftp/python/3.12.0/python-3.12.0-embed-amd64.zip"
my_zip = ZipFile(HttpFile(URL))
print("\n".join(my_zip.namelist()))
And create httpfile.py with just the constructor as a starting point:
#!/usr/bin/env python3
class HttpFile:
    def __init__(self, url):
        self.url = url
Trying that, we get:
AttributeError: 'HttpFile' object has no attribute 'seek'
So let's implement seek:
#!/usr/bin/env python3
import requests

class HttpFile:
    def __init__(self, url):
        self.url = url
        self.offset = 0
        self._size = -1

    def size(self):
        if self._size < 0:
            response = requests.get(self.url, stream=True)
            response.raise_for_status()
            if response.status_code != 200:
                raise OSError(f"Bad response of {response.status_code}")
            self._size = int(response.headers["Content-length"], 10)
        return self._size

    def seek(self, offset, whence=0):
        if whence == 0:
            self.offset = offset
        elif whence == 1:
            self.offset += offset
        elif whence == 2:
            self.offset = self.size() + offset
        else:
            raise ValueError(f"whence value {whence} unsupported")
        return self.offset
That gets us to the next error:
AttributeError: 'HttpFile' object has no attribute 'tell'
So we implement tell():
    def tell(self):
        return self.offset
Making progress, we reach the next error:
AttributeError: 'HttpFile' object has no attribute 'read'
So we implement read:
    def read(self, count=-1):
        if count < 0:
            end = self.size() - 1
        else:
            end = self.offset + count - 1
        headers = {
            'Range': "bytes=%s-%s" % (self.offset, end),
        }
        response = requests.get(self.url, headers=headers, stream=True)
        if response.status_code != 206:
            raise OSError(f"Bad response of {response.status_code}")
        # The headers contain the information we need to check that; in particular,
        # When the server accepts the range request, we get
        # Accept-Ranges: bytes
        # Content-Length: 22
        # Content-Range: bytes 27382-27403/27404
        # vs when it does not accept the range:
        # Content-Length: 27404
        content_range = response.headers.get('Content-Range')
        if not content_range:
            raise OSError("Server does not support Range")
        if content_range != f"bytes {self.offset}-{end}/{self.size()}":
            raise OSError(f"Server returned unexpected range {content_range}")
        # End of paranoia checks
        chunk = len(response.content)
        if count >= 0 and chunk != count:
            raise OSError(f"Asked for {count} bytes but got {chunk}")
        self.offset += chunk
        return response.content
We have a lot going on here; particularly around handling error checking and ensuring the responses match what we expect. We want to fail loudly if we get something unexpected rather than attempt to forge ahead and fail in an obscure way later on.
And now we finally reach some success, giving a listing of the filenames within the ZIP:
python.exe
pythonw.exe
python312.dll
python3.dll
vcruntime140.dll
vcruntime140_1.dll
LICENSE.txt
pyexpat.pyd
select.pyd
unicodedata.pyd
winsound.pyd
_asyncio.pyd
_bz2.pyd
_ctypes.pyd
_decimal.pyd
_elementtree.pyd
_hashlib.pyd
_lzma.pyd
_msi.pyd
_multiprocessing.pyd
_overlapped.pyd
_queue.pyd
_socket.pyd
_sqlite3.pyd
_ssl.pyd
_uuid.pyd
_wmi.pyd
_zoneinfo.pyd
libcrypto-3.dll
libffi-8.dll
libssl-3.dll
sqlite3.dll
python312.zip
python312._pth
python.cat
So let's see if we can extract part of the LICENSE.txt file from within the zip:
data = my_zip.open('LICENSE.txt')
data.seek(99)
print(data.read(239).decode('utf-8'))
That triggers a new error (which a comment 8 years after the initial code was posted pointed out was needed as of Python 3.7):
AttributeError: 'HttpFile' object has no attribute 'seekable'
So a trivial implementation of that:
    def seekable(self):
        return True
and we now get the content:
Guido van Rossum at Stichting
Mathematisch Centrum (CWI, see https://www.cwi.nl) in the Netherlands
as a successor of a language called ABC.  Guido remains Python's
principal author, although it includes many contributions from others.
There are a number of ways to further improve this code for production use, but for our pedagogical purposes here, I think we can call that "good enough". (Areas of improvement from an engineering perspective include: actual unit tests, integration tests that do not rely on a remote server, filling out the file object's full interface, addressing the read-only nature of the file access, using a session to support authentication mechanisms and connection reuse, among others.)
This gets us an object that acts like a local file even though it's reaching over the network. The implementation requires less code than a modified HttpZipFile would.
This same interface of a file-like object can be used for other purposes as well.
A Second Application Of The Pattern
Let's continue with our motivating use case of accessing parts of remote zip files where we don't want to download the entire file. If we don't want to download the entire file, then surely we would not want to download part of the file multiple times, right? So we would like HttpFile to cache data. But then we wind up mixing caching into the HTTP logic. Instead, we can again use the file-like-object interface to add a caching layer for a file-like object.
So we will need a class that takes a file object and a location to save the cached data. To keep this simple, let's say we point to a directory where the cache for this one file object will be stored. We will want to be able to store the file's total size, every chunk of data, and where each chunk of data maps into the file. So let's say the directory can contain a file named size with the file's size as a base 10 string with a newline, and any number of data.<offset> files with a chunk of data. This makes it easy for a human to understand how the data on disk works. I would not call it exactly "self describing", but it does lean in that general direction. (There are many, many ways we could store the data in the cache directory. Each one has its own set of trade-offs. Here I'm aiming for ease of implementation and obviousness.)
Since the file's data will be stored in segments, we will want to be able to think in terms of segments which can be ordered, check if two segments overlap, or if one segment contains another. So let's create a class to provide that abstraction:
import functools


@functools.total_ordering
class Segment(object):
    def __init__(self, offset, length):
        self.offset = offset
        self.length = length

    def overlaps(self, other):
        return (
            self.offset < other.offset+other.length and
            other.offset < self.offset + self.length
        )

    def contains(self, offset):
        return self.offset <= offset < (self.offset + self.length)

    def __lt__(self, other):
        return (self.offset, self.length) < (other.offset, other.length)

    def __eq__(self, other):
        return self.offset == other.offset and self.length == other.length
Using that class, we can create a constructor that loads the metadata from the cache directory:
class CachingFile:
    def __init__(self, fileobj, backingstore):
        """fileobj is a file-like object to cache.  backingstore is a directory name.
        """
        self.fileobj = fileobj
        self.backingstore = backingstore
        self.offset = 0
        os.makedirs(backingstore, exist_ok=True)
        try:
            with open(os.path.join(backingstore, 'size'), 'r', encoding='utf-8') as size_file:
                self._size = int(size_file.read().strip(), 10)
        except Exception:
            self._size = -1

        # Get files and sizes for any pre-existing data, so
        # self.available_segments is a sorted list of Segments.
        self.available_segments = [
            Segment(int(filename[len("data."):], 10), os.stat(os.path.join(self.backingstore, filename)).st_size)
            for filename in os.listdir(self.backingstore) if filename.startswith("data.")]
and the simple seek/tell/seekable parts of the interface we learned above:
    def size(self):
        if self._size < 0:
            self._size = self.fileobj.seek(0, 2)
            with open(os.path.join(self.backingstore, 'size'), 'w', encoding='utf-8') as size_file:
                size_file.write(f"{self._size}\n")
        return self._size

    def seek(self, offset, whence=0):
        if whence == 0:
            self.offset = offset
        elif whence == 1:
            self.offset += offset
        elif whence == 2:
            self.offset = self.size() + offset
        else:
            raise ValueError("Invalid whence")
        return self.offset

    def tell(self):
        return self.offset

    def seekable(self):
        return True
Implementation of read() is a bit more complex. It needs to handle reads with nothing in the cache, reads with everything in the cache, but also reads with multiple cached and uncached segments.
    def _read(self, offset, count):
        """Does not update self.offset"""
        if offset >= self.size() or count == 0:
            return b""
        desired_segment = Segment(offset, count)
        # Is there a cached segment for the start of this segment?
        matches = sorted(segment for segment in self.available_segments if segment.contains(offset))
        if matches: # Read data from cache
            match = matches[0]
            with open(os.path.join(self.backingstore, f"data.{match.offset}"), 'rb') as data_file:
                data_file.seek( offset - match.offset )
                data = data_file.read(min(offset+count, match.offset+match.length) - offset)
        else: # Read data from underlying file
            # The beginning of the requested data is not cached, but if a later
            # portion of the data is cached, we don't want to re-read it, so
            # request only up to the next cached segment..
            matches = sorted(segment for segment in self.available_segments if segment.overlaps(desired_segment))
            if matches:
                match = matches[0]
                chunk_size = match.offset - offset
            else:
                chunk_size = count
            # Read from the underlying file object
            if not self.fileobj:
                raise RuntimeError(f"No underlying file to satisfy read of {count} bytes at offset {offset}")
            self.fileobj.seek(offset)
            data = self.fileobj.read(chunk_size)
            # Save to the backing store
            with open(os.path.join(self.backingstore, f"data.{offset}"), 'wb') as data_file:
                data_file.write(data)
            # Add it to the list of available segments
            self.available_segments.append(Segment(offset, chunk_size))
        # Read the rest of the data if needed
        if len(data) < count:
            data += self._read(offset+len(data), count-len(data))
        return data

    def read(self, count=-1):
        if count < 0:
            count = self.size() - self.offset
        data = self._read(self.offset, count)
        self.offset += len(data)
        return data
Notice the RuntimeError raised if we created the CachingFile object with fileobj=None. Why would we ever do that? Well, if we have fully cached the file, then we can run entirely from cache. If the original file (or URL, in our HttpFile case) is no longer available, the cache may be all we have. Or perhaps we want to isolate some operation, so we run once in "non-isolated" mode with the file object passed in, and then run in "isolated" mode with no file object. If the second run works, we know we have locally cached everything needed for the operation in question.
Our motivation is to use this with HttpFile, but it could be used in other situations. Perhaps you have mounted an sshfs file system over a slow or expensive link; CachingFile would improve performance or reduce cost. Or maybe you have the original files on a harddrive, but put the cache on an SSD so repeated reads are faster. (Though in the latter case, Linux offers functionality that would likely be superior to anything implemented in Python.)
Generalized Lesson
So those are a couple of handy utilities, but they demonstrate a more profound point.
When you design your code around standard interfaces, your solutions can be applied in a broader range of situations, and reduce the amount of code you must write to achieve your goal.
When faced with a problem of the form "I want to perform an operation on <something>, but I only know how to operate on <something else>", consider if you can create code that takes the "something" you have, and provides an interface that looks like the "something else" that you can use. If you can write that code to adapt one kind of thing to another kind of thing, you can solve your problem without having to reimplement the operation you already have code to do. And you might find there are more uses for the result than you anticipated.
Grid-based Tiling Window Management, Mark II
A few years ago, I implemented a grid-based tiling window management tool for Linux/KDE that drastically improved my ability to utilize screen realestate on a 4K monitor.
The basic idea is that a 4K screen is divided into 16 cells in a 4x4 grid, and a Full HD screen is divided into 4 cells in a 2x2 grid. Windows can be snapped (Meta-Enter) to the nearest rectangle that aligns with that grid, whether that rectangle is 1 cell by 1 cell, or if it is 2 cells by 3 cells, etc. They can be moved around the grid with the keyboard (Meta-Up, Meta-Down, Meta-Left, Meta-Right). They can be grown by increments of the cell size in the four directions (Ctrl-Meta-Up, Ctrl-Meta-Down, Ctrl-Meta-Left, Ctrl-Meta-Right), and can be shrunk similarly (Shift-Meta-Up, Shift-Meta-Down, Shift-Meta-Left, Shift-Meta-Right).
While simple in concept, it dramatically improves the manageability of a large number of windows on multiple screens.
Since that first implementation, KDE or X11 introduced a change that broke some of the logic in the quicktile code for dealing with differences in behavior between different windows. All windows report location and size information for the part of the window inside the frame. When moving a window, some windows move the window inside the frame to the given coordinates (meaning that you set the window position to 100,100, and then query the location and it reports as 100,100). But other windows move the window _frame_ to the given coordinates (meaning that you set the window position to 100,100, and then query the location and it reports as 104,135). It used to be that we could differentiate those two types of windows because one type would show a client of N/A, and the other type would show a client of the hostname. But now, all windows show a client of the hostname, so I don't have a way to differentiate them.
Fortunately, all windows report their coordinates in the same way, so we can set the window's coordinates to the desired value, get the new coordinates, and if they aren't what were expected, adjust the coordinates we request by the error amount, and try again. That gets the window to the desired location reliably.
The downside is that you do see the window move to the wrong place and then shift to the right place. Fixing that would require finding some characteristic that can differentiate between the two types of windows. It does seem to be consistent in terms of what program the window is for, and might be a GTK vs QT difference or something. Alternatively, tracking the error correction required for each window could improve behavior by making a proactive adjustment after the first move of a window. But that requires maintaining state from one call of quicktile to the next, which would entail saving information to disk (and then managing the life-cycle of that data), or keeping it in memory using a daemon (and managing said daemon). For the moment, I don't see the benefit being worth that level of effort.
Here is the updated quicktile script.
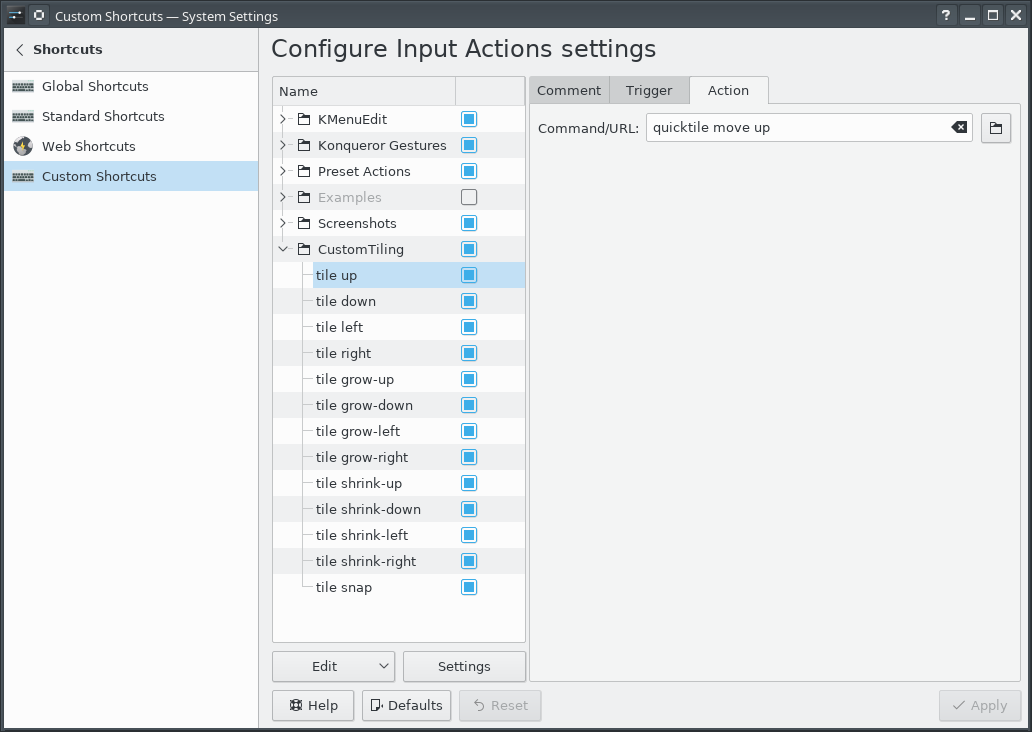
To use the tool, you need to set up global keyboard shortcuts for the various quicktile subcommands. To make that easier, I created an importable quicktile shortcuts config file for KDE.
Of late I have also noticed that some windows may get rearranged when my laptop has the external monitor connected or disconnected. When that happens, I frequently wind up with a large number of windows with odd shapes and in odd locations. Clicking on each window, hitting Meta-Enter to snap it to the grid, and then moving it out of the way of the next window gets old very quickly. To more easily get back to some sane starting point, I added a quicktile snap all subcommand which will snap all windows on the current desktop to the grid. The shortcuts config file provided above ties that action to Ctrl-Meta-Enter.
This version works on Fedora 34; I have not tested on other distributions.
Random Username Generator
Sometimes you need a username for a service, and you may not want it to be tied to your name. You could try to come up with something off the top of your head, but while that might seem random, it's still a name you would think of, and the temptation will always be to choose something meaningful to you. So you want to create a random username. On the other hand, "gsfVauIZLuE1s4gO" is extremely awkward as a username. It'd be better to have something more memorable; something that might seem kinda normal at a casual glance,
You could grab a random pair of lines from /usr/share/dict/words, but that includes prefixes, acronymns, proper nouns, and scientific terms. Even without those, "stampedingly-isicle" is a bit "problematical". So I'd rather use "adjective"-"noun". I went looking for word lists that included parts of speech information, and found a collection of English words categorized by various themes, which are grouped by parts of speech. The list is much smaller, but the words are also going to be more common, and therefore more familiar.
Using this word list, and choosing one adjective and one noun yields names like "gray-parent", "boxy-median", and "religious-tree". The smaller list means that such a name only has about 20 bits of randomness, but for a username, that's probably sufficient.
On the otherhand, we could use something like this for passwords like "correct horse battery staple", but in the form of adjective-adjective-adjective-noun. Given the part-of-speech constraint, 3 adjectives + 1 noun is about 40 bits of entropy. Increasing that to 4 adjectives and 1 noun gets about 49 bits of entropy.
So of course, I implemented such a utility in Python:
usage: generate-username [-h] [--adjectives ADJECTIVES] [--divider DIVIDER] [--bits BITS] [--verbose]

Generate a random-but-memorable username.

optional arguments:
  -h, --help            show this help message and exit
  --adjectives ADJECTIVES, -a ADJECTIVES
                        number of adjectives (default: 1)
  --divider DIVIDER     character or string between words (default: )
  --bits BITS           minimum bits of entropy (default: 0)
  --verbose             be chatty (default: False)
As the word list grows, the number of bits of entropy per word will increase, so the code calculates that from the data it actually has. It allows you to specify the number of adjectives and the amount of entropy desired so you can choose something appropriate for the usecase.
That said, 128 bits of entropy does start to get a little unweildy with 13 adjectives and one noun: "concrete-inverse-sour-symmetric-saucy-stone-kind-flavorful-roaring-vertical-human-balanced-ebony-gofer". Whoo-boy; that's one weird gofer. That could double as a crazy writing prompt.
If the word list had adverbs, we might be able to make this even more interesting. For that matter, it might be fun to create a set of "Mad Libs"-like patterns "The [adjective] [noun] [adverb] [verb] a [adjective] [noun]." Verb tenses and conjugations would make that more difficult to generate, but could yield quite memorable passphrases. Something to explore some other time.
Hopefully this will be useful to others.
Filtering embedded timestamps from PNGs
PNG files created by ImageMagick include an embedded timestamp. When programatically generating images, sometimes an embedded timestamp is undesirable. If you want to ensure that your input data always generates the exact same output data, bit-for-bit, embedded timestamps break what you're doing. Cryptographic signature schemes, or content-addressible storage mechanisms do not allow for even small changes to file content without changing their signature or address. Or if you are regenerating files from some source and tracking changes in the generated files, updated timestamps just add noise.
The PNG format has an 8-byte header followed by chunks with a length, type, content, and checksum. The embedded timestamp chunk has a type of tIME. For images created directly by ImageMagick, there are also creation and modification timestamps in tEXt chunks.
To see this for yourself:
convert -size 1x1 xc:white white-pixel-1.png
sleep 1
convert -size 1x1 xc:white white-pixel-2.png
cmp -l white-pixel-{1,2}.png
That will generate two 258-byte PNG files, and show the differences between the binaries. You should see output something like this:
122   3   4
123 374 142
124  52 116
125 112 337
126 123 360
187  63  64
194 156 253
195 261  26
196  32  44
197  30 226
236  63  64
243  37 332
244 354 113
245 242 234
246 244  52
I have a project where I want to avoid these types of changes in PNG files generated from processed inputs. We can remove these differences from the binaries by iterating over the chunks and dropping those with a type of either tIME or tEXt. So I wrote a bit of (Python 3) code (png_chunk_filter.py) that allows filtering specific chunk types from PNG files without making any other modifications to them.
./png_chunk_filter.py --verbose --exclude tIME --exclude tEXt \
    white-pixel-1.png white-pixel-1-cleaned.png
./png_chunk_filter.py --verbose --exclude tIME --exclude tEXt \
    white-pixel-2.png white-pixel-2-cleaned.png
cmp -l white-pixel-{1,2}-cleaned.png
Because of the --verbose option, you should see this output:
Excluding tEXt, tIME chunks
Found IHDR chunk
Found gAMA chunk
Found cHRM chunk
Found bKGD chunk
Found tIME chunk
Excluding tIME chunk
Found IDAT chunk
Found tEXt chunk
Excluding tEXt chunk
Found tEXt chunk
Excluding tEXt chunk
Found IEND chunk
Excluding tEXt, tIME chunks
Found IHDR chunk
Found gAMA chunk
Found cHRM chunk
Found bKGD chunk
Found tIME chunk
Excluding tIME chunk
Found IDAT chunk
Found tEXt chunk
Excluding tEXt chunk
Found tEXt chunk
Excluding tEXt chunk
Found IEND chunk
The cleaned PNG files are each 141 bytes, and both are identical.
usage: png_chunk_filter.py [-h] [--exclude EXCLUDE] [--verbose] filename target

Filter chunks from a PNG file.

positional arguments:
  filename
  target

optional arguments:
  -h, --help         show this help message and exit
  --exclude EXCLUDE  chunk types to remove from the PNG image.
  --verbose          list chunks encountered and exclusions
The code also accepts - in place of the filenames to read from stdin and/or write to stdout so that it can be used in a shell pipeline.
Another use for this code is stripping every unnecessary byte from a png to acheive a minimum size.
./png_chunk_filter.py --verbose \
    --exclude gAMA \
    --exclude cHRM \
    --exclude bKGD \
    --exclude tIME \
    --exclude tEXt \
    white-pixel-1.png minimal.png
That strips our 258-byte PNG down to a still-valid 67-byte PNG file.
Filtering of PNG files solved a problem I faced; perhaps it will help you at some point as well.
Grid-based Tiling Window Management
Many years ago, a coworker of mine showed me Window's "quick tiling" feature, where you would press Window-LeftArrow or Window-RightArrow to snap the current window to the left or right half of the screen. I then found that KDE on Linux had that same feature and the ability to snap to the upper-left, lower-left, upper-right, or lower-right quarter of the screen. I assigned those actions to the Meta-Home, Meta-End, Meta-PgUp, and Meta-PgDn shortcuts. (I'm going to use "Meta" as a generic term to mean the modifier key that on Windows machines has a Windows logo, on Linux machines has a Ubuntu or Tux logo, and Macs call "command".) Being able to arrange windows on screen quickly and neatly with keyboard shortcuts worked extremely well and quickly became a capability central to how I work.
Then I bought a 4K monitor.
With a 4K monitor, I could still arrange windows in the same way, but now I had 4 times the number of pixels. There was room on the screen to have a lot more windows that I could see at the same time and remain readable. I wanted a 4x4 grid on the screen, with the ability to move windows around on that grid, but also to resize windows to use multiple cells within that grid.
Further complicating matters is the fact that I use that 4K monitor along with the laptop's !FullHD screen which is 1920x1080. Dividing that screen into a 4x4 grid would be awkward; I wanted to retain a 2x2 grid for that screen, and keep a consistent mechanism for moving windows around on that screen and across screens.
KDE (Linux)
Unfortunately, KDE does not have features to support such a setup. So I went looking for a programatic way to control window size and placement on KDE/X11. I found three commandline tools that among them offered primitives I could build upon: xdotool, wmctrl, and xprop.
My solution was to write a Python program which took two arguments: a command and a direction.
The commands were 'move', 'grow', and 'shrink', and the directions 'left', 'right', 'up', and 'down'. And one additional command 'snap' with the location 'here' to snap the window to the nearest matching grid cells. The program would identify the currently active window, determine which grid cell was a best match for the action, and execute the appropriate xdotool commands. Then I associated keyboard shortcuts with those commands. Meta-Arrow keys for moving, Meta-Ctrl-Arrow keys to grow the window by a cell in the given direction, Meta-Shift-Arrow to shrink the window by a cell from the given direction, and Meta-Enter to snap to the closest cell.
Conceptually, that's not all that complicated to implement, but in practice:
Window geometry has to be adjusted for window decorations. But there appears to be a bug with setting the position of a window. The window coordinates used by the underlying tools for setting and getting the geometries do not include the frame, except for setting the position of the window, on windows that have a 'client' of the machine name instead of N/A. Getting the position, getting the size, and setting the size, all use the non-frame values. Windows with a client of N/A use the non-frame values for everything. A border width by title bar height offset error for only some of the windows proved to be a vexing bug to track down.
The space on a secondary monitor where the taskbar would be is also special, even if there is no task bar on that monitor; attempting to move a window into that space causes the window to shift up out of that space, so there remains an unused border on the bottom of the screen. Annoying, but I have found no alternative.
Move operations are not instantaneous, so setting a location and immediately querying it will yield the old coordinates for a short period.
A window which is maximized does not respond to the resize and move commands (and attempting it will cause xdotool to hang for 15 seconds), so that has to be detected and unmaximized.
A window which has been "Quick Tiled" using KDE's native quick-tiling feature acts like a maximized window, but does not set the maximized vert or maximized horz state flags, so cannot be detected with xprop, and to get it out of the KDE quick tiled state, it must be maximized and then unmaximized. So attempting to move a KDE quick tiled window leads to a 15 second pause, then the window maximizing briefly, and then resizing to the desired size. In practice, this is not much of an issue since my tool has completely replaced my use of KDE's quick-tiling.
OS X
I recently whined to a friend about not having the same window management setup on OS X; and he pointed me in the direction of a rather intriguing open source tool called Hammerspoon which lets you write Lua code to automate tasks in OS X and can assign keyboard shortcuts to those actions. That has a grid module that offers the necessary primitives to accomplish the same goal.
After installing Hammerspoon, launching it, and enabling Accessibility for Hammerspoon (so that the OS will let it control application windows), use init.lua as your ~/.hammerspoon/init.lua and reload the Hammerspoon config. This will set up the same set of keyboard shortcuts for moving application windows around as described in the KDE (Linux) section. For those who use OS X as their primary system, that set of shortcuts are going to conflict with (and therefore override) many of the standard keyboard shortcuts. Changing the keyboard shortcuts to add the Option key as part of the set of modifiers for all of the shortcuts should avoid those collisions at the cost of either needing another finger in the chord or putting a finger between the Option and Command keys to hit them together with one finger.
I was pleasantly surprised with how easily I could implement this approach using Hammerspoon.
Demo
Simple demo of running this on KDE:
(And that beautiful background is a high resolution photo by a friend and colleague, Sai Rupanagudi.)
Adhoc RSS Feeds
I have a few audio courses, with each lecture as a separate mp3. I wanted to be able to listen to them using AntennaPod, but that means having an RSS feed for them. So I wrote a simple utility to take a directory of mp3s and create an RSS feed file for them.
It uses the PyRSS2Gen module, available in Fedora with dnf install python-PyRSS2Gen.
$ ./adhoc-rss-feed --help
usage: adhoc-rss-feed [-h] [--feed-title FEED_TITLE] [--url URL]
                      [--base-url BASE_URL] [--filename-regex FILENAME_REGEX]
                      [--title-pattern TITLE_PATTERN] [--output OUTPUT]
                      files [files ...]
Let's work through a concrete example.
An audio version of the King James version of the Bible is available from Firefighters for Christ; they provide a 990MB zip of mp3s, one per chapter of each book of the Bible.
wget http://server.firefighters.org/kjv/kjv.zip
unzip kjv.zip
mv -- "- FireFighters" FireFighters # use a less cumbersome directory name
There are a lot of chapters in the Bible:
$ ls */*/*/*.mp3 | wc -l
1189
We can create an RSS2 feed with as little as
./adhoc-rss-feed \
    --output rss2.xml \
    --url=http://example.com/rss-feeds/kjv \
    --base-url=http://example.com/rss-feeds/kjv/ \
    */*/*/*.mp3
However, that's going to make for an ugly feed. We can make it a little less awful with
./adhoc-rss-feed \
    --feed-title="KJV audio Bible" \
    --filename-regex="FireFighters/KJV/(?P<book_num>[0-9]+)_(?P<book>.*)/[0-9]+[A-Za-z]+(?P<chapter>[0-9]+)\\.mp3" \
    --title-pattern="KJV %(book_num)s %(book)s chapter %(chapter)s" \
    --output rss2.xml \
    --url=http://example.com/rss-feeds/kjv \
    --base-url=http://example.com/rss-feeds/kjv/ \
    */*/*/*.mp3
That's simple, and good enough to be useful. Fixing up the names of the bible is beyond what that simple regex substitution can do, but we can also do some pre-processing cleanup of the files to improve that. A bit of tedius sed expands the names of the books:
for f in */*/*; do
    mv -iv $f $(echo "$f" | sed '
        s/Gen/Genesis/
        s/Exo/Exodus/
        s/Lev/Leviticus/
        s/Num/Numbers/
        s/Deu/Deuteronomy/
        s/Jos/Joshua/
        s/Jdg/Judges/
        s/Rth/Ruth/
        s/1Sa/1Samuel/
        s/2Sa/2Samuel/
        s/1Ki/1Kings/
        s/2Ki/2Kings/
        s/1Ch/1Chronicles/
        s/2Ch/2Chronicles/
        s/Ezr/Ezra/
        s/Neh/Nehemiah/
        s/Est/Esther/
        s/Job/Job/
        s/Psa/Psalms/
        s/Pro/Proverbs/
        s/Ecc/Ecclesiastes/
        s/Son/SongOfSolomon/
        s/Isa/Isaiah/
        s/Jer/Jeremiah/
        s/Lam/Lamentations/
        s/Eze/Ezekiel/
        s/Dan/Daniel/
        s/Hos/Hosea/
        s/Joe/Joel/
        s/Amo/Amos/
        s/Oba/Obadiah/
        s/Jon/Jonah/
        s/Mic/Micah/
        s/Nah/Nahum/
        s/Hab/Habakkuk/
        s/Zep/Zephaniah/
        s/Hag/Haggai/
        s/Zec/Zechariah/
        s/Mal/Malachi/
        s/Mat/Matthew/
        s/Mar/Mark/
        s/Luk/Luke/
        s/Joh/John/
        s/Act/Acts/
        s/Rom/Romans/
        s/1Co/1Corinthians/
        s/2Co/2Corinthians/
        s/Gal/Galatians/
        s/Eph/Ephesians/
        s/Php/Philipians/
        s/Col/Colosians/
        s/1Th/1Thesalonians/
        s/2Th/2Thesalonians/
        s/1Ti/1Timothy/
        s/2Ti/2Timothy/
        s/Tts/Titus/
        s/Phm/Philemon/
        s/Heb/Hebrews/
        s/Jam/James/
        s/1Pe/1Peter/
        s/2Pe/2Peter/
        s/1Jo/1John/
        s/2Jo/2John/
        s/3Jo/3John/
        s/Jde/Jude/
        s/Rev/Revelation/
    ')
done
There are a couple of errors generated due to the m3u files the wildcard includes as well as 'Job' already having its full name, but it will get the job done.
Run the same adhoc-rss-feed command again, then host it on a server under the given base url, and point your podcast client at the rss2.xml file.
AntennaPod lists episodes based on time, and in this case that makes for an odd ordering of the episodes, but by using the selection page in AntennaPod, you can sort by "Title A->Z", and books and chapters will be ordered as expected. And then when adding to the queue, you may want to sort them again. While there is some awkwardness in the UI with this extreme case, being able to take a series of audio files and turn them into a consumable podcast has proven quite helpful.
Driving Corsair Gaming keyboards on Linux with Python, IV
Here is a new release of my Corsair keyboard software.
The 0.4 release of rgbkbd includes:
- Union Jack animation and still image
- Templates and tools for easier customization
- Re-introduced brightness control
New Flag
For our friends across the pond, here's a Union Jack.
I started with this public domain image (from Wikipedia)
I scaled it down to 53px wide, cropped it to 18px tall, and saved that as uka.png in the flags/k95 directory. I then cropped it to 46px wide and saved that as flags/k70/uka.png. Then I ran make.
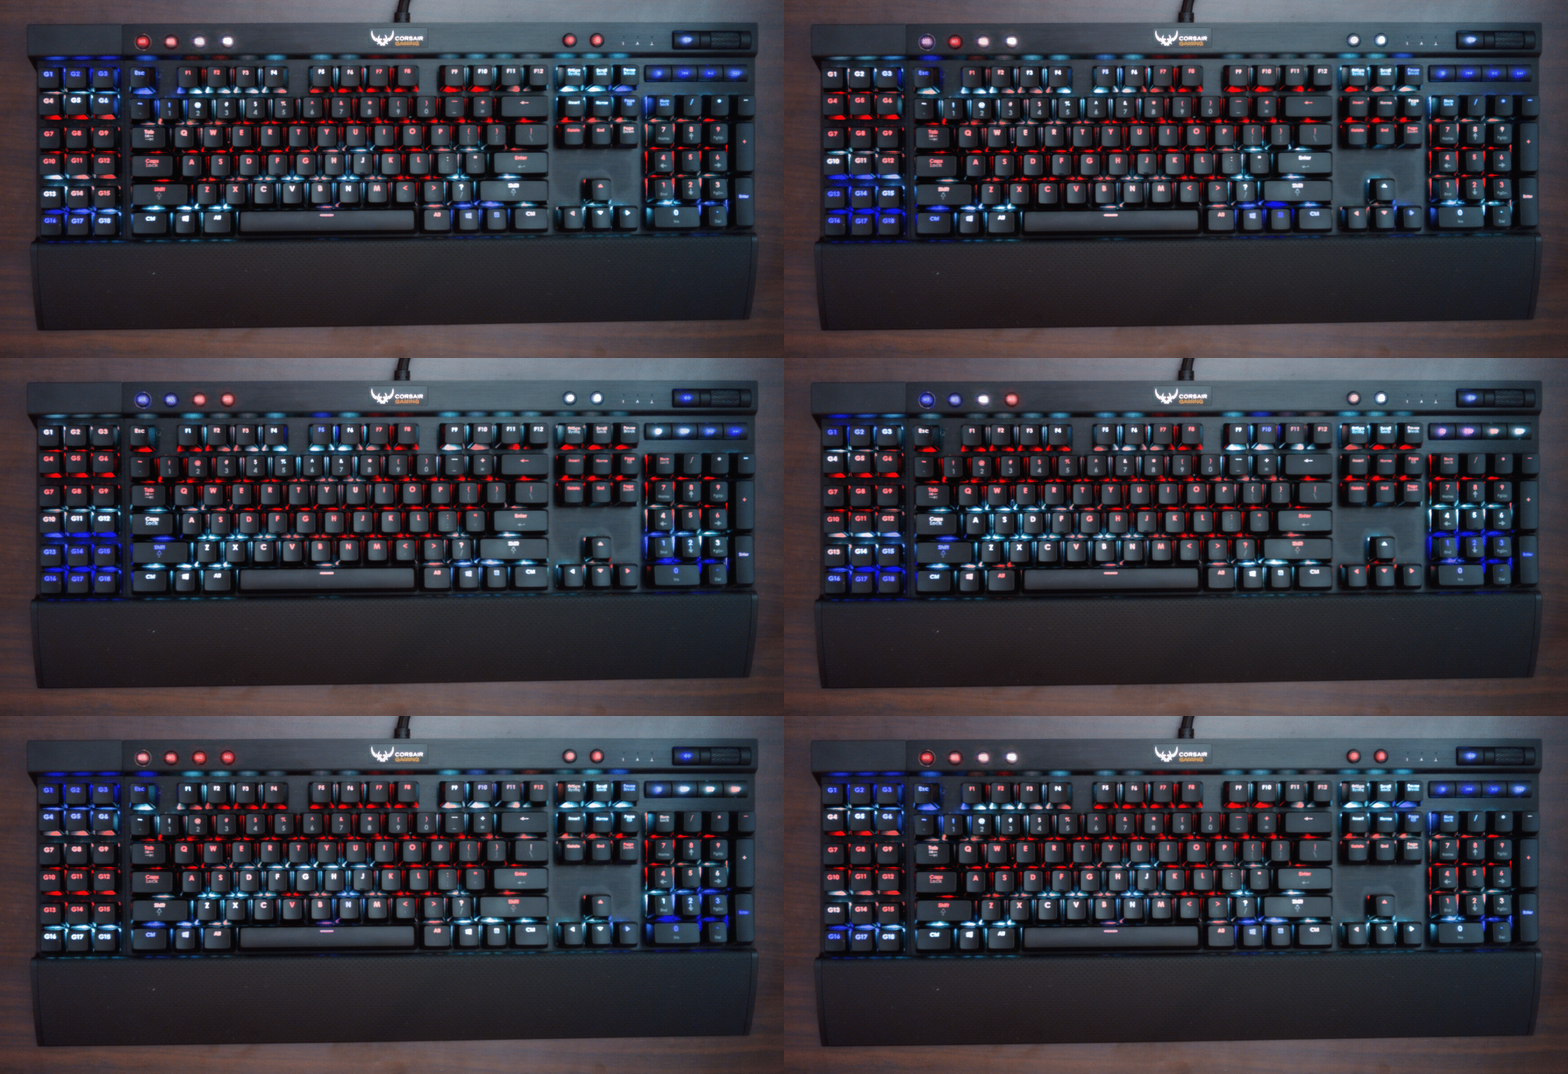
Here is what it looks like on the K95:
Tools
To make it easier to draw images for the keyboard, I created templates for the supported keyboards that are suitable for use with simple graphics programs.
Each key has an outline in not-quite-black, so you can flood fill each key. Once that image is saved, ./tools/template2pattern modified-template-k95.png images/k95/mine.png will convert that template to something the animated GIF mode can use. A single image will obviously give you a static image on the keyboard.
But you can also use this with ImageMagick's convert to create an animation without too much trouble.
For example, if you used template-k70.png to create 25 individual frames of an animation called template-k70-fun-1.png through template-k70-run-25.png, you could create an animated GIF with these commands (in bash):
for frame in {1..25}; do
    ./tools/template2pattern template-k70-fun-$frame.png /tmp/k70-fun-$frame.png
done
convert /tmp/k70-fun-{1..25}.png images/k70/fun.gif
rm -f /tmp/k70-fun-{1..25}.png
Brightness control
This version re-introduces the brightness level control so the "light" key toggles through four brightness levels.
Grab the source code, or the pre-built binary tarball.
Driving Corsair Gaming keyboards on Linux with Python, III
Here is a new release of my Corsair keyboard software.
The 0.3 release of rgbkbd includes:
- Add flying flag animations
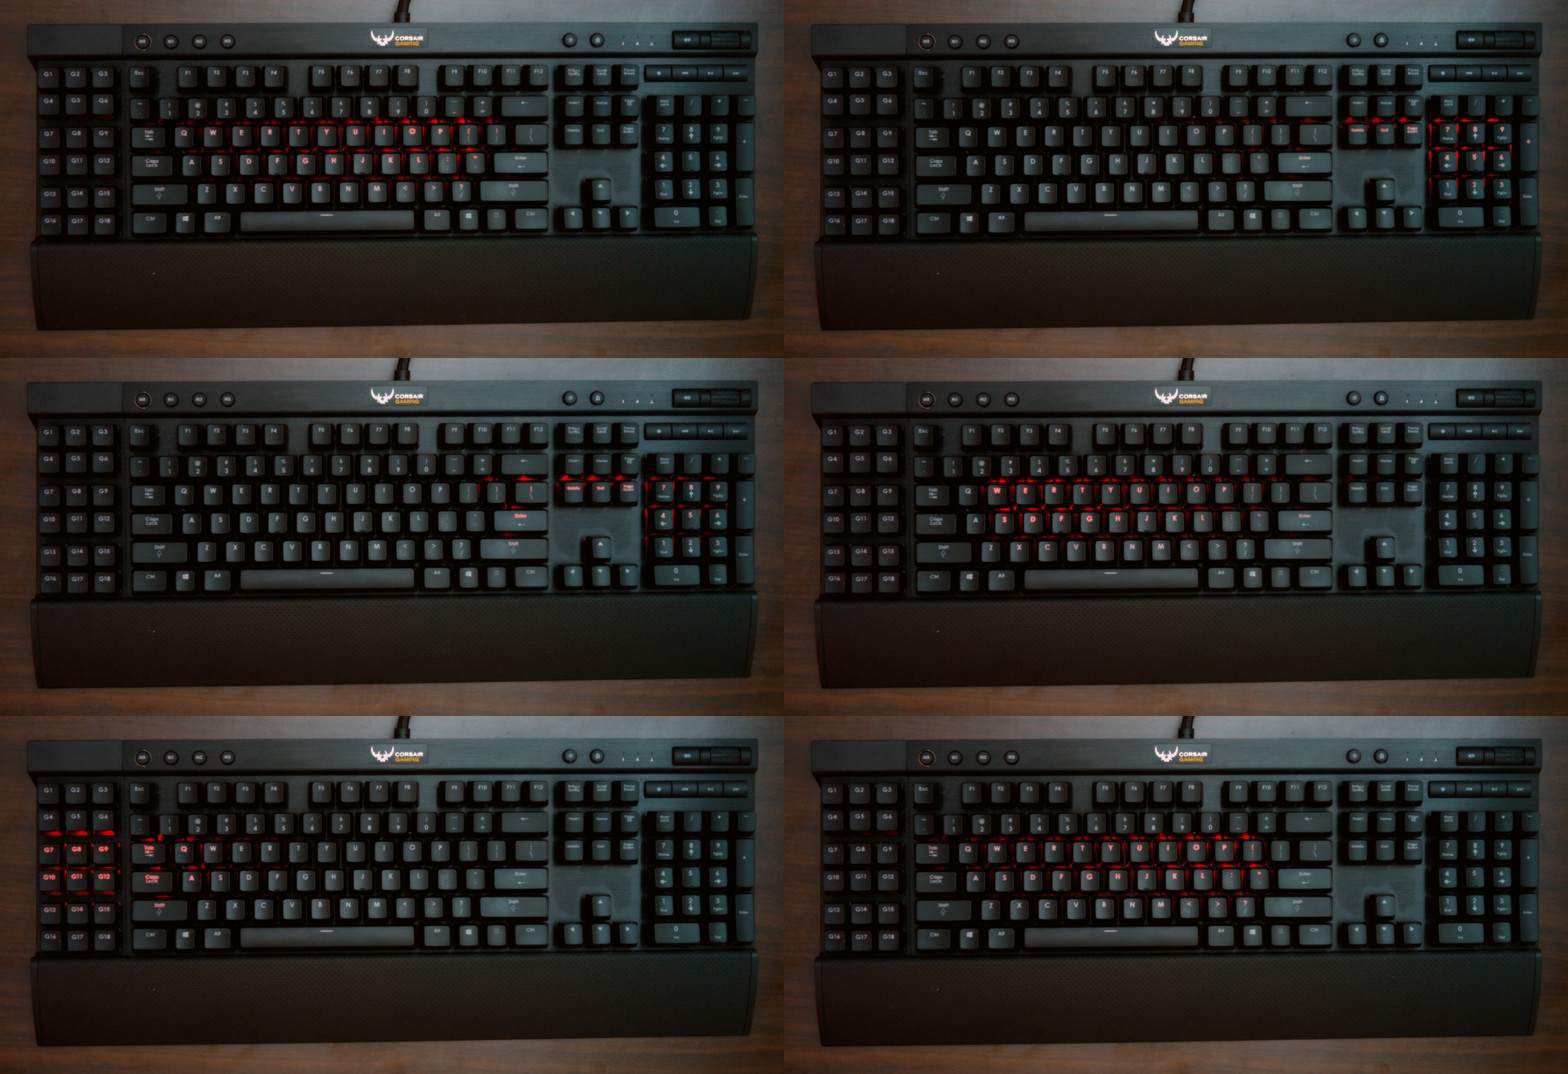
- Add Knight Rider inspired animation
- Support images with filenames that have extensions
- Cleanup of the Pac-Man inspired animation code
Here is what the flying Texas flag looks like:
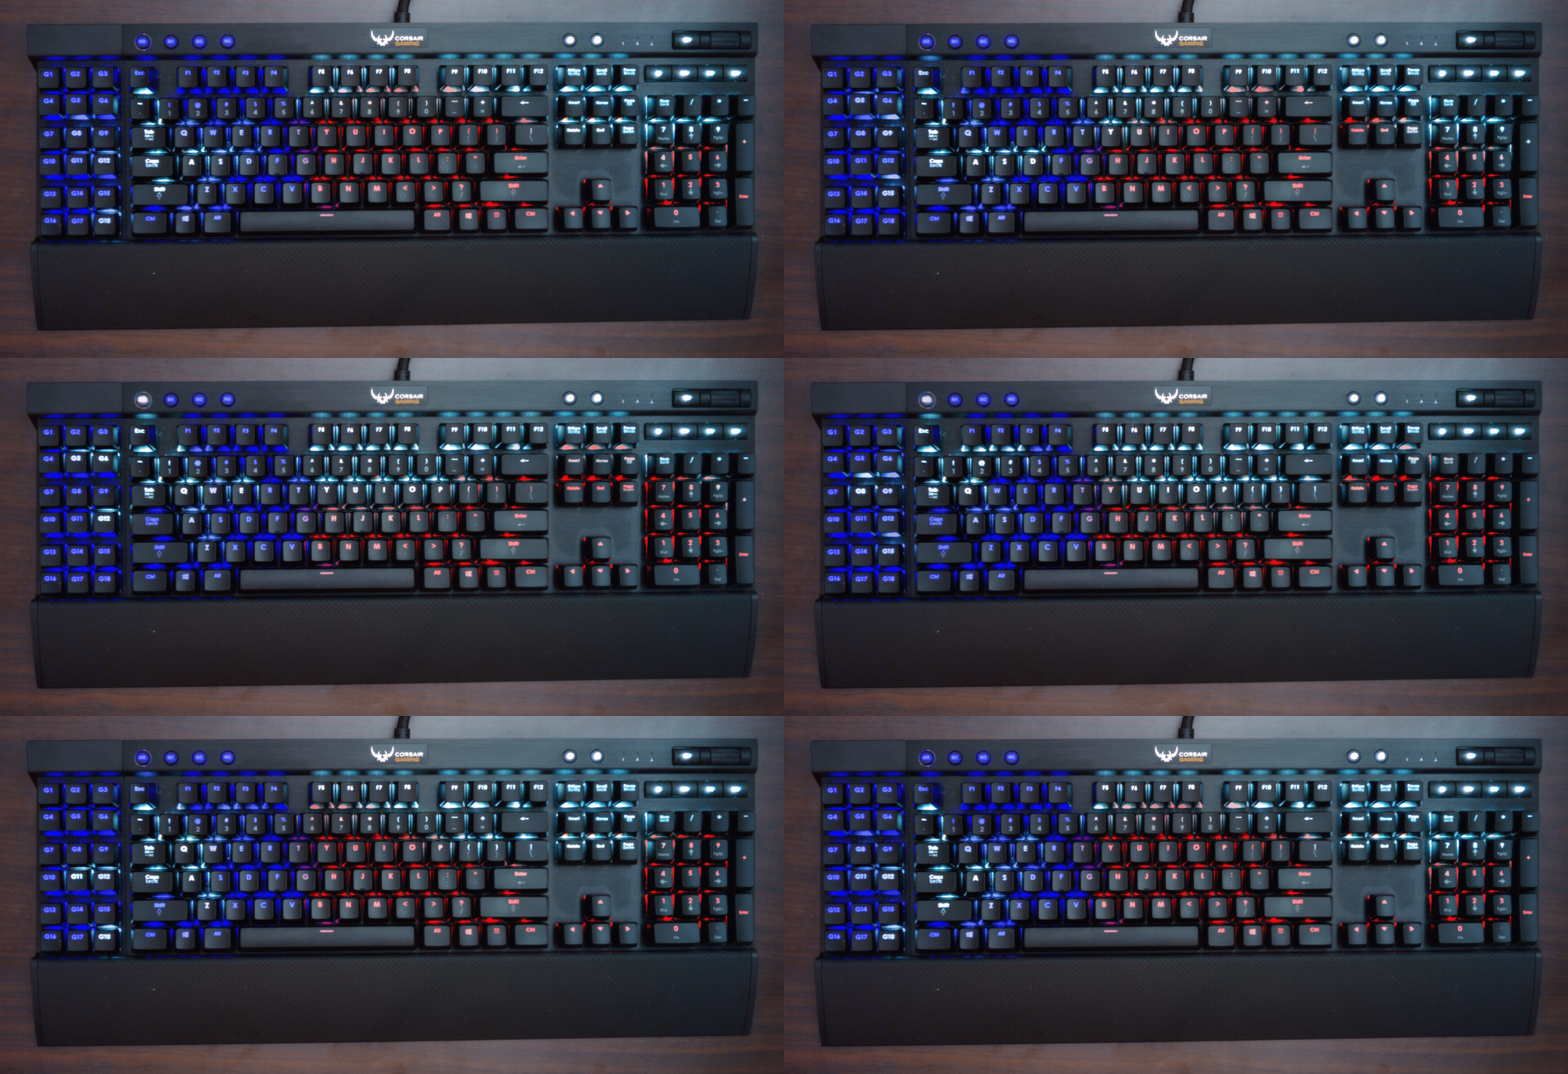
And the Knight Rider inspired animation:
Grab the source code, or the pre-built binary tarball.
Update: Driving Corsair Gaming keyboards on Linux with Python, IV
Driving Corsair Gaming keyboards on Linux with Python, II
Since I wrote about Driving the Corsair Gaming K70 RGB keyboard on Linux with Python, the ckb project has released v0.2. With that came changes to the protocol used to communicate with ckb-daemon which broke my rgbkbd tool.
So I had to do some work on the code. But that wasn't the only thing I tackled.
The 0.2 release of rgbkbd includes:
- Updates the code to work with ckb-daemon v0.2
- Adds support for the K95-RGB, in addition to the existing support for the K70-RGB.
- Adds a key-stroke driven "ripple" effect.
- Adds a "falling-letter" animation, inspired by a screen saver which was inspired by The Matrix.
- Adds support for displaying images on the keyboard, with a couple of example images.
- Adds support for displaying animated GIFs on the keyboard, with an example animated GIF.
That's right; you can play animated GIFs on these keyboards. The keyboards have a very low resolution, obviously, but internally, I represent them as an image sized based on a standard key being 2x2 pixels. That allows for half-key offsets in the mapping of pixels to keys which gets a reasonable approximation. Keys are colored based on averaging the color of the pixels for that key. Larger keys are backed by more pixels. If the image dimensions don't match the dimensions of the keyboard's image buffer (46x14 for K70, 53x14 for K95), it will slowly scroll around the image. Since the ideal image size depends on the keyboard model, the image files are segregated by model name.
Here is what that looks like:
(Also available on YouTube)
Grab the source code and have fun.
Update: Driving Corsair Gaming keyboards on Linux with Python, III
The Floppy-Disk Archiving Machine, Mark III
"I'm not building a Mark III."
Famous last words.
I made the mistake of asking my parents if they had any 3.5" floppy disks at their place.
They did.
And a couple hundred of them were even mine.
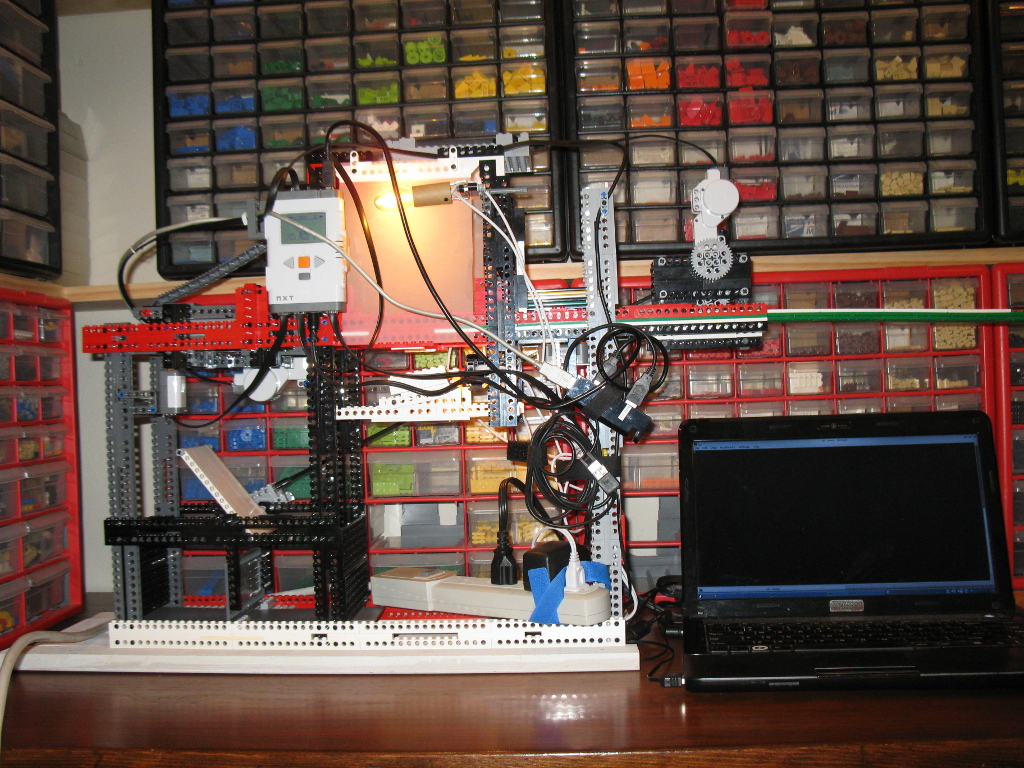
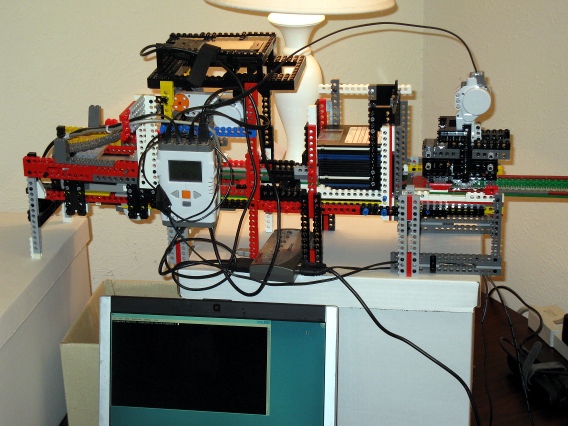
Faced with the prospect of processing another 500-odd disks, I realized the Mark III was worth doing. So I made a few enhancements for the Floppy Machine Mark III:
- Changed the gearing of the track motor assembly to increase torque and added plates to keep its structure from spreading apart. The latter had been causing the push rod mechanism to bind up and block the motor, even at 100% power.
- Removed the 1x4 technic bricks from the end of the tractor tread, and lengthened the tread by several links and added to the top of the structure under those links. This reduced the frequency that something got caught on the structure and caused a problem.
- Extended the drive's shell's lower half by replacing the 1x6 technic bricks with 1x10 technic bricks; and a 1x4 plate on the underside flush with the end. This made the machine more resilient to the drive getting dropped too quickly.
- Added 1x2 bricks to lock the axles into place for the drive shell's pivot point, since they seemed to be working their way out very slowly.
- Added 1x16 technic bricks to the bottom of all the legs, and panels to accommodate that, increasing the machine's height by 5" and making it easier to pull disks out of the GOOD and BAD bins.
- Added doors at the bottom of the trays in the front to keep disks from bouncing out
- Added back wall at bottom of the trays in the back to keep disks from bouncing out.
- Moved the ultrasonic sensor lower in an attempt to reduce the false empty magazine scenario. This particular issue was sporadic enough that the effectiveness of the change is hard to determine. I only had one false-empty magazine event after this change.
- Added a touch sensor to detect when the push rod has been fully retracted in order to protect the motor. Before this, the machine identified the position of the push rod by driving the push rod to the extreme right until the motor blocked. This seems to have had a negative effect upon the motor in question. Turning the rotor of that poor, abused motor in one direction has a very rough feel. This also used the last sensor port on the NXT. (One ultrasonic sensor and three touch sensors.)
- Replaced the cable to the push rod motor with a longer one from HiTechnic.
- Significantly modified the controlling software to calibrate locations of the motors in ways that did not require driving a motor to a blocked state.
- Enhanced the controlling software to allow choosing what events warranted marking a disk as bad and which didn't.
- Enhanced the data recovery software to allow bailing on the first error detected. This helps when you want to do an initial pass through the disks to get all the good disks archived first. Then you can run the disks through a second time, spending more time recovering the data off the disks.
- Enhanced the controlling software to detect common physical complications and take action to correct it, such as making additional attempts to eject a disk.
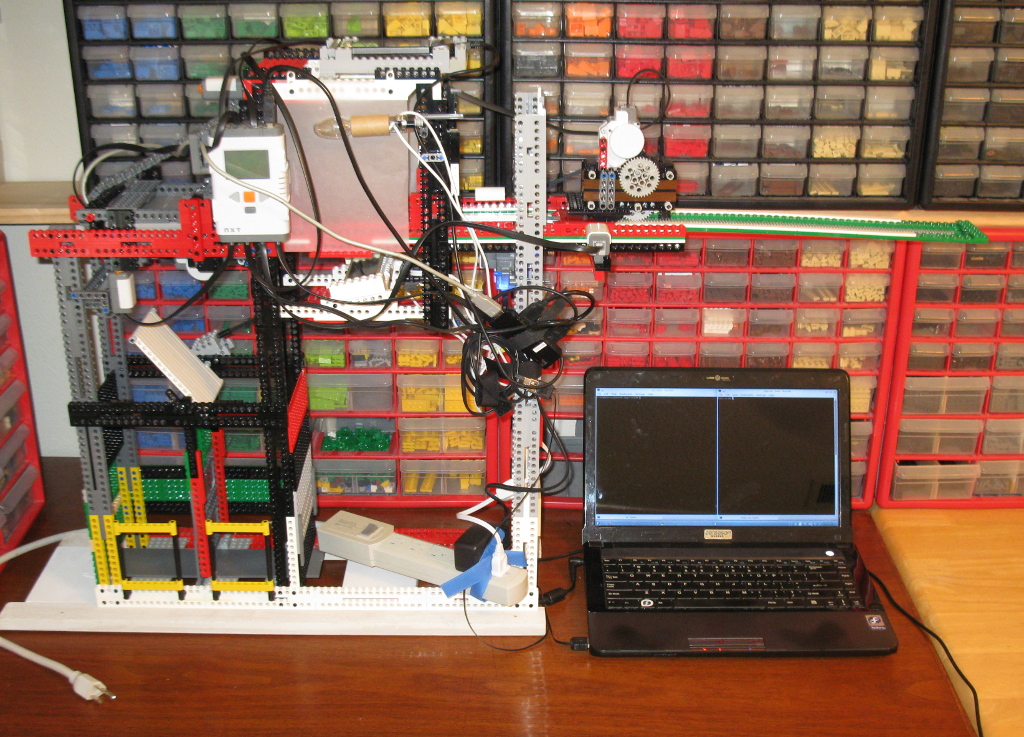
With those changes, the Mark III wound up much more rainbow-warrior than the Mark II:
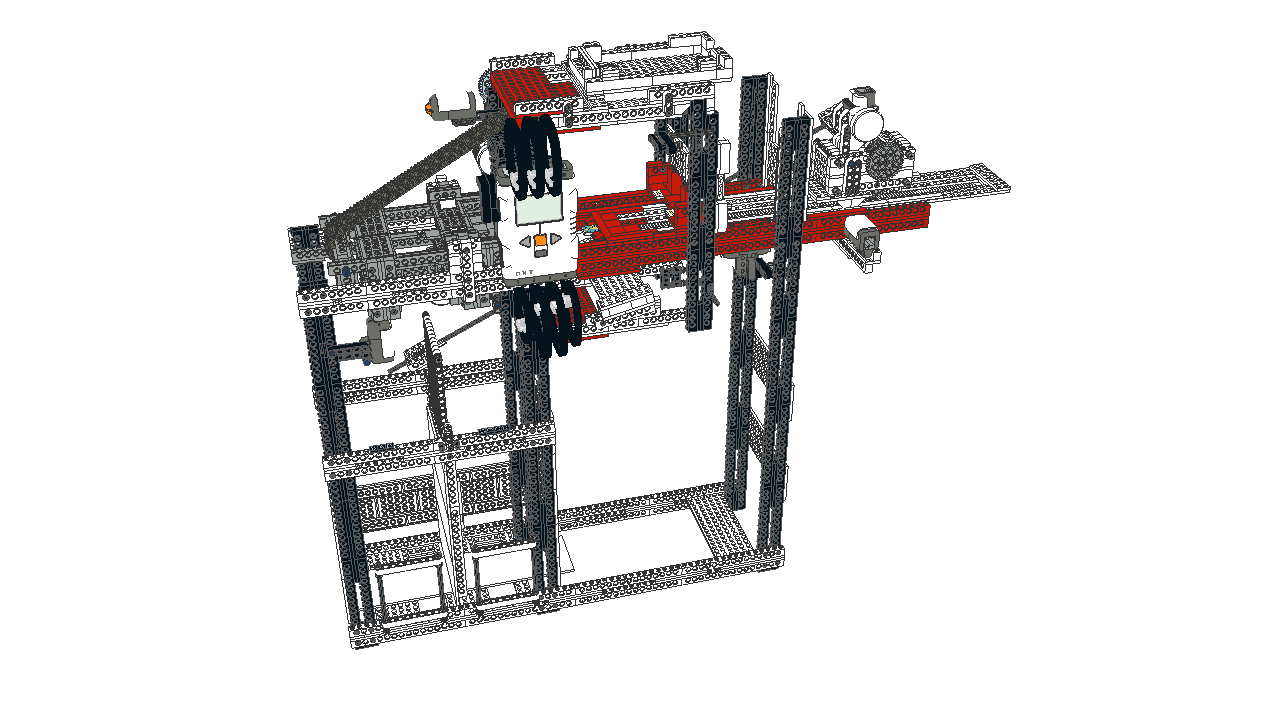
And naturally, I updated the model with the changes:
The general theme for the Mark II was to rebuild the machine with a cleaner construction, reasonable colors, and reduced part count. The general theme for the Mark III was to improve the reliability of the machine so it could process more disks with less baby-sitting.
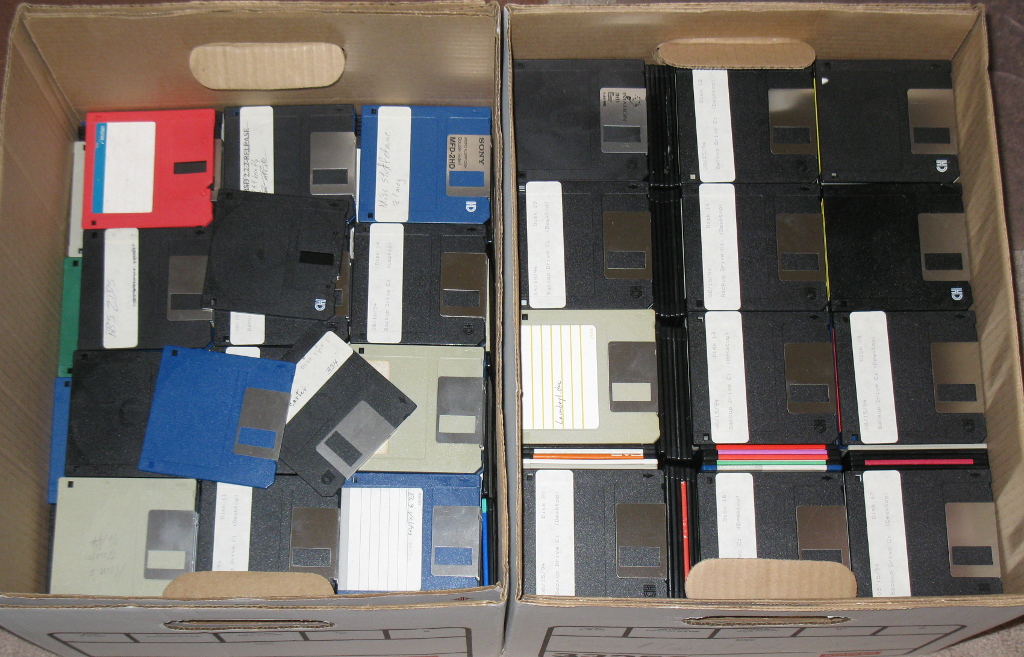
All told, I had 1196 floppy disks. If you stack them carefully, they'll fit in a pair of bankers boxes.
And with that, I'm done. No Mark IV. For real, this time. I hope.
Previously: the Mark II
The Floppy-Disk Archiving Machine, Mark II
Four and a half years ago, I built a machine to archive 3.5" floppy disks. By the time I finished doing the archiving of the 443 floppies, I realized that it fell short of what I wanted. There were a couple of problems:
- many 3.5" floppy disk labels wrap around to the back of the disk
- disks were dumped into a single bin
- the machine was sensitive to any shifts to the platform, which consisted of two cardboard boxes
- the structure of the frame was cobbled together and did not use parts efficiently
- lighting was ad-hoc and significantly affected by the room's ambient light
- the index of the disks was cumbersome
I recently had an opportunity to dust off the old machine (quite literally), and do a complete rebuild of it. That allowed me to address the above issues. Thus, I present:
The Floppy-Disk Archiving Machine, Mark II
The Mark II addresses the shortcomings of the first machine.
Under the photography stage, an angled mirror provides the camera (an Android Dev Phone 1) a view of the label on the back of the disk. That image needs perspective correction, and has to be mirrored and cropped to extract a useful image of the rear label. OpenCV serves this purpose well enough, and is straight forward to use with the Python bindings.
The addition of lights and tracing-paper diffusers improved the quality of the photos and reduced the glare. It also made the machine usable whether the room lights were on or off.
The baffle under disk drive allows the machine to divert the ejected disks into either of two bins. I labeled those bins "BAD" and "GOOD". I wrote the control software (also Python) to accept a number of options to allow sorting the disks by different criteria. For instance, sometimes OpenCV's object matching selects a portion of a disk or its label instead of the photography stage's arrows. When that happens, the extraction of the label will fail. That can happen for either the front or back disk labels. The machine can treat such a disk as 'BAD'. When a disk is processed, and bad bytes are found, the machine can treat the disk as bad. The data extraction tool supports different levels of effort for extracting data from around bad bytes on a disk.
This allows for a multiple-pass approach to processing a large number of disks.
In the first pass, if there is a problem with either picture, or if there are bad bytes detected, sort the disk as bad. That first pass can configure the data extraction to not try very hard to get the data, and thus not spend much time per disk. At the end of the first pass, all the 'GOOD' disks have been successfully read with no bad bytes, and labels successfully extracted. The 'BAD' disks however, may have failed for a mix of different reasons.
The second pass can then expend more effort extracting data from disks with read errors. Disks which encounter problems with the label pictures would still be sorted as 'BAD', but disks with bad bytes would be sorted as 'GOOD' since we've extracted all the data we can from them, and we have good pictures of them.
That leaves us with disks that have failed label extraction at least once, and probably twice. At this point, it makes sense to run the disks through the machine and treat them as 'GOOD' unconditionally. Then the label extraction tool can be manually tweaked to extract the labels from this small stack of disks.
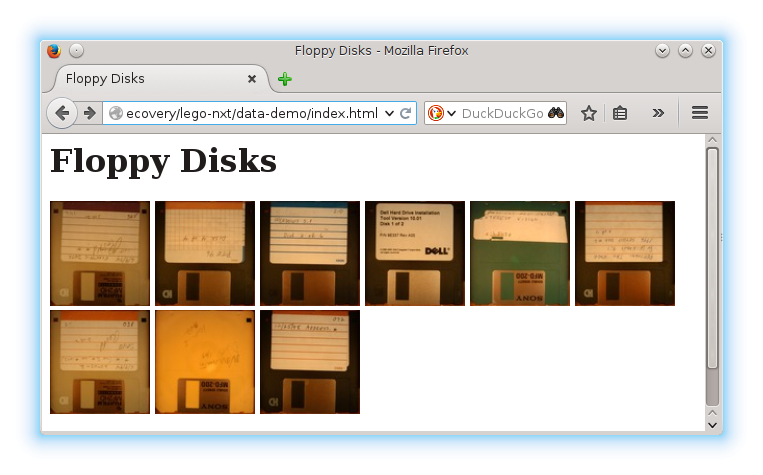
Once the disks have been successfully photographed and all available data extracted, an html-based index can be created. That process creates one page containing thumbnails of the front of the disks.
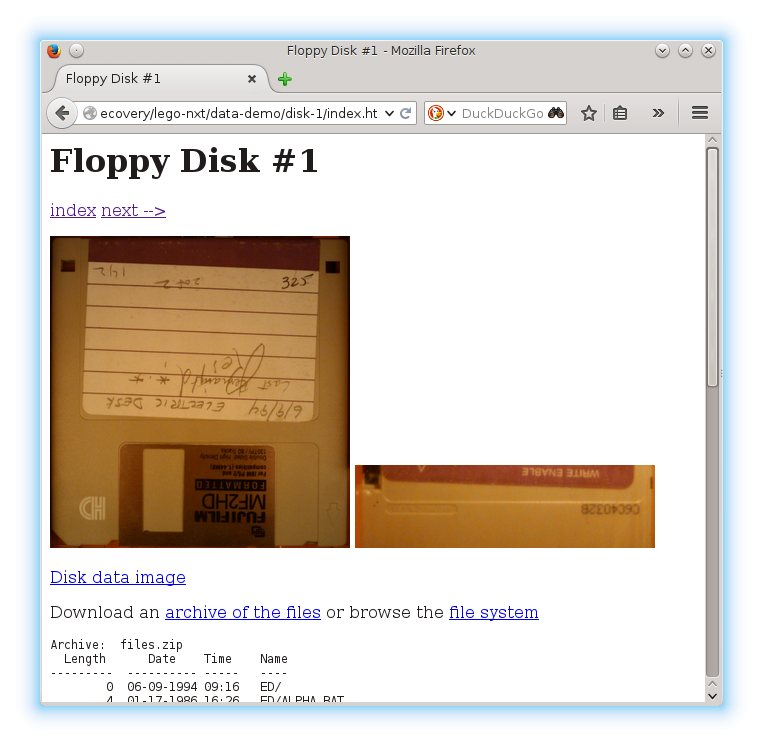
Each thumbnail links to a page for a disk giving ready access to:
- a full-resolution picture of the extracted front label
- a full-resolution picture of the extracted back label
- a zip file containing the files from the disk
- a browsable file tree of the files from the disk
- an image of the data on the disk
- a log of the data extracted from the disk
- the un-processed picture of the front of the disk
- the un-processed picture of the back of the disk
The data image of the disk can be mounted for access to the original filesystem, or forensic analysis tools can be used on it to extract deleted files or do deeper analysis of data affected by read errors. The log of the data extracted includes information describing which bytes were read successfully, which had errors, and which were not directly attempted. The latter may occur due to time limits placed on the data extraction process. Since a single bad byte may take ~4 seconds to return from the read operation, and there may be 1474560 bytes on a disk, if every byte were bad you could spend 10 weeks on a single disk, and recover nothing. The data recovery software (also written in Python) therefore prioritizes the sections of the disk that are most likely to contain the most good data. This means that in practice everything that can be read off the disk will be read off in less than 20 minutes. For a thorough run, I will generally configure the data extraction software to give up if it has not successfully read any data in the past 30 minutes (it's only machine time, after all). At that point, the odds of any more bytes being readable are quite low.
So what does the machine look like in action?
(Also posted to YouTube.)
Part of the reason I didn't disassemble the machine while it collected dust for 4.5 years was that I knew I would not be able to reproduce it should I have need of it again in the future. Doing a full rebuild of the machine allowed me to simplify the build dramatically. That made it feasible to create an Ldraw model of it using LeoCAD.
Rebuilding the frame with an eye to modeling it in the computer yielded a significantly simpler support mechanism, and one that proved to be more rigid as well. To address the variations of different platforms and tables, I screwed a pair of 1x2 boards together with some 5" sections of 1x4 using a pocket hole jig. The nice thing about the 5" gap between the 1x2 boards is that the Lego bricks are 5/16" wide, so 16 studs fit neatly within that gap. The vertical legs actually extend slightly below the top of the 1x2's, and the bottom horizontal frame rests on top of the boards. This keeps the machine from sliding around on the wooden frame, and makes for a consistent, sturdy platform which improves the machine's reliability.
The increase in stability and decrease in parts required also allowed me to increase the height of the machine itself to accommodate the inclusion of the disk baffle and egress bins.
What about a Mark III?
Uhm, no.
I have processed all 590 disks in my possession (where did the additional 150 come from?), and will be having these disks shredded. That said, the Mark II is not a flawlessly perfect machine. Were I to build a third machine, increasing the height a bit further to make the disk bins more easily accessible would be a worthwhile improvement. Likewise, the disk magazine feeding the machine is a little awkward to load with the cables crossing over it, and could use some improvement so that the weight of a tall stack of disks does not impede the proper function of the pushrod.
So, no, I'm not building a Mark III. Unless you or someone you know happen to have a thousand 3.5" floppy disks you need archived, and are willing to pay me well to do it. But who still has important 3.5" floppy disks lying around these days? I sure don't. (Well, not anymore, anyway.)
Previously: the Mark I
Update: the Mark III
Migrating contacts from Android 1.x to Android 2.x
I'm finally getting around to upgrading my trusty old Android Dev Phone 1 from the original Android 1.5 firmware to Cyanogenmod 6.1. In doing so, I wanted to take my contacts with me. The contacts application changed its database schema from Android 1.x to Android 2.x, so I need to export/import. Android 2.x's contact application supports importing from VCard (.vcf) files. But Android 1.5's contact application doesn't have an export function.
So I wrote a minimal export tool.
The Android 1.x contacts database is saved in /data/com.android.providers.contacts/databases/contacts.db which is a standard sqlite3 database. I wanted contact names and phone numbers and notes, but didn't care about any of the other fields. My export tool generates a minimalistic version of .vcf that the new contacts application understands.
Example usage:
./contacts.py contacts.db > contacts.vcf
adb push contacts.vcf /sdcard/contacts.vcf
Then in the contacts application import from that file.
If you happen to have a need to export your contacts from an Android 1.x phone, this tool should give you a starting point. Note that the clean_data function fixes up some issues I had in my particular contact list, and might not be very applicable to a different data set. I'm not sure the labels ("Home", "Mobile", "Work", etc.) for the phone numbers are quite right, but then, they were already a mess in my original data. Since this was a one-off task, the code wasn't written for maintainability, and it'll probably do something awful to your data--use it at your own risk.
Announcing BrickBuiltNameplates.com
I have long wanted to start my own business, and have worked toward that goal for a few years now. On July 29, 2011 I launched that work publicly in the form of BrickBuiltNameplates.com. It took a lot of work to get to this point, but I know a mountain of work remains before me.
Many, many late nights and busy weekends, interrupted all-too-frequently by RealLife(TM) , trickled into one business idea in particular: a nameplate for your desk, built out of Lego pieces. But not just any old pre-built mosaic nameplate like some people offer--that's just not good enough. It had to be as detailed as possible, and that meant using advanced building techniques referred to as "Studs Not On Top", or SNOT. And building with Lego is the fun part, so it's got to come with clear, step-by-step instructions, not pre-assembled. And when those instructions run to a hundred pages or more, paper ceases to be viable, and you have to go digital--namely to a pdf on a CD. The final result is a nameplate on a desk that gets incredulous responses of "That's LEGO?!" and "Cool!".
There are a surprising number of things required to bring such a vision to life.
I implemented the core logic and design using Python. This was the first part I worked on--afterall, if I couldn't make the core idea work, the rest of the trappings of business would be pointless. The core of this early work remains, though I have revisited much of the original prototype to improve the durability of the nameplates and add support for more characters. (And I have ideas for more enhancements I'd like to do.) At first, I had support for the upper-case alphabet and spaces. Since then, I've added support for digits and 13 punctuation marks--50 different characters in all. With that, you aren't limited to "first-name-space-last-name"--you can include honorifics, or quoted nick-name middle names, or make email addresses, or even (short) sentences.
There were a few wheels that I didn't have to reinvent, though most of them required a bit of work. I had to work on LPub, LDView, ldglite, and Satchmo, to package, customize, fix bugs and add features. Thankfully, the authors of these tools released them under OpenSource licenses, so molding them to my needs was actually possible. Using Django yielded a functional website after a not-too-difficult learning curve.
And that was just the technical side. There was also filing paperwork with the county to register the business name, setting up an account with Google Checkout, getting set up to collect sales tax for the state, buying inventory, and numerous other little things lost to the mists of a sleep-deprived memory.
The next learning curve to climb is something called "marketing". I hear it's important...
Programming the Floppy-disk Archiving Machine
I used the nxt-python-2.0.1 library to drive the floppy-disk archiving machine. I don't see value in releasing the full source code for driving the machine as it is very tied to the details of the robot build, but there are a few points of interest to highlight. (The fact that the code also happens to be 200 lines of ugliness couldn't possibly have influenced that decision in anyway.)
Overview of nxt-python
The library provides an object oriented API to drive the NXT brick. First, you get the brick object like this:
import nxt.locator
brick = nxt.locator.find_one_brick()
Motor objects are created by passing the motor and the NXT port it is connected to:
import nxt.motor
eject_motor = nxt.motor.Motor(brick, nxt.motor.PORT_B)
Motors can be run by a couple of methods, but the method I used was the turn() method. This takes a powerlevel, and the number of degrees to rotate the motor. The powerlevel can be anything from -127 to 127, with negative values driving the motor in reverse. The higher the powerlevel, the faster the motor turns and the harder it is to block, but it will also not stop exactly where you wanted it to stop. Lower powerlevels give you more exact turns, but won't overcome as much friction. So I found that it worked best to drive the motor at high powerlevels to get a rough position, then drive it at lower powerlevels to tune its position. To determine how far the motor actually turned, I used motor.get_tacho().tacho_count. That value then allowed me to drive slowly to the correct position from the actual position achieved.
When a motor is unable to rotate as far as instructed at the powerlevel specified, it will raise an nxt.motor.BlockedException. While typically you should probably avoid having that happen, I found that by designing the robot to have a "zeroing point" that I could drive the motor to until it blocked, I could recalibrate the robot's positioning during operation and increase the reliability of the mechanism.
Implementation Details
In order to keep the NXT from going to sleep, I setup a keepalive with brick.keep_alive() every 300 seconds. I believe the NXT brick can be configured to avoid needing that. In the process, I discovered that the nxt-python library does not appear to be threadsafe; sometimes the keep_alive would interfere with a motor command and trigger an exception.
I structured my code so that I had a DiskLoadingMachine object with a brick, load_motor, eject_motor, and dump_motor. This allowed me to build high-level instructions for the DiskLoadingMachine such as stage_disk_for_photo().
Another thing I did was to sub-class nxt.motor.Motor and override the turn() method to accept a either a tacho_units or a studs parameter. This allowed me to set a tacho_units-to-studs ratio, and turn the motor the right number of turns to move the ram a specified number of studs.
Room for Improvement
I think there is room to enhance nxt-python's implementation of Motor.turn, or to add a Motor.smart_turn. The idea here is to specify the distance to rotate the motor and have the library drive the motor as quickly as it can while still making the rotation hit the exact distance specified. Depending on implementation, it might make sense to have the ability to specify some heuristic tuneables determined by a one-time calibration process. Drive trains with significant angular momentum, gearlash, or variable loadings may make it difficult to implement in the general case.
Alternatively, perhaps Motor.turn_to() would be a more robust approach: provide an absolute position to turn the motor to. It should then have a second parameter with three options: FAST, PRECISE, and SMART. FAST would use max power at the cost of probably overrunning the target, while PRECISE would turn more slowly and get to the correct position, and SMART would ramp up the speed to get to the correct position without overrunning it at the cost of a more variable rate. The implementation would also imply operating with absolute positions rather than specifying how much to turn the motor. There can be some accumulation of error, so such an implementation would need a method for re-zeroing the motor.
Making the library threadsafe is an obvious step for making this library more robust.
A default implementation of a keep-alive process for the brick object would also be worth considering.
Conclusions
Despite the threading issue, the nxt-python library was very useful and helped me quickly create a functioning robot. If you're looking to use a real programming language to drive a tethered NXT, nxt-python will serve you well.
3.5" Floppy-disk Archiving Machine
August 31st of last year, at the age of 89, my Grandfather passed away. I'm a computer geek, as was he, though his machines filled rooms, and mine, merely pockets. His software flew fighter aircraft. He worked on the Apollo missions. He wrote the first software by which to operate a nuclear reactor. That is a hard act to follow.
But as a computer geek, he had accumulated a large stack of 3.5" floppy disks: 443, of them in fact. And when he passed away, it became my responsibility to deal with those. I was not looking forward to the days of mindless repetition inherent in that task. So, I did what any self-respecting software engineer would do: I automated it.
Start with Lego Mindstorms, add a laptop running Fedora Linux, an Android Dev Phone 1, a good bit of Python code, and about the same number of hours of work, and you get this:
Watch it in action on YouTube
There are a number of interesting details in this build which I plan to write about in the coming weeks, so stay tuned.
Follow up articles: NXT control software, The Floppy-Disk Archiving Machine, Mark II
Converting from MyPasswordSafe to OI Safe
Having failed to get my Openmoko FreeRunner working as a daily-use phone due to buzzing, I broke down and bought an Android Dev Phone. One of the key applications I need on a phone or PDA is a password safe. On my FreeRunner, I was using MyPasswordSafe under Debian. But for Android, it appears that OI Safe is the way to go at the moment. So I needed to move all my password entries from MyPasswordSafe to OI Safe. To do that, I wrote a python utility to read in the plaintext export from MyPasswordSafe and write out a CSV file that OI Safe could import. Grab it from subversion at https://retracile.net/svn/mps2ois/trunk or just download it.
However, I am not entirely happy with OI Safe. It appears that the individual entries in the database are encrypted separately instead of encrypting the entire file. Ideally, OI Safe would support the same file format as the venerable Password Safe and allow interoperability with it. But more disconcerting is the specter of data loss if you uninstall the application. OI Safe creates a master key that gets removed if you uninstall the application. Without the master key you can't access the passwords you stored in the application, even if you know the password. The encrypted backup file does appear to include the master key, so be sure to make that backup.
PyCon 2009 -- Chicago

I'm going to PyCon again this year. Today is the last day for the early bird enrollment rates, so sign up today! If you're going, drop me an email. I'll be there for the conference as well as the sprints. During the sprints I plan to work on porting a couple of Trac plugins and improving the test coverage.

 rss
rss
