Building an electronics organizer
The number of tablets, laptops, phones, ... let's just say "electronic devices" around the house has increased noticeably over the years, and finding that we had them haphazardly piled upon the end-table, ready to cascade off into a pile of mutual destruction, I decided we needed a mechanism for organizing them and defining an official location where they belong.
Design:
Given that I wanted room for six devices up to 1" thick, that meant 7 vertical boards, 3/4" thick each, yielding a base board 11-1/4" long. Allowing 1/4" for kerf leaves me with some room for error, so that leaves 60.5" of material from which to cut 7 uprights. That will mean 6 kerfs, giving me 59" of remaining material to allocate among the uprights. Making the upgrights equal lengths gives a height a little under 8.5". Rather than doing that, I opted to make the upgrights 9", 8.5", 8", 8", 8", 8.5", and 9" tall, giving a more interesting shape to the final product and giving nice "round" numbers for the lengths.
Materials:
- 1x 6-foot, 1x8 poplar lumber
- 14x 1-1/4" pocket-hole screws
- wood stain
Tools:
- pocket-hole jig
- drill motor
- tablesaw with fence and miter gauge
- mitersaw
(Ideally, anyway; I actually made do with the tablesaw, but some of the cuts suffered for it.)
- bench sander
- several bar clamps with rubber feet
Cutting:
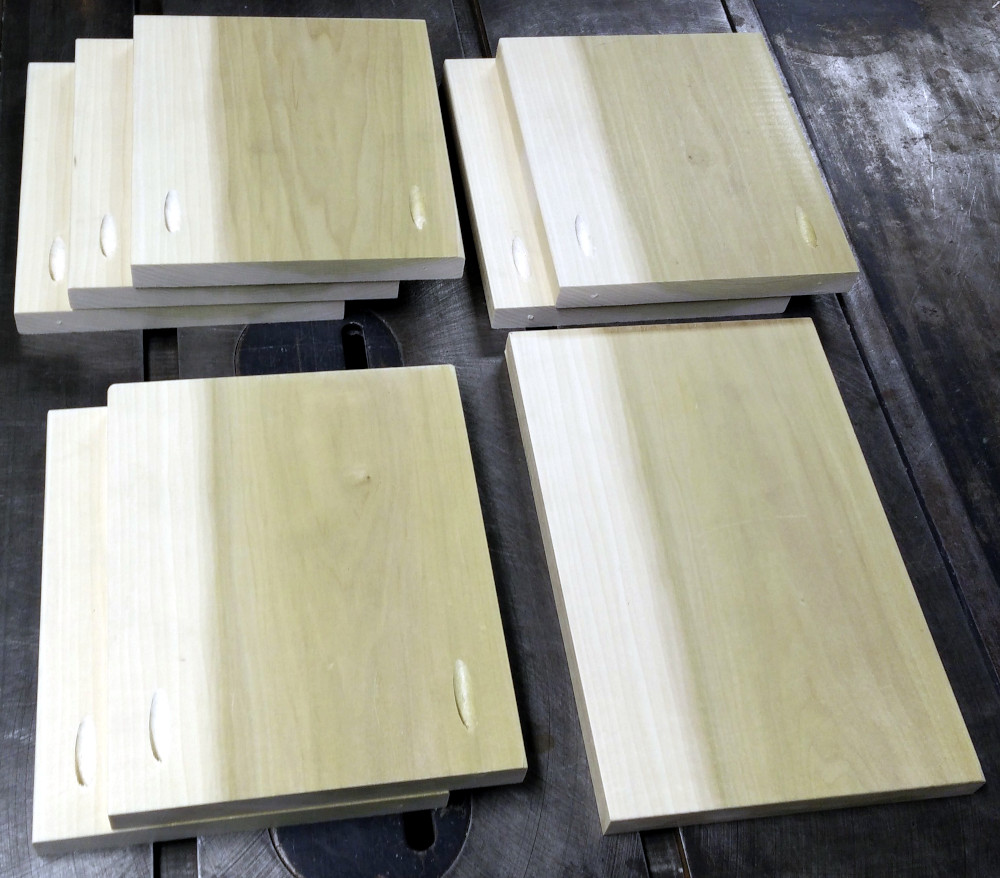
I cut the 11-1/4" base, two 9" uprights, two 8.5" uprights, and three 8" uprights. Then drilled two pocket-holes in each of the uprights, but _not_ in the base. I slightly rounded the corners of the wood on the bench sander, and touched up a couple of the cut faces where I had accidentally wiggled the board and gotten a less-than-perfect cut.
Staining:
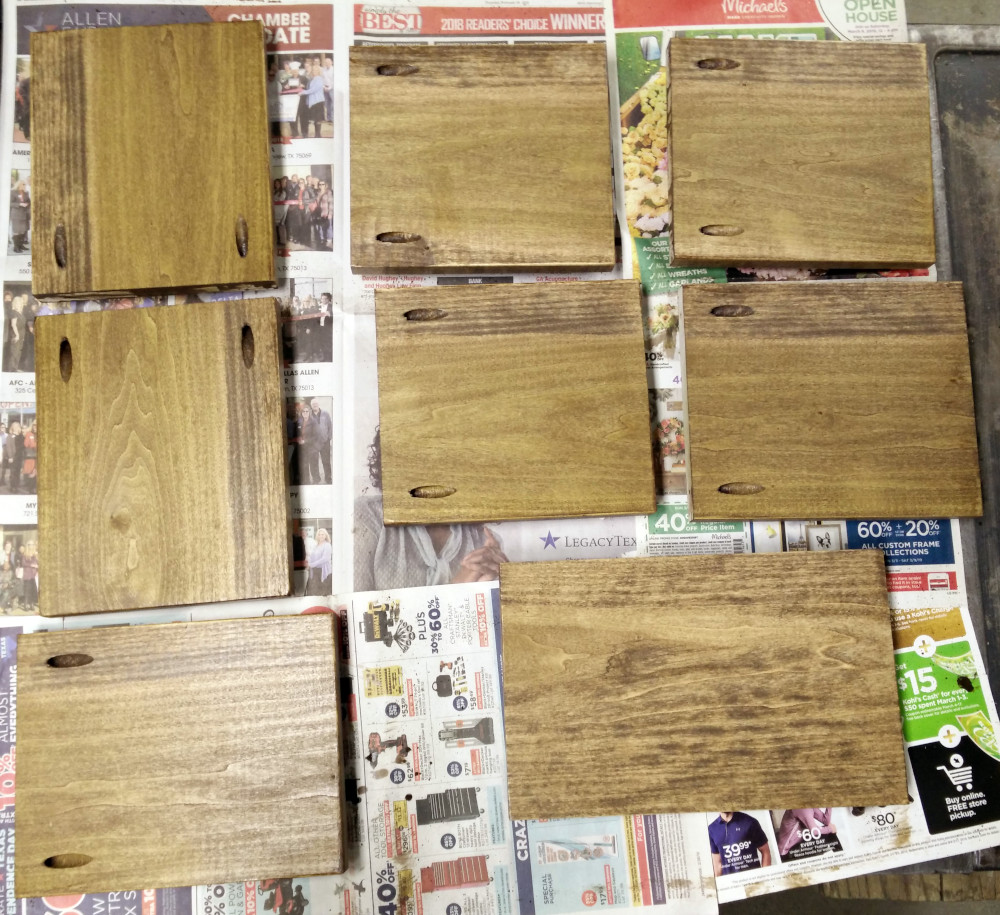
With a brush, I applied stain to one side of each of the pieces, wiped them down with a rag, applied stain to the edges (except the bottom edges of the uprights since those would not be visible) and wiped them down again, and then applied stain to the reverse side of each upright and wiped them all down. Then allowed them to dry overnight.
Assembly:
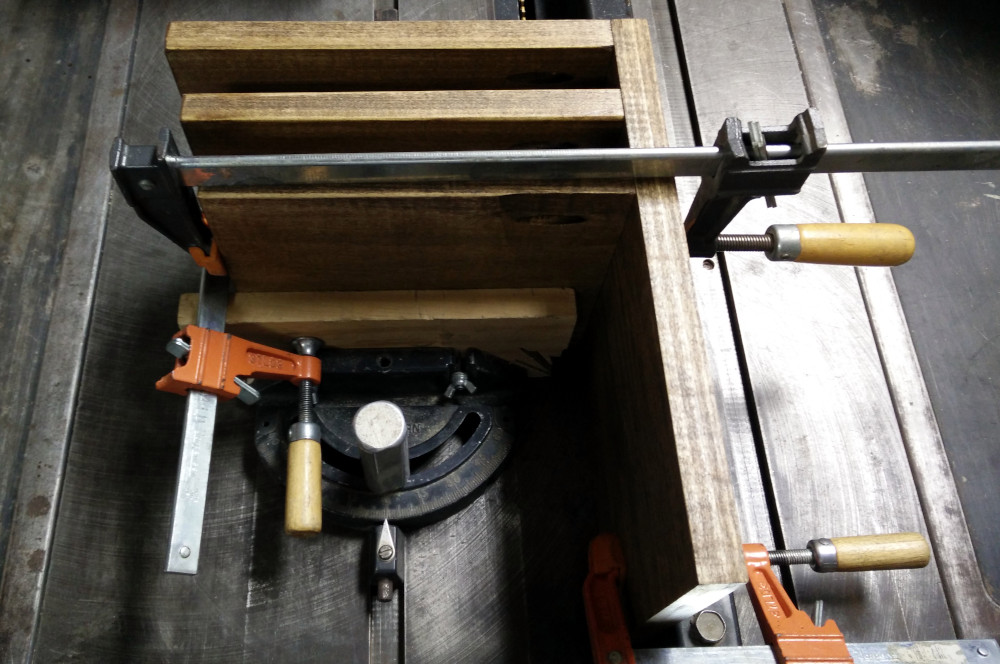
The gaps between the uprights are too narrow to get a drill motor between them, so all the uprights have the pockethole screws facing the same direction, and I screwed them to the base in order from one end. Using the table saw as a clamping structure worked out very well for keeping the uprights aligned with the base and at right angles to it.
Installed:
And here it is placed on a deep shelf with powerstrips behind it for the wall-warts and chargers.
All-in-all, this worked out very well for what I was attempting to solve, and it came together with a lot less time invested than I had expected.

 rss
rss


