Building an electronics organizer
The number of tablets, laptops, phones, ... let's just say "electronic devices" around the house has increased noticeably over the years, and finding that we had them haphazardly piled upon the end-table, ready to cascade off into a pile of mutual destruction, I decided we needed a mechanism for organizing them and defining an official location where they belong.
Design:
Given that I wanted room for six devices up to 1" thick, that meant 7 vertical boards, 3/4" thick each, yielding a base board 11-1/4" long. Allowing 1/4" for kerf leaves me with some room for error, so that leaves 60.5" of material from which to cut 7 uprights. That will mean 6 kerfs, giving me 59" of remaining material to allocate among the uprights. Making the upgrights equal lengths gives a height a little under 8.5". Rather than doing that, I opted to make the upgrights 9", 8.5", 8", 8", 8", 8.5", and 9" tall, giving a more interesting shape to the final product and giving nice "round" numbers for the lengths.
Materials:
- 1x 6-foot, 1x8 poplar lumber
- 14x 1-1/4" pocket-hole screws
- wood stain
Tools:
- pocket-hole jig
- drill motor
- tablesaw with fence and miter gauge
- mitersaw
(Ideally, anyway; I actually made do with the tablesaw, but some of the cuts suffered for it.)
- bench sander
- several bar clamps with rubber feet
Cutting:
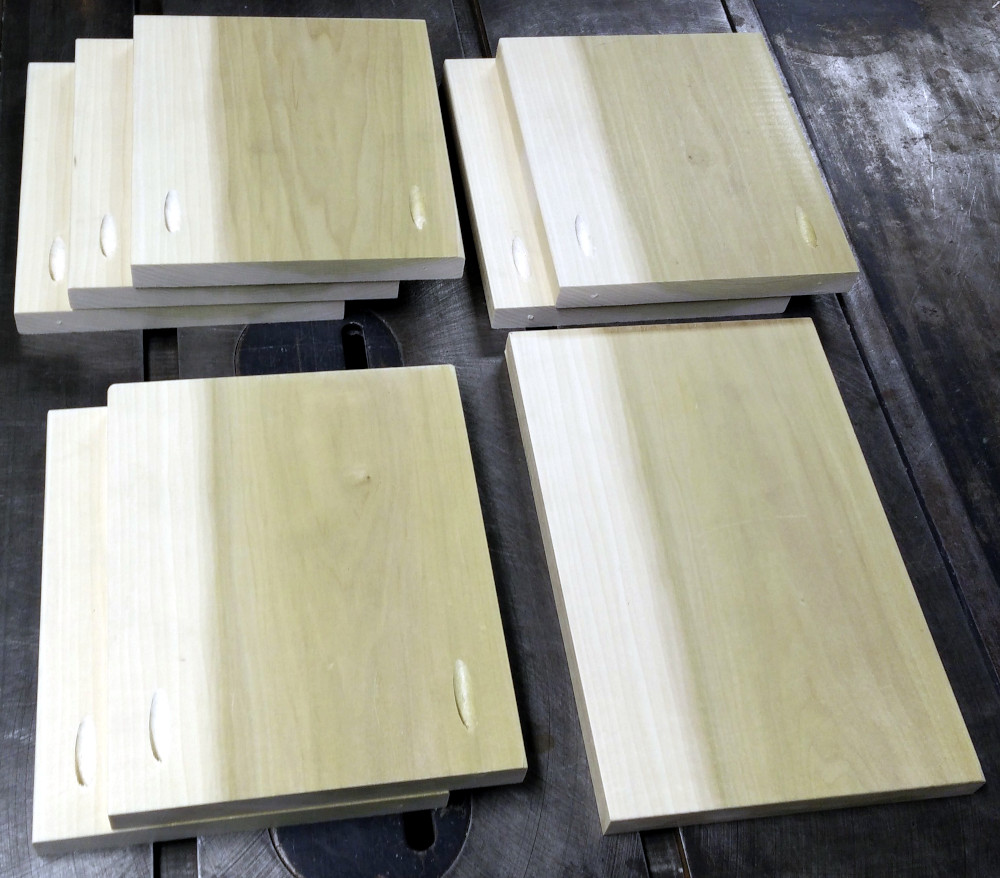
I cut the 11-1/4" base, two 9" uprights, two 8.5" uprights, and three 8" uprights. Then drilled two pocket-holes in each of the uprights, but _not_ in the base. I slightly rounded the corners of the wood on the bench sander, and touched up a couple of the cut faces where I had accidentally wiggled the board and gotten a less-than-perfect cut.
Staining:
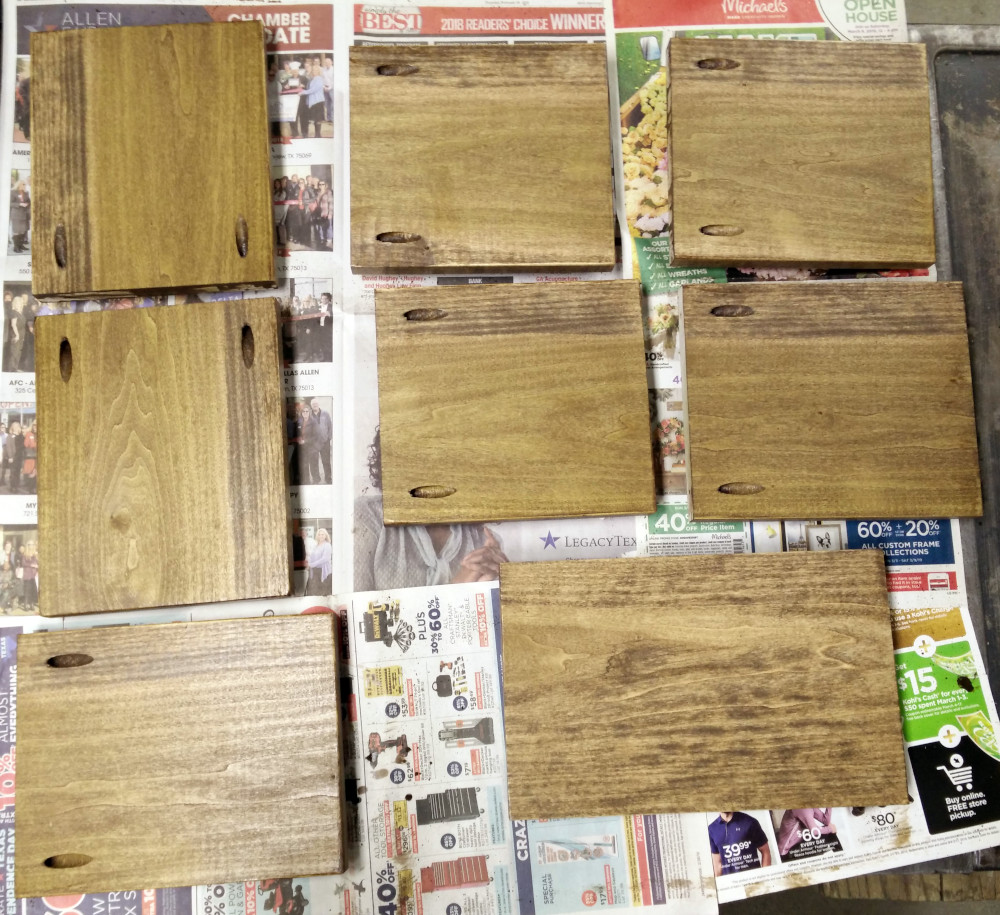
With a brush, I applied stain to one side of each of the pieces, wiped them down with a rag, applied stain to the edges (except the bottom edges of the uprights since those would not be visible) and wiped them down again, and then applied stain to the reverse side of each upright and wiped them all down. Then allowed them to dry overnight.
Assembly:
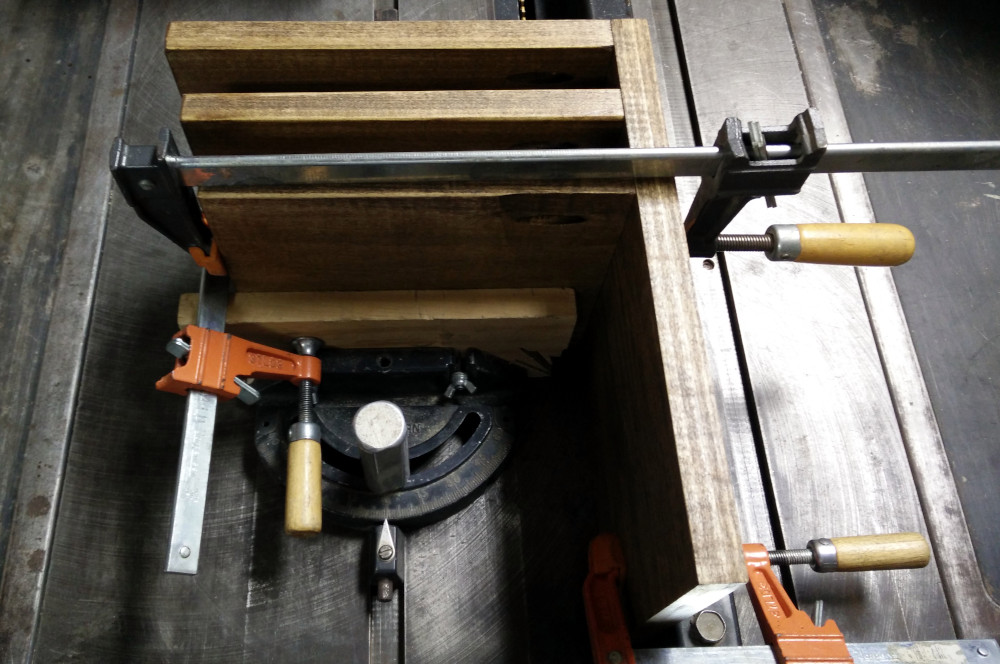
The gaps between the uprights are too narrow to get a drill motor between them, so all the uprights have the pockethole screws facing the same direction, and I screwed them to the base in order from one end. Using the table saw as a clamping structure worked out very well for keeping the uprights aligned with the base and at right angles to it.
Installed:
And here it is placed on a deep shelf with powerstrips behind it for the wall-warts and chargers.
All-in-all, this worked out very well for what I was attempting to solve, and it came together with a lot less time invested than I had expected.
Durable Chair Mat
One of the difficulties of having a desk and an office chair where there is residential carpet is the chair-mat. Especially when it sees full-time daily use. You can spend $50 for flimsy vinyl, or $200 for high-end vinyl chair-mats. In my experience, none of them last a year; as soon as you get into the colder months and the floor cools down, I'd flop into the chair one morning and hear that tell-tale snap of cold vinyl failing. Even before the failure, the vinyl develops divots where the wheels tend to rest, and once they start to develop, gravity ensures that same location is the natural resting place for the wheels every time you sit down.
You can make your own chair-mat, and you'll find many people online who have described how they've done it, with a variety of materials. But they only show you the newly finished product; they don't show you how it's held up over the course of years. Many of them won't last, despite their creators' confident claims. Here, I distill about a decade's worth of chair mat experience.
Attempt 0
I bought a vinyl chair-mat. It died quickly.
Attempt 1
Thinking that maybe this is a case of "you get what you pay for," I bought a high-end vinyl chair-mat. When the temperature dropped and I flopped into the chair, it died with a snap. And continued to crack, and crack, and crack.
Attempt 2
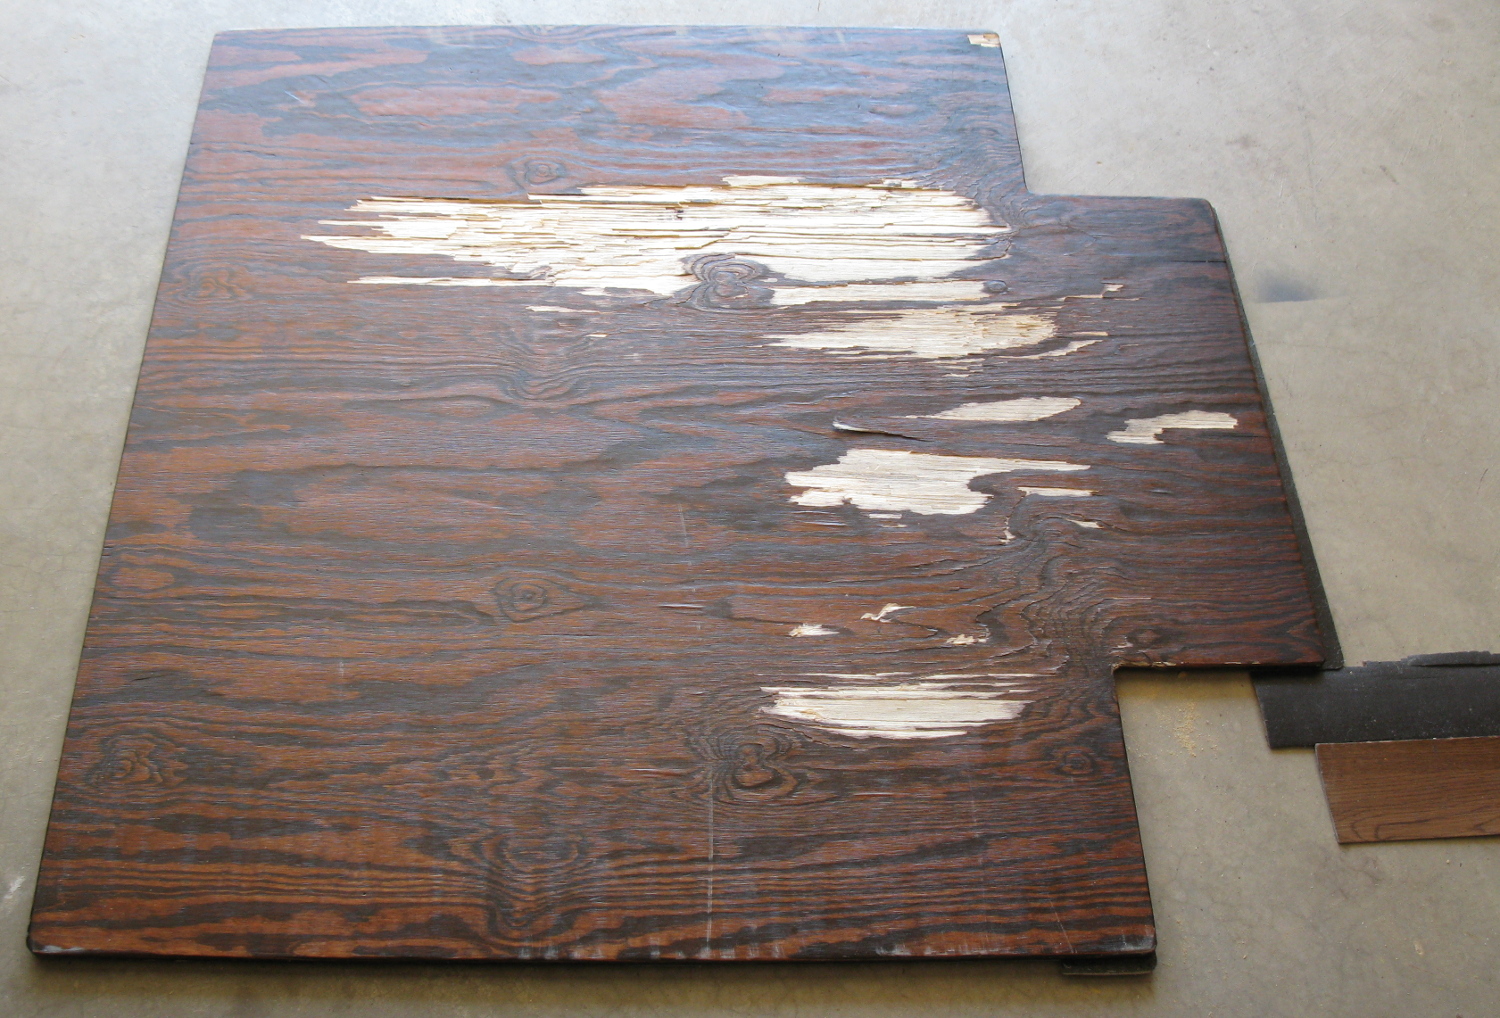
Let's try building something sturdier. I bought a sheet of plywood, cut it to shape, and stained the top of it. A hard, flat chair-mat that wouldn't snap when it got cold? Perfect!
Well... that lasted a while, but the rolling of the wheels across the wood grain compressed the wood unevenly, and the wood fibers began to separate.
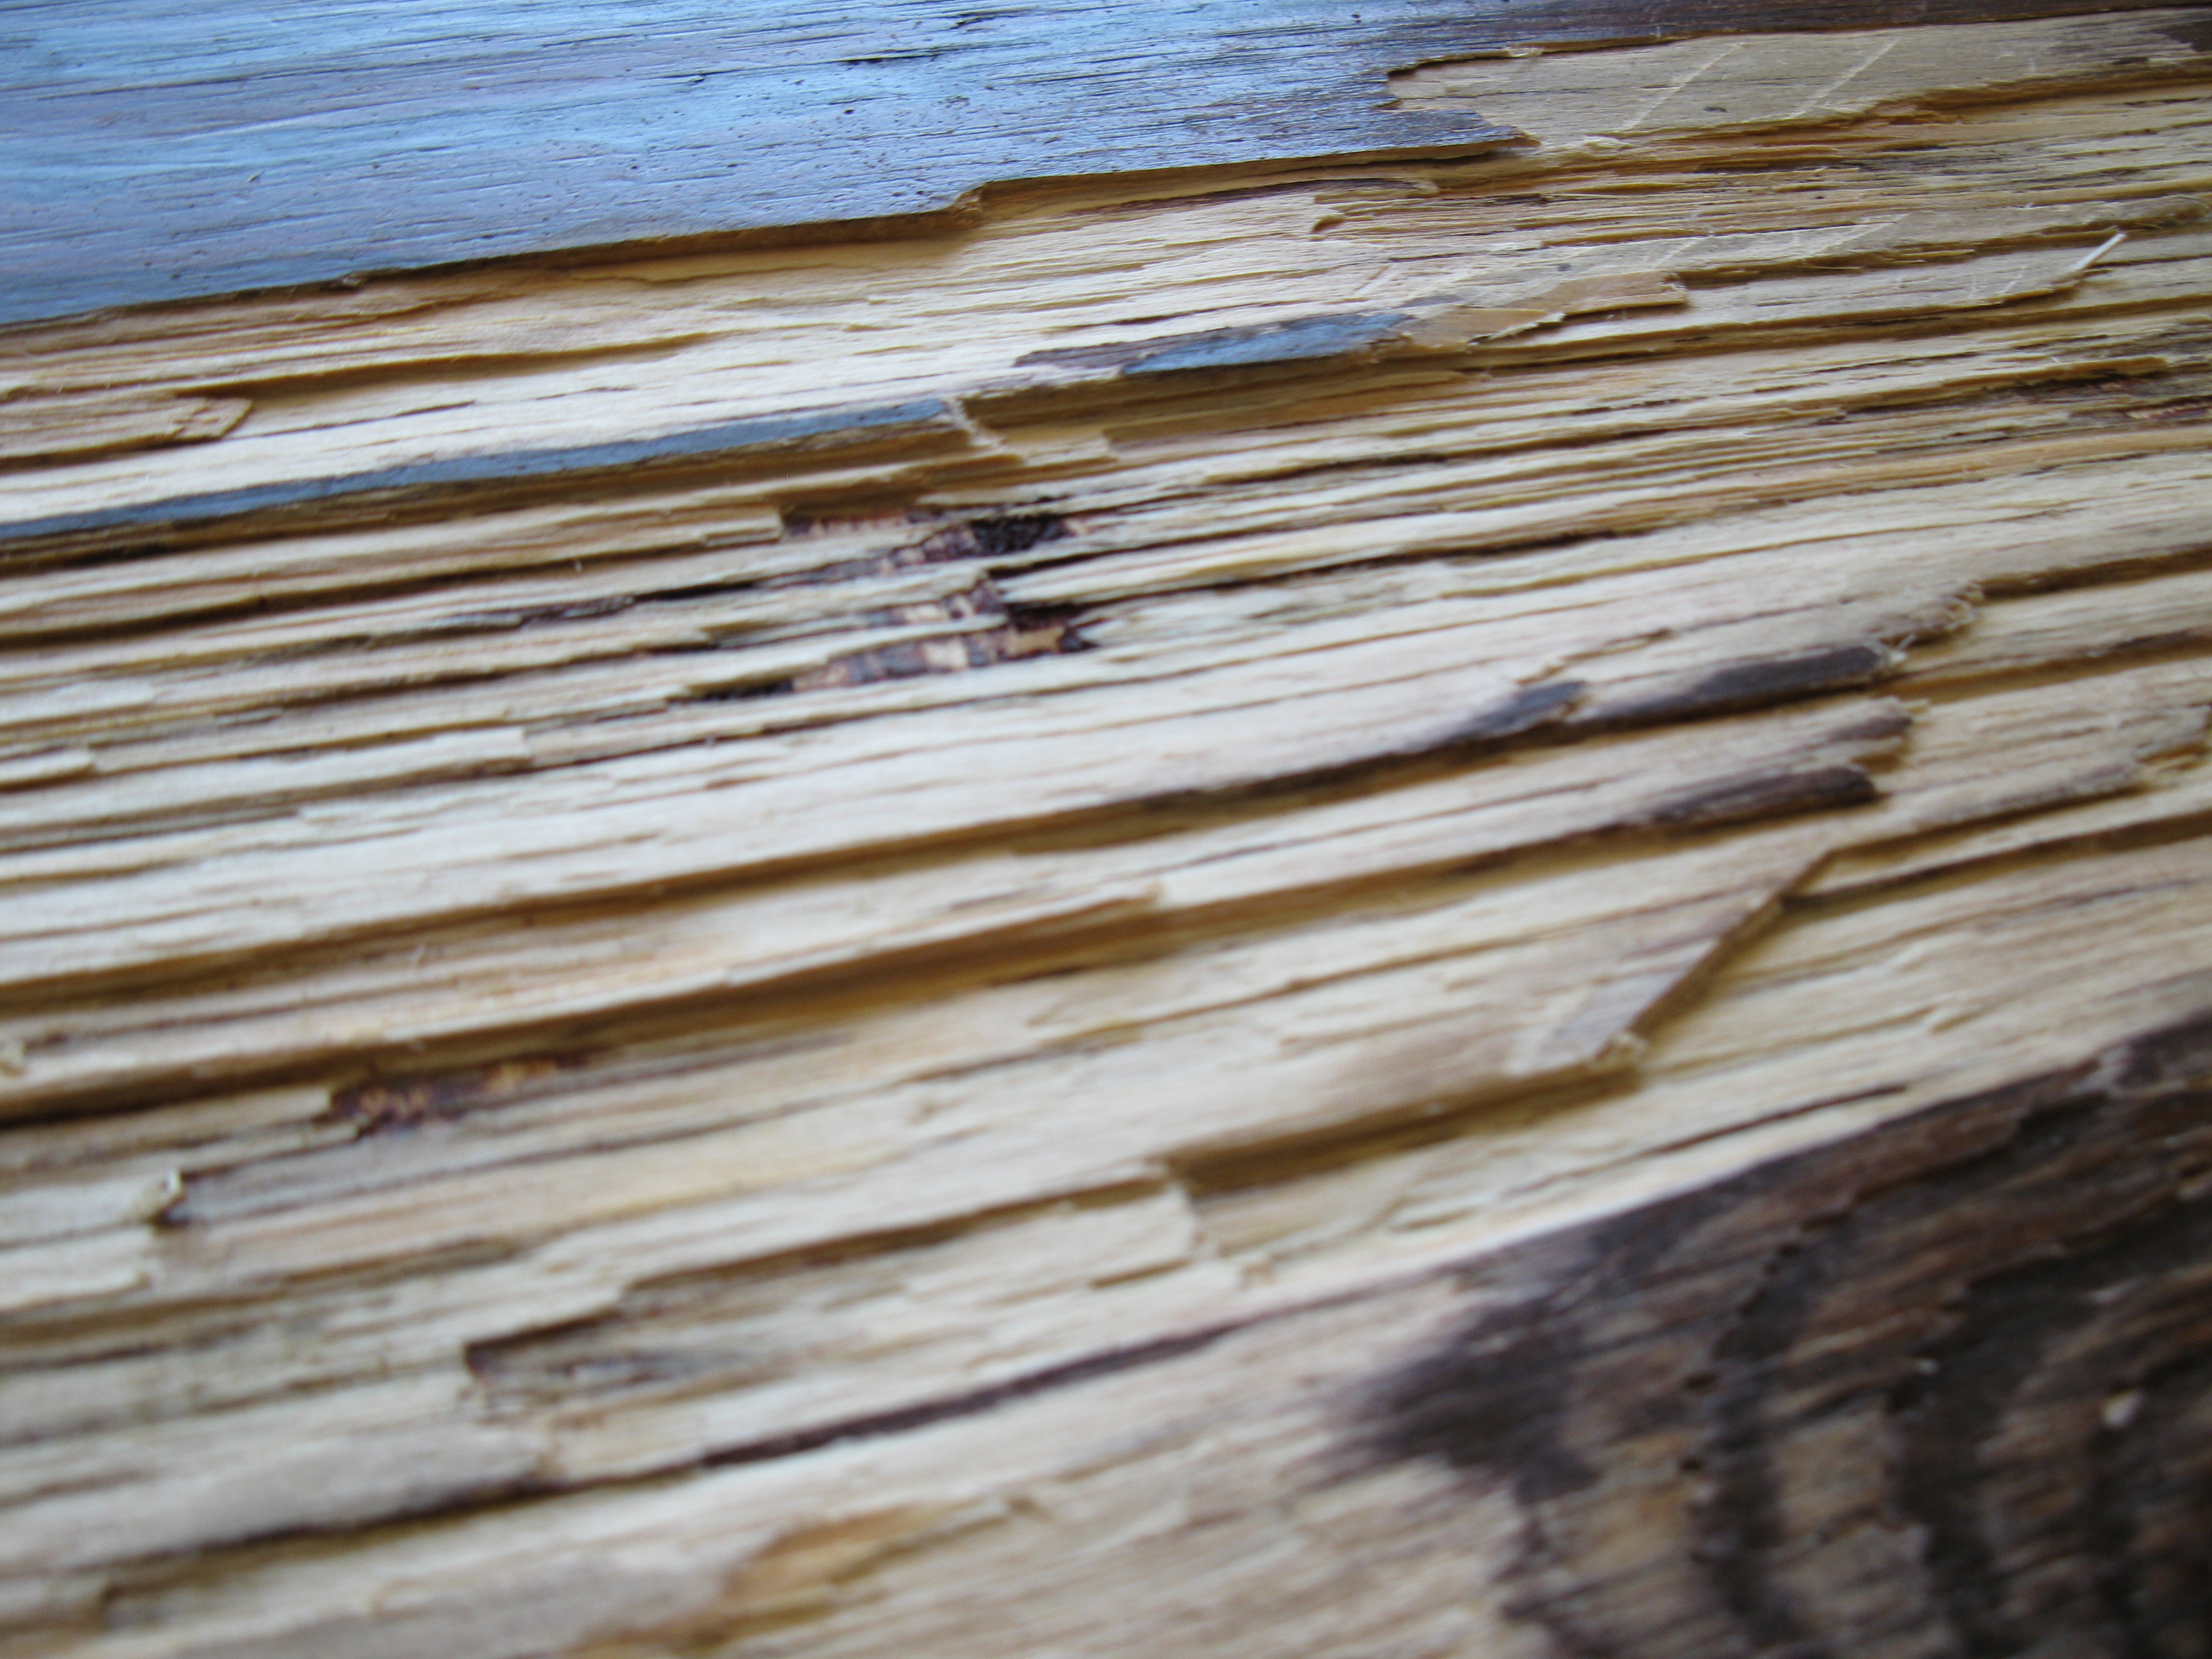
That doesn't really do it justice; you need to look closer; so you can see how the wood separates with the grain.
But it just kept getting worse, and the damage kept getting deeper.
After a while, I was generating piles of wood splinters. I used that for about 3-1/2 years, but I put up with it falling apart for way too large a portion of that time.
Attempt 3
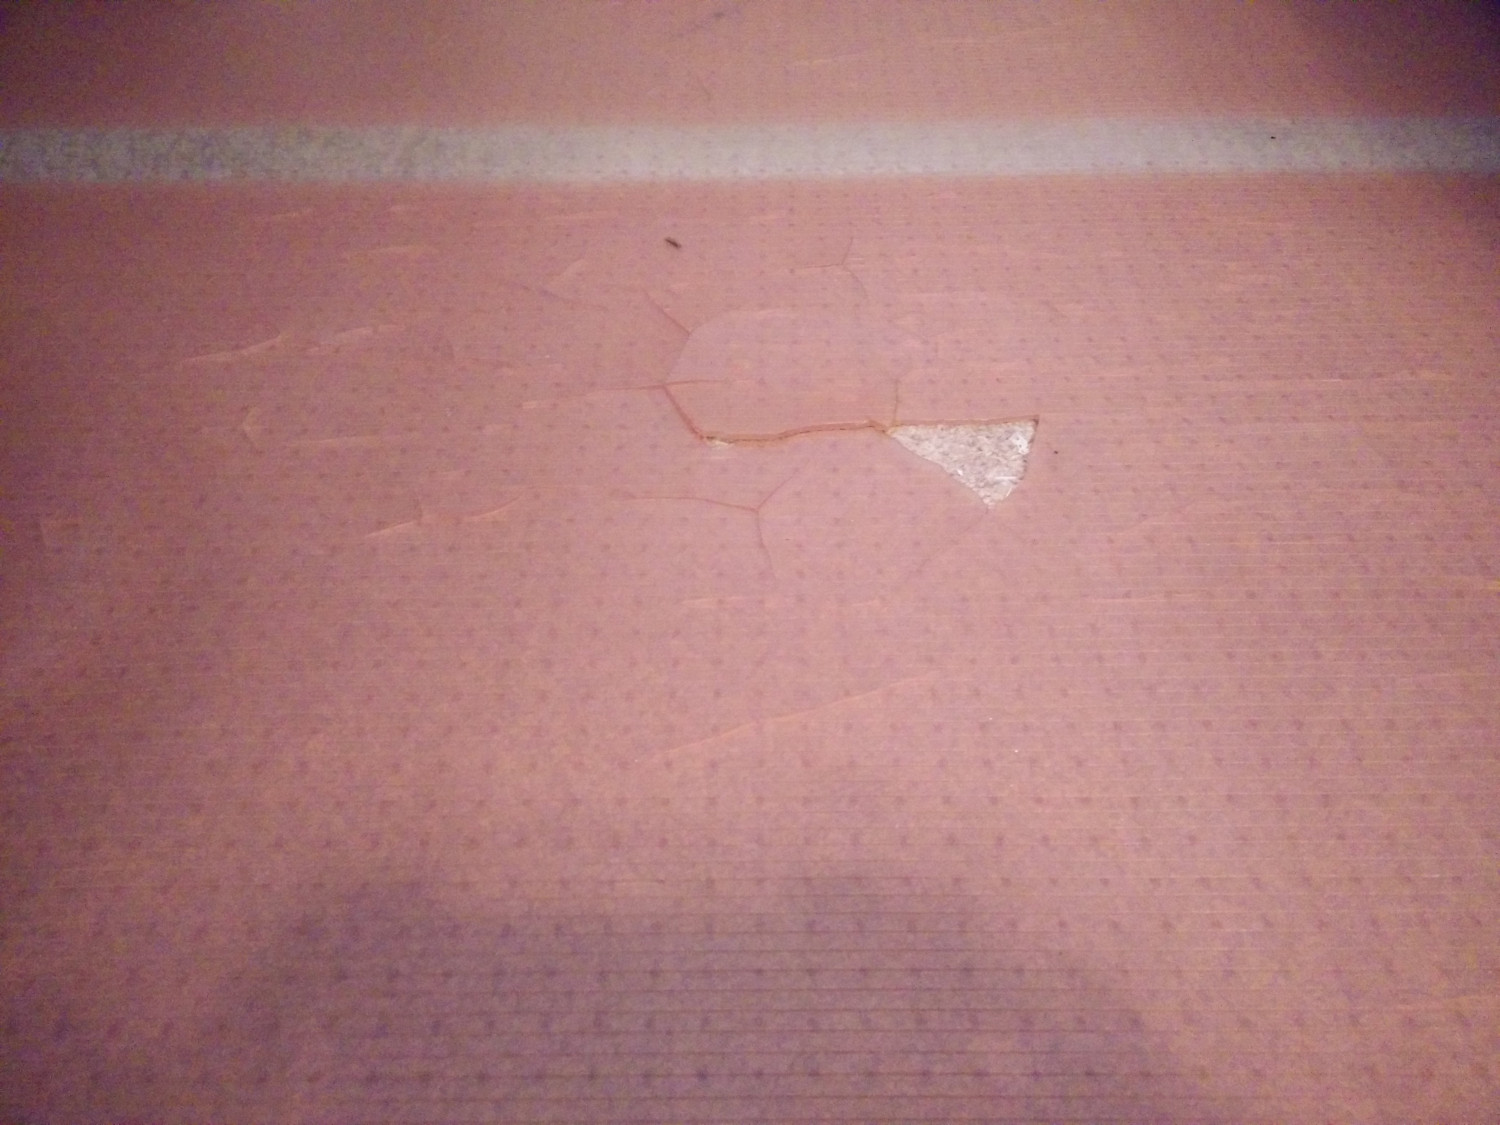
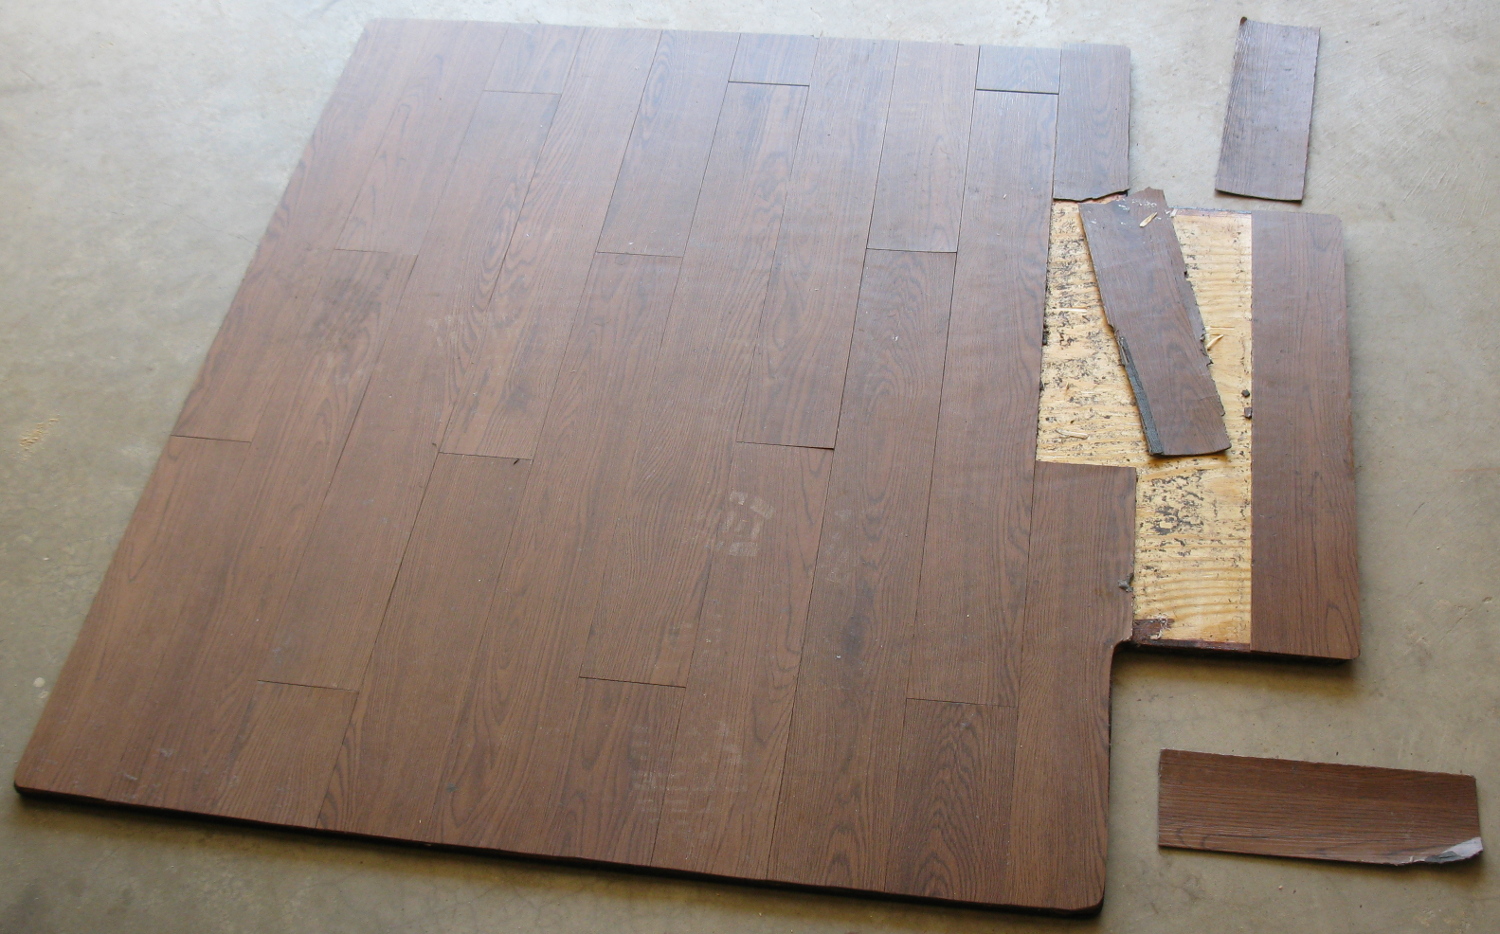
For my next attempt, I flipped the plywood over, and applied self-adhesive faux-wood vinyl laminate flooring (4x36" planks) directly to the plywood. I figured that would keep the plywood from coming apart, and the plywood would provide a solid underlayment for the flooring. Unfortunately, the slats of flooring immediately began sliding under the pressure of the chair. They didn't move rapidly, but as they edged away from their initial position, they exposed the gooey adhesive that was failing to hold them in place. And the slats under my feet went even faster. I had a mess under my chair in less than a week.
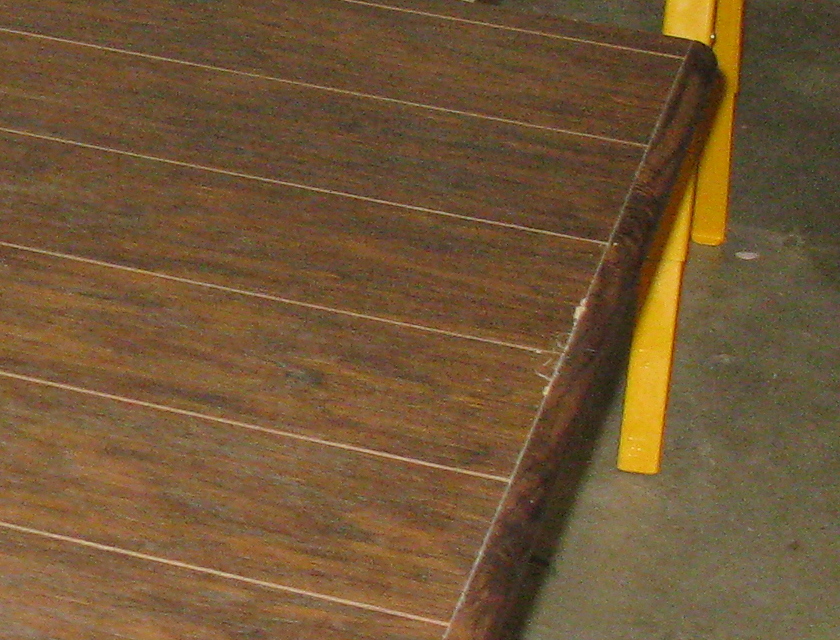
In fact, if you look back at the first picture of the torn-up plywood chair-mat, you can see the adhesive backing of the flooring sticking out from under it around the edges.
Again, the above picture doesn't look as bad as it was. If you look closely, you can see the seams don't quite line up, but it was only in this "good" of shape because I kept pushing the slats back into place.
Attempt 4
At this point, I did some research, and found that there are two kinds of office chair caster wheels. The normal kind that comes with any office chair you buy, and a second kind made from a different plastic intended for use on hardwood floors. Hardwood floors? Hmm...
I ordered a set of those wheels and installed them on my office chair in the hopes that they'd be gentler on my next attempt.
Construction
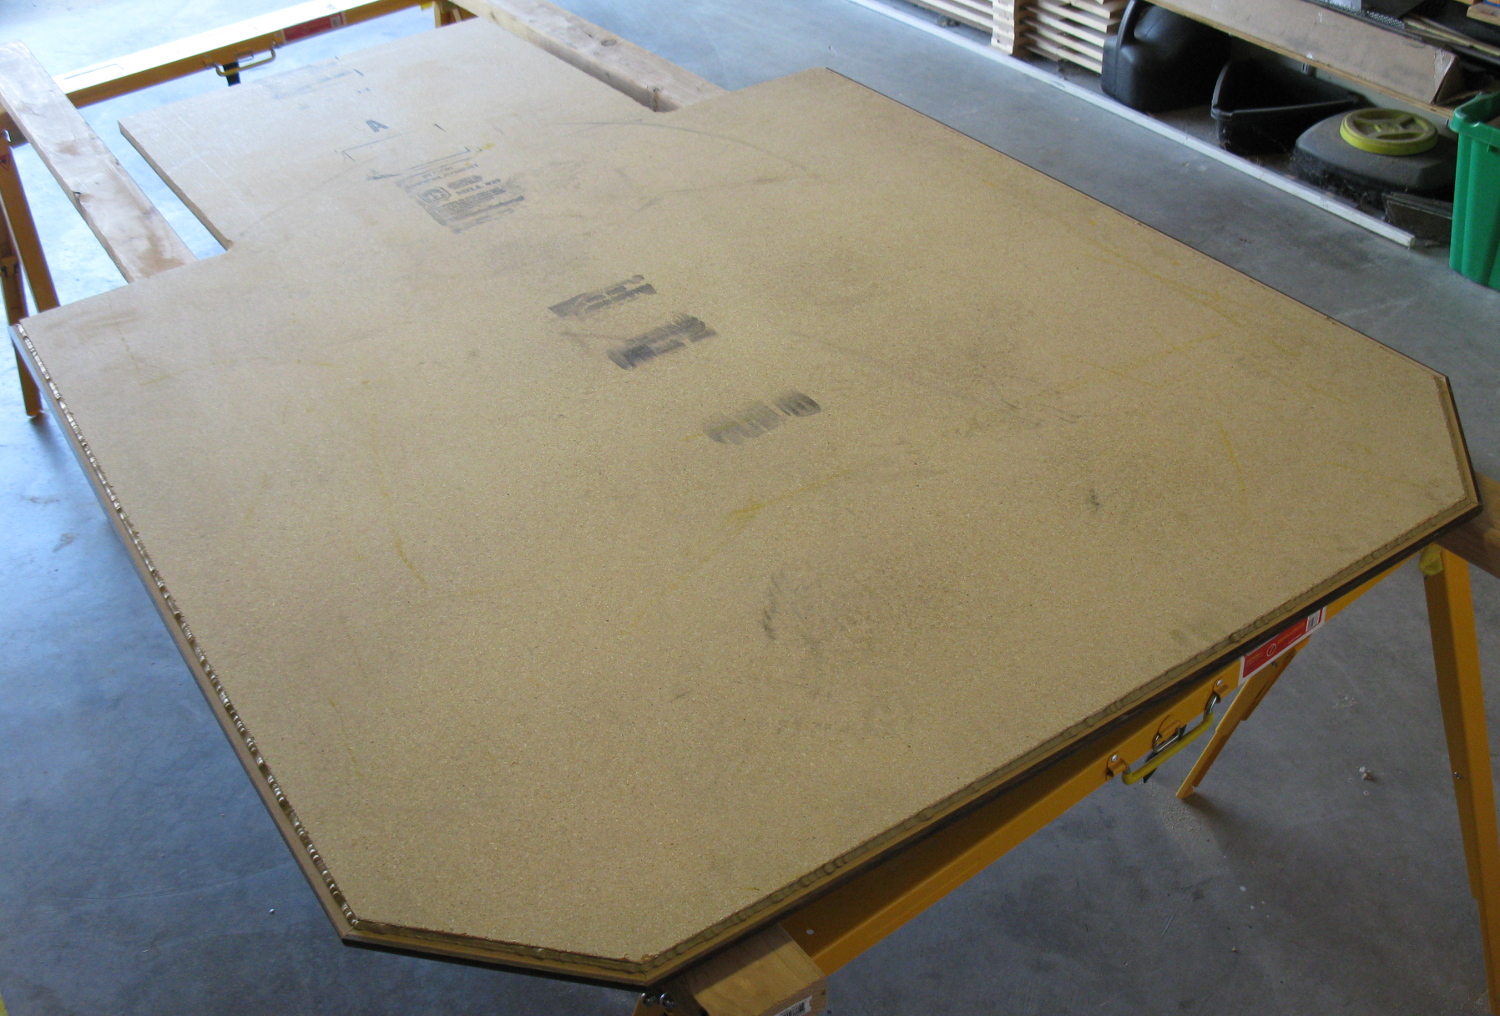
I bought a 4'x8' sheet of 3/4" particle board to use as the base because I wanted something more rigid than the plywood I had been using before.
For the flooring, I bought faux-wood engineered flooring that snaps together at the seams.
This is the label from the flooring sample of what I used; but I'm not finding any indication that they even make this stuff any more.
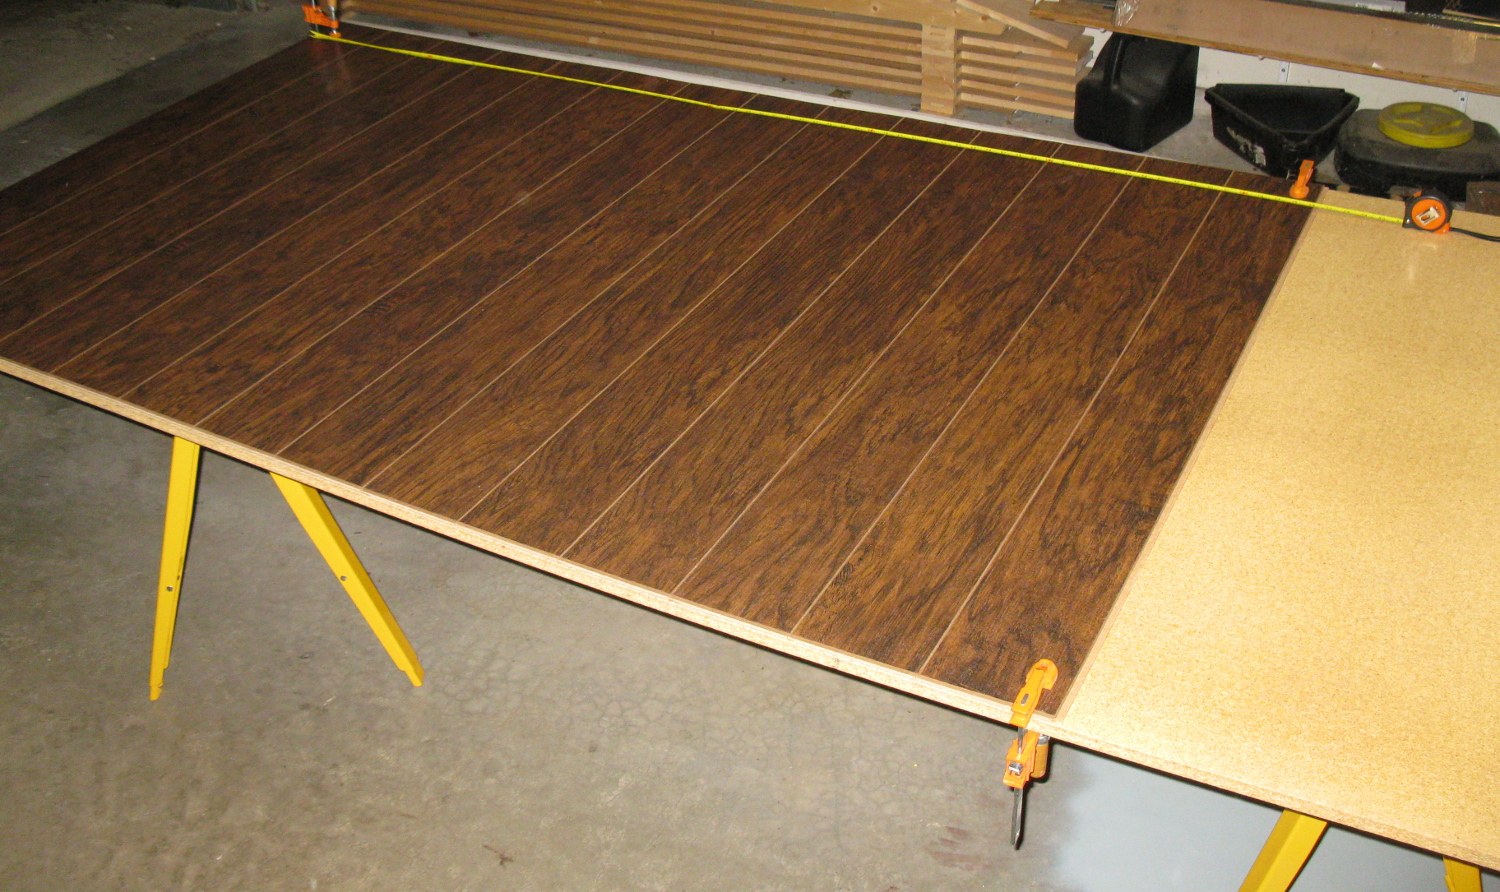
The planks were about 5-1/2"x48" planks; that allowed me to build the chair-mat with no end-to-end seams. I glued the flooring to the 4'x8' particle board using liquid nails.
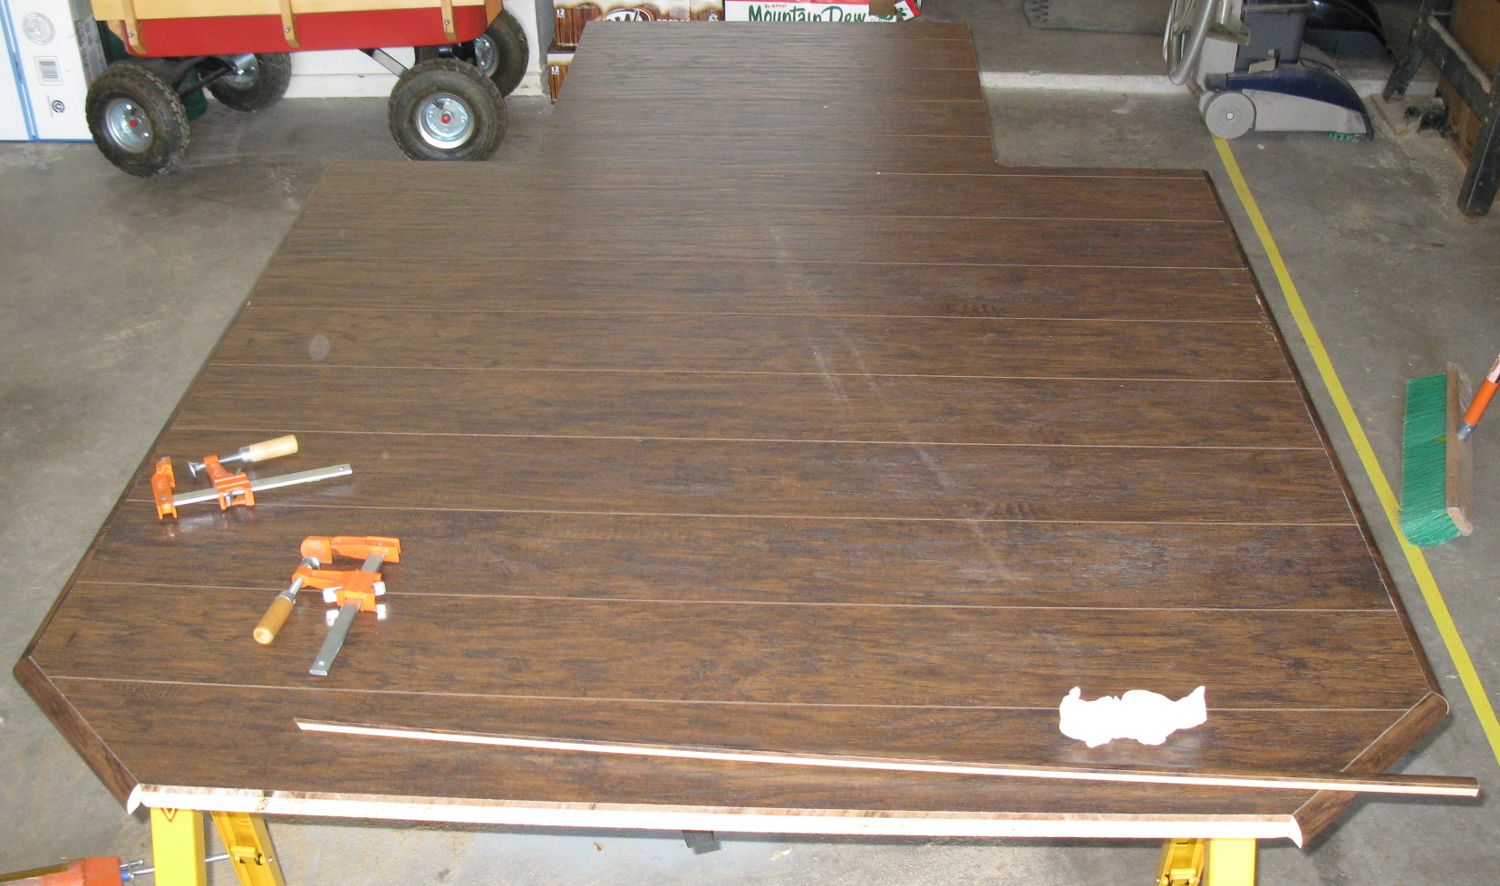
The next day, after the adhesive had dried, I flipped the board over, cut off the excess length and trimmed the long edges.
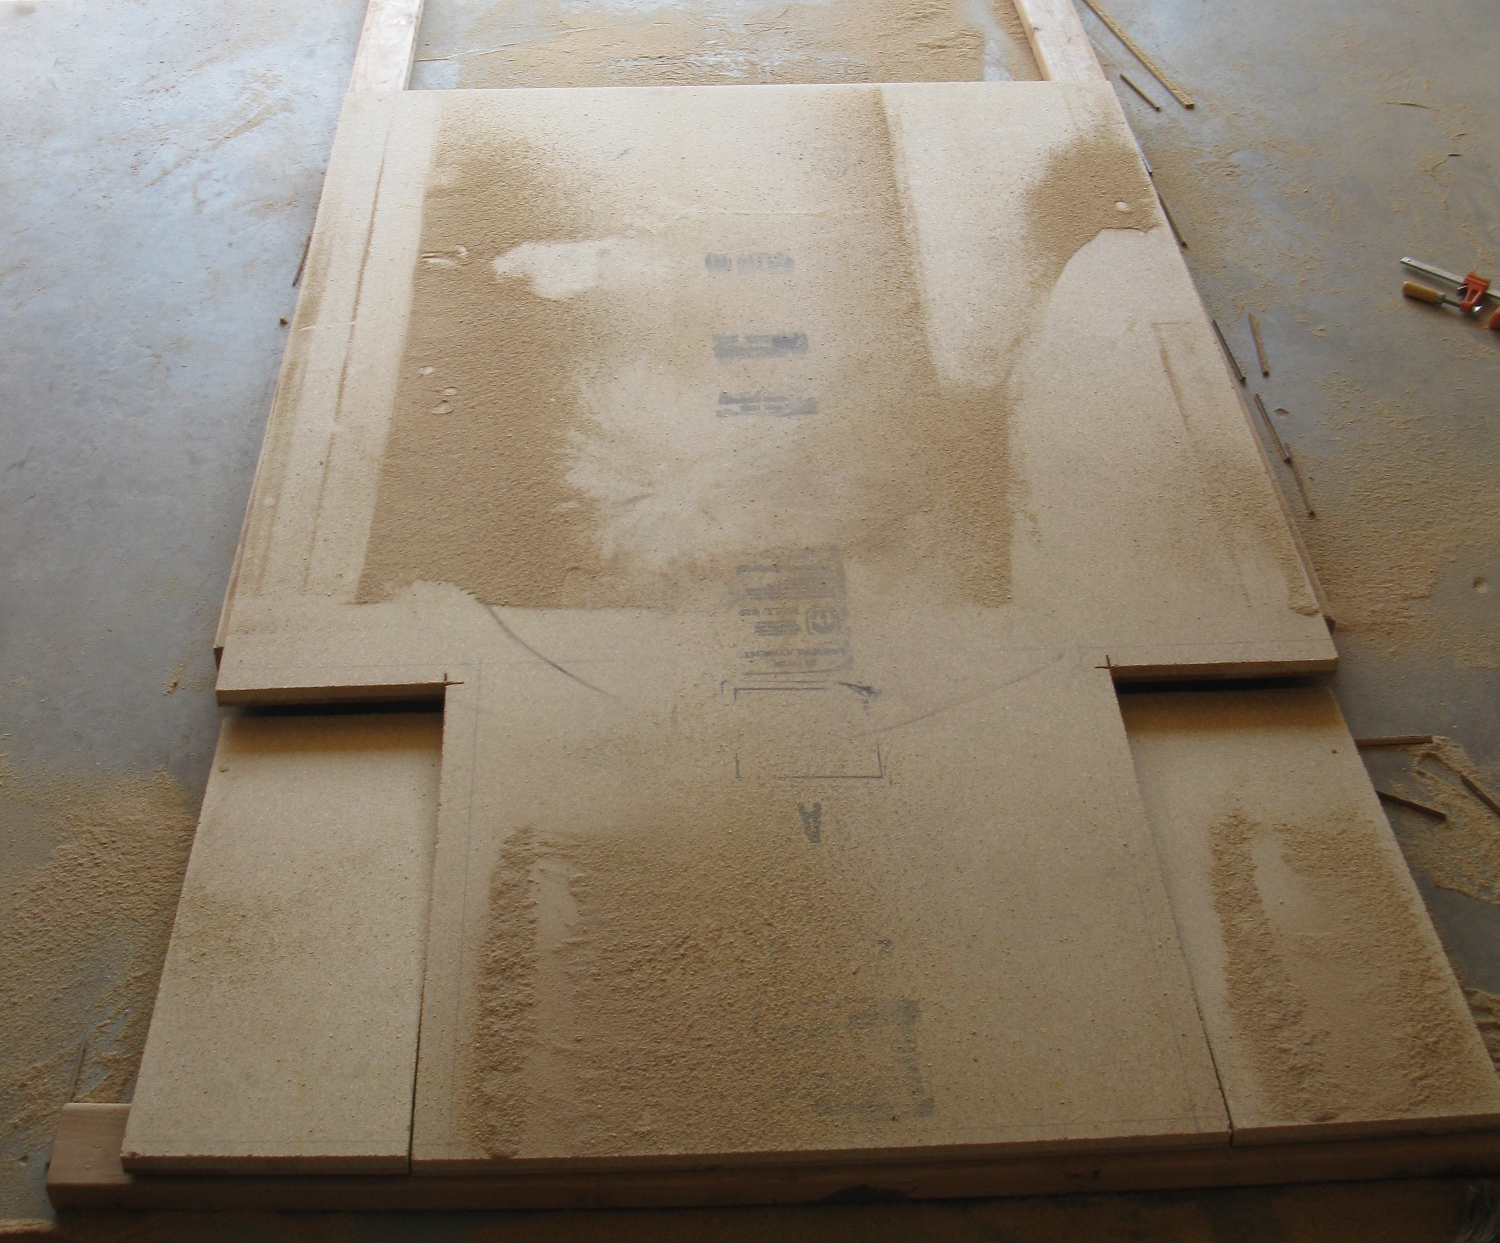
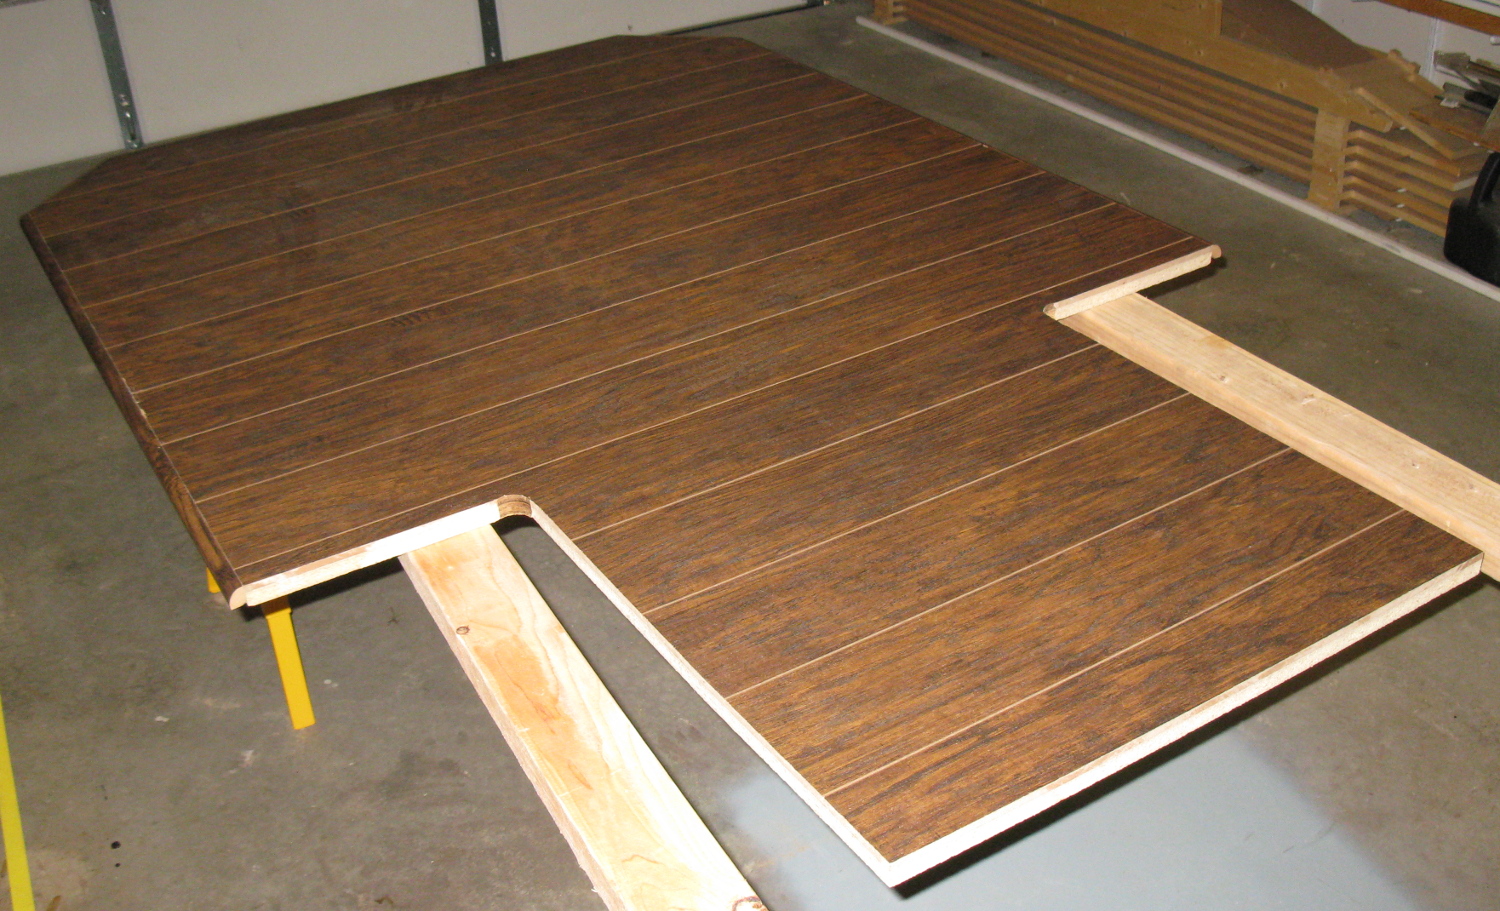
Cutting the long edges was needed since the 48" long planks had the interlocking groove system on their ends as well; so I had to trim them to a bit less than 48" Then I rough-cut the inside corners ...
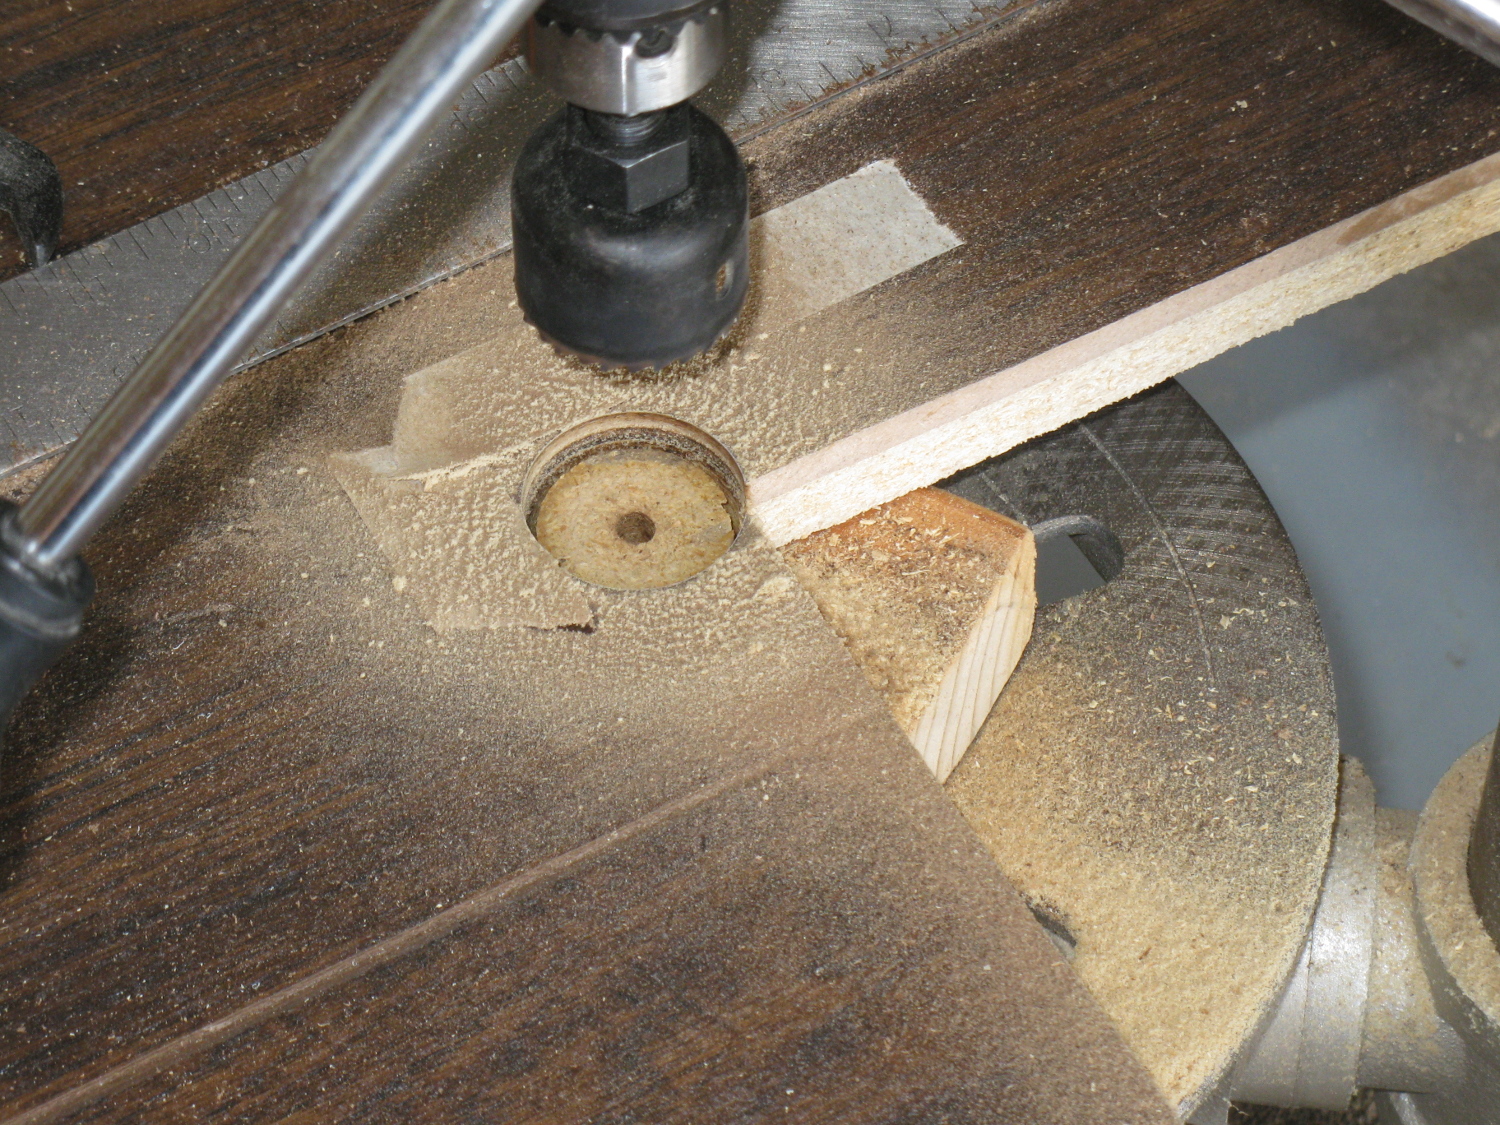
... so that I could reach with the drill press and a hole-cutter to fillet the inner corners.
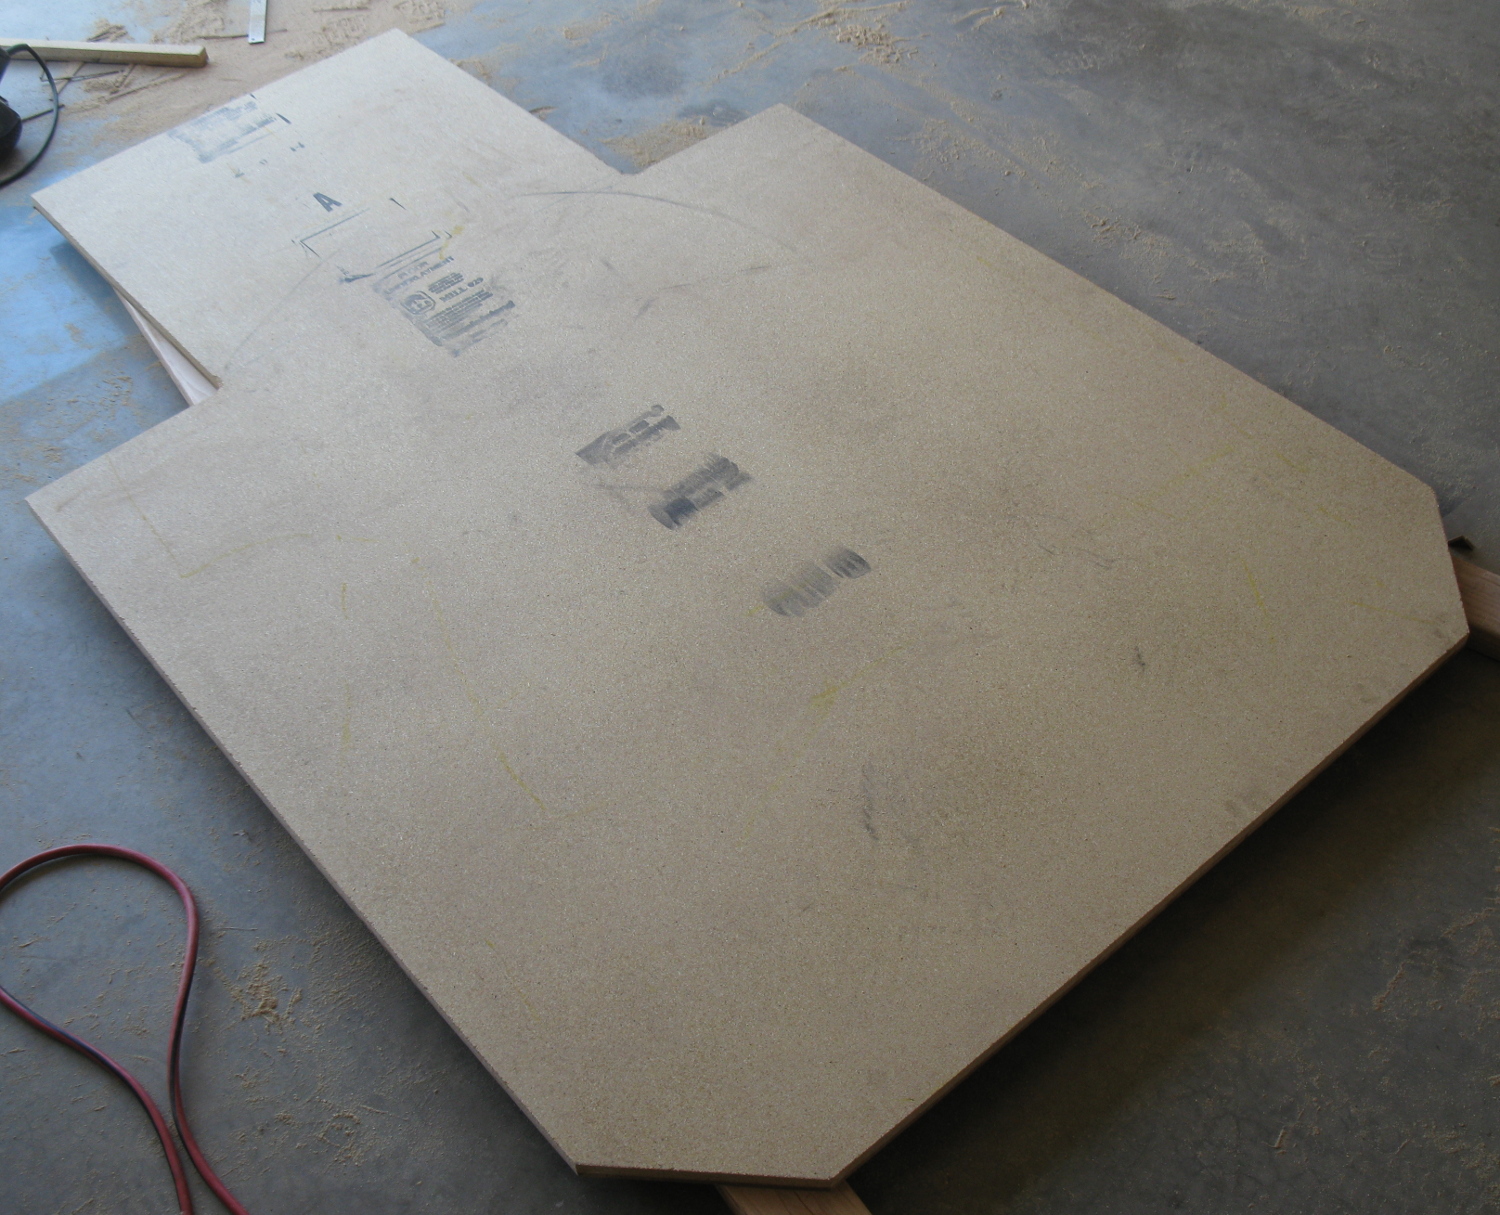
I also cut the outside rear corners of the mat at a 45 to give the whole thing a more interesting shape, without reducing the usable surface of the chair-mat.
I bought matching quarter-round trim, and used liquid nails to glue it to the edges that would not be adjacent to the desk, with the top edge of the trim flush with the top of the flooring since I didn't want a lip. Yes, that means I can roll off the edge, but in practice that hasn't been a problem, and makes it easier to sweep stuff off of it.
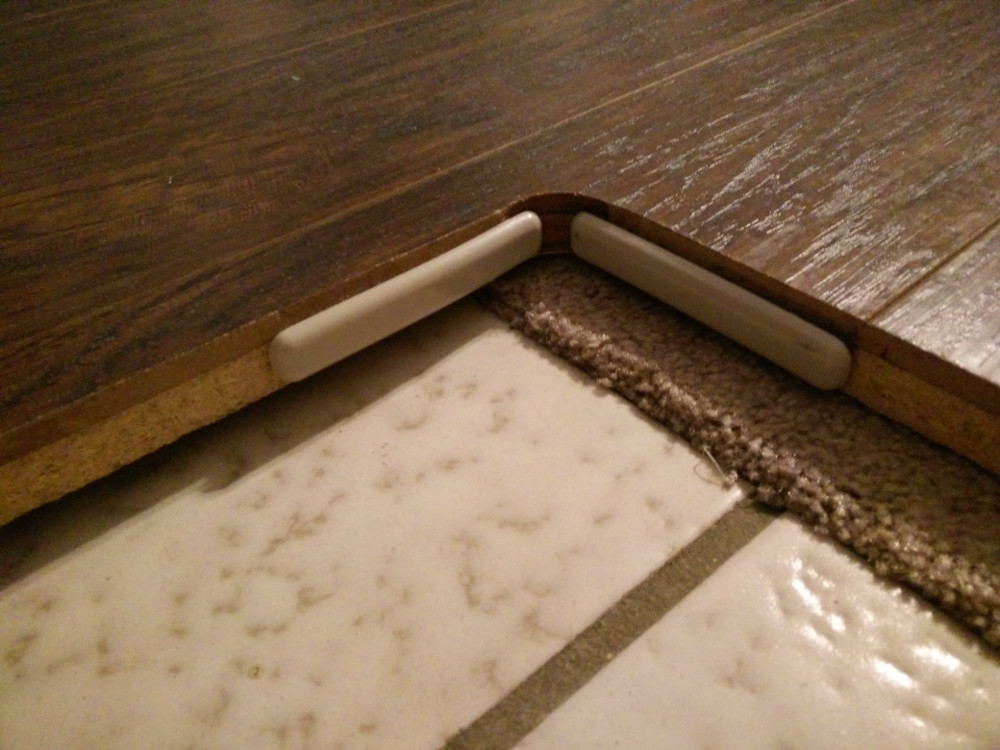
I also later added nylon furniture sliders to the edges of the mat that were rubbing on the desk; I should have done that to begin with.
Challenges
One of the challenges building this was the weight of this thing. I damaged a bit of the edge one of the times I flipped it over because I had trouble with the weight.
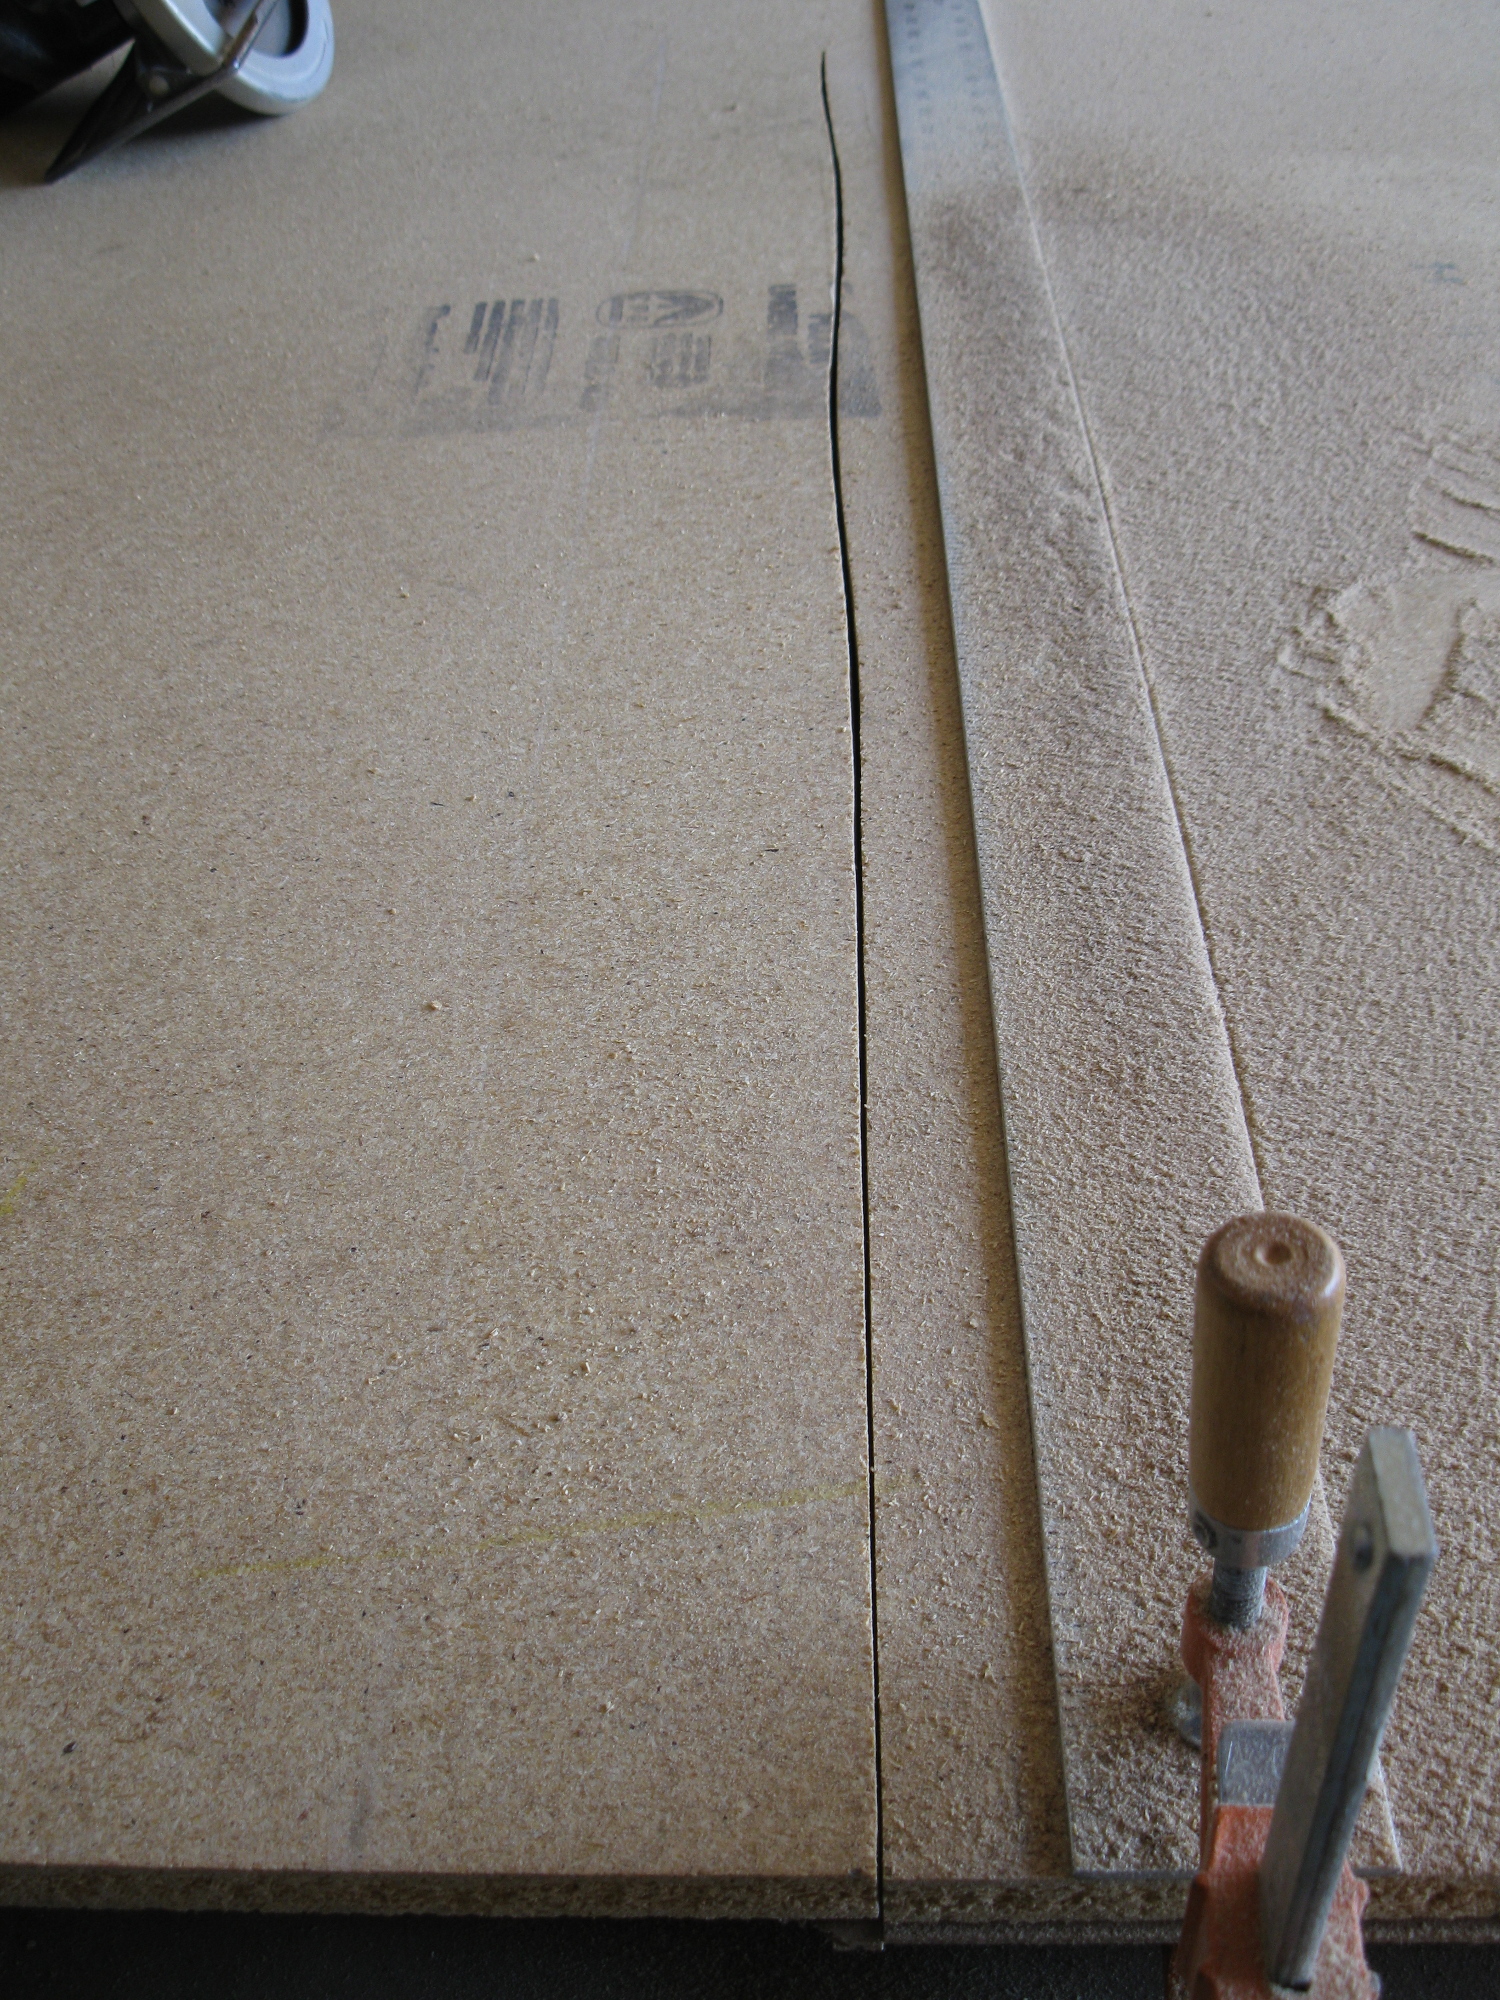
The other was that cutting through the particle board and flooring caused my circular saw blade to over-heat, leading to this awful cut.
Fortunately I learned this on the first cut to remove the excess particle board so fixing it simply meant taking another cut and losing a quarter-inch of the over-all length.
Wear
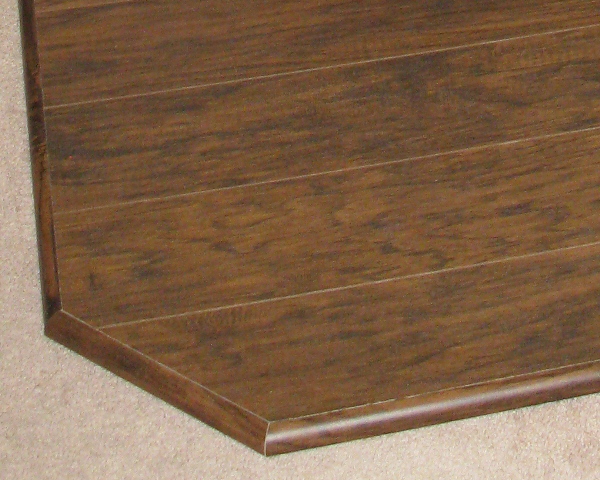
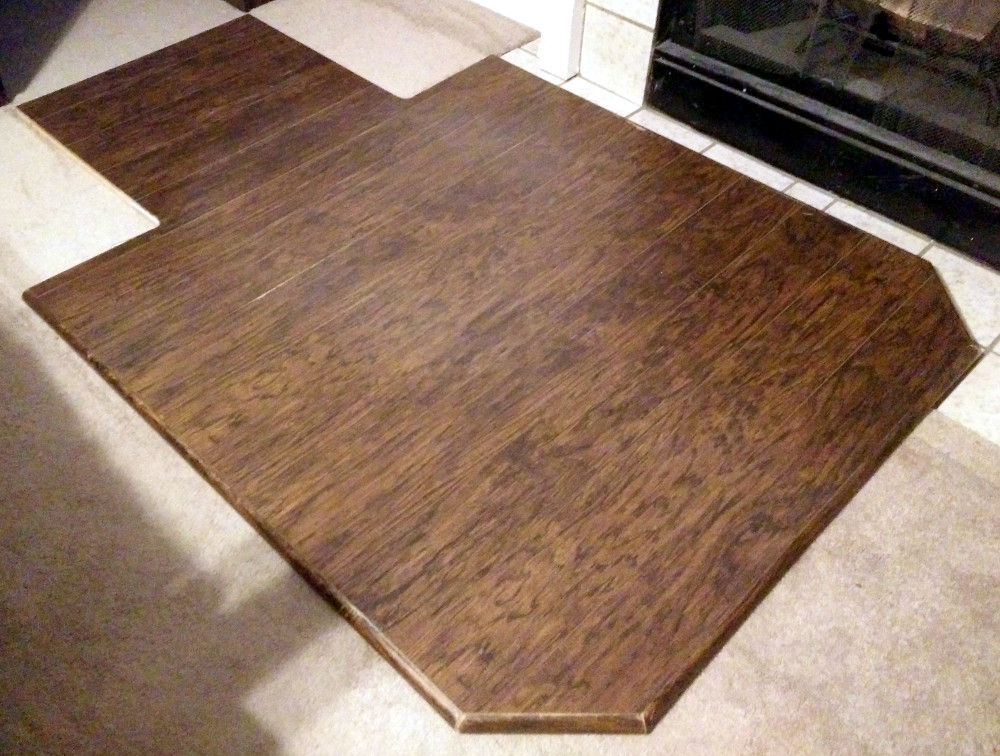
So the real question is, "How has it held up?" From a photo taken the day it was installed, you can see that the corners were nice and clean.
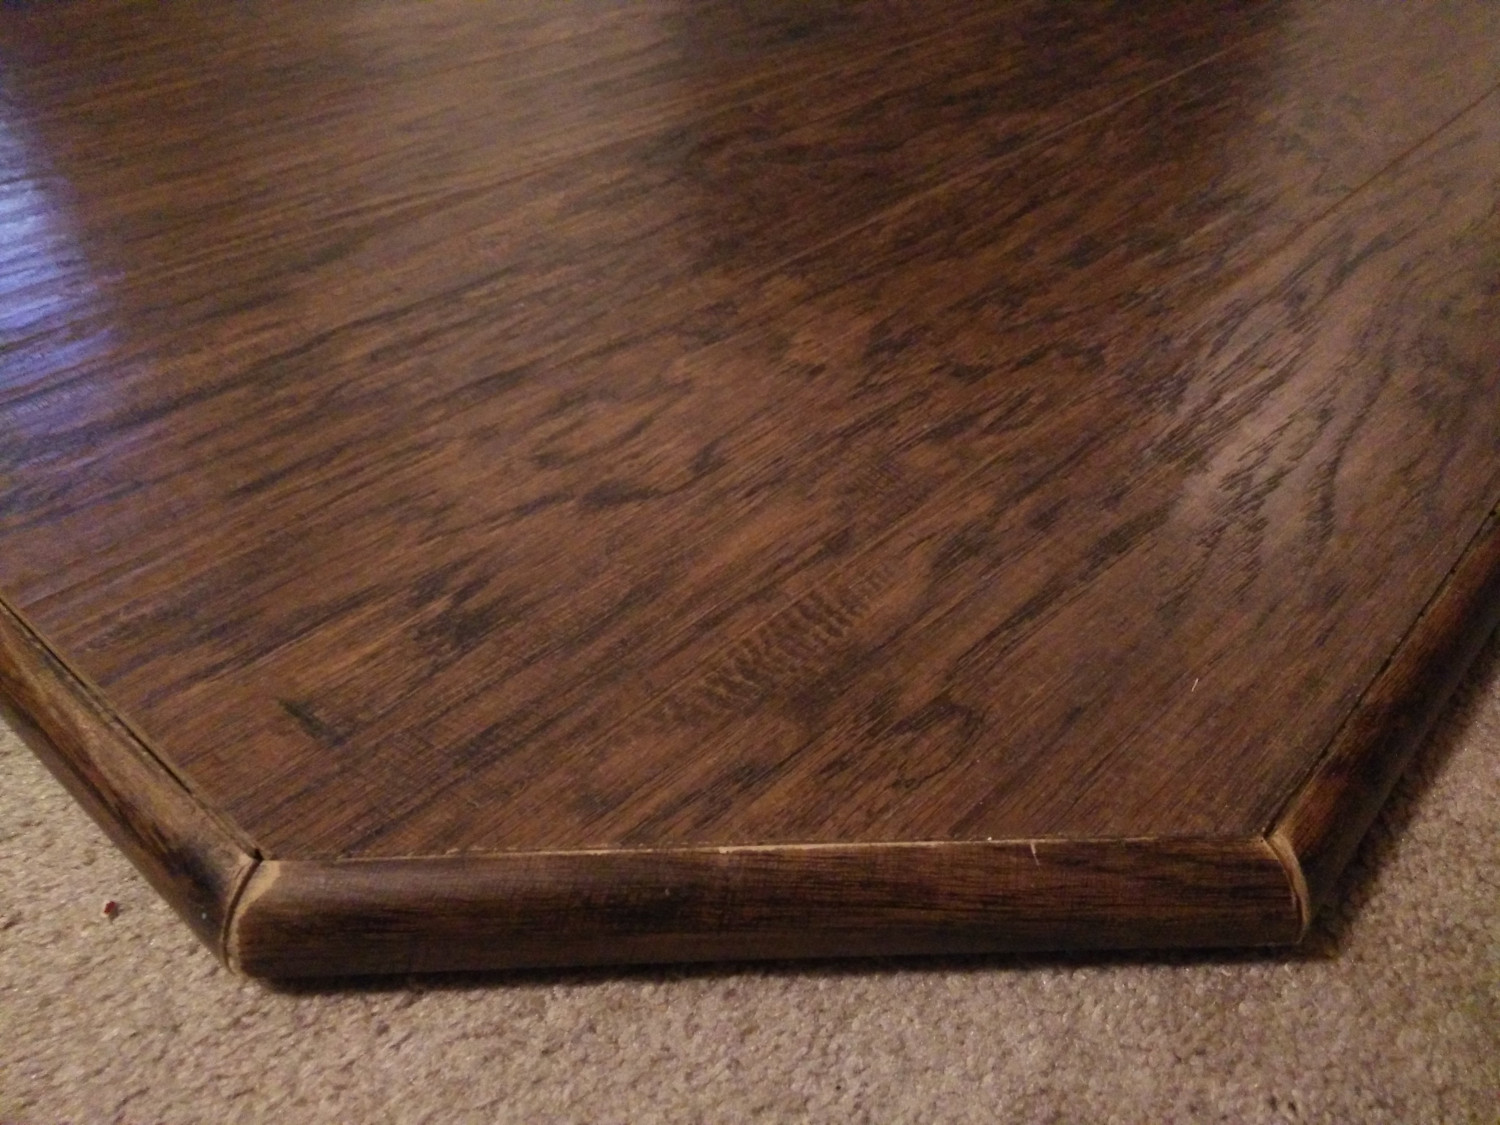
Due to where this corner is, it sees a great deal of foot traffic; not just when I'm going to sit down. From this picture taken after nearly three years of daily use, you can see that the cut edges had worn noticeably, but is still very serviceable.
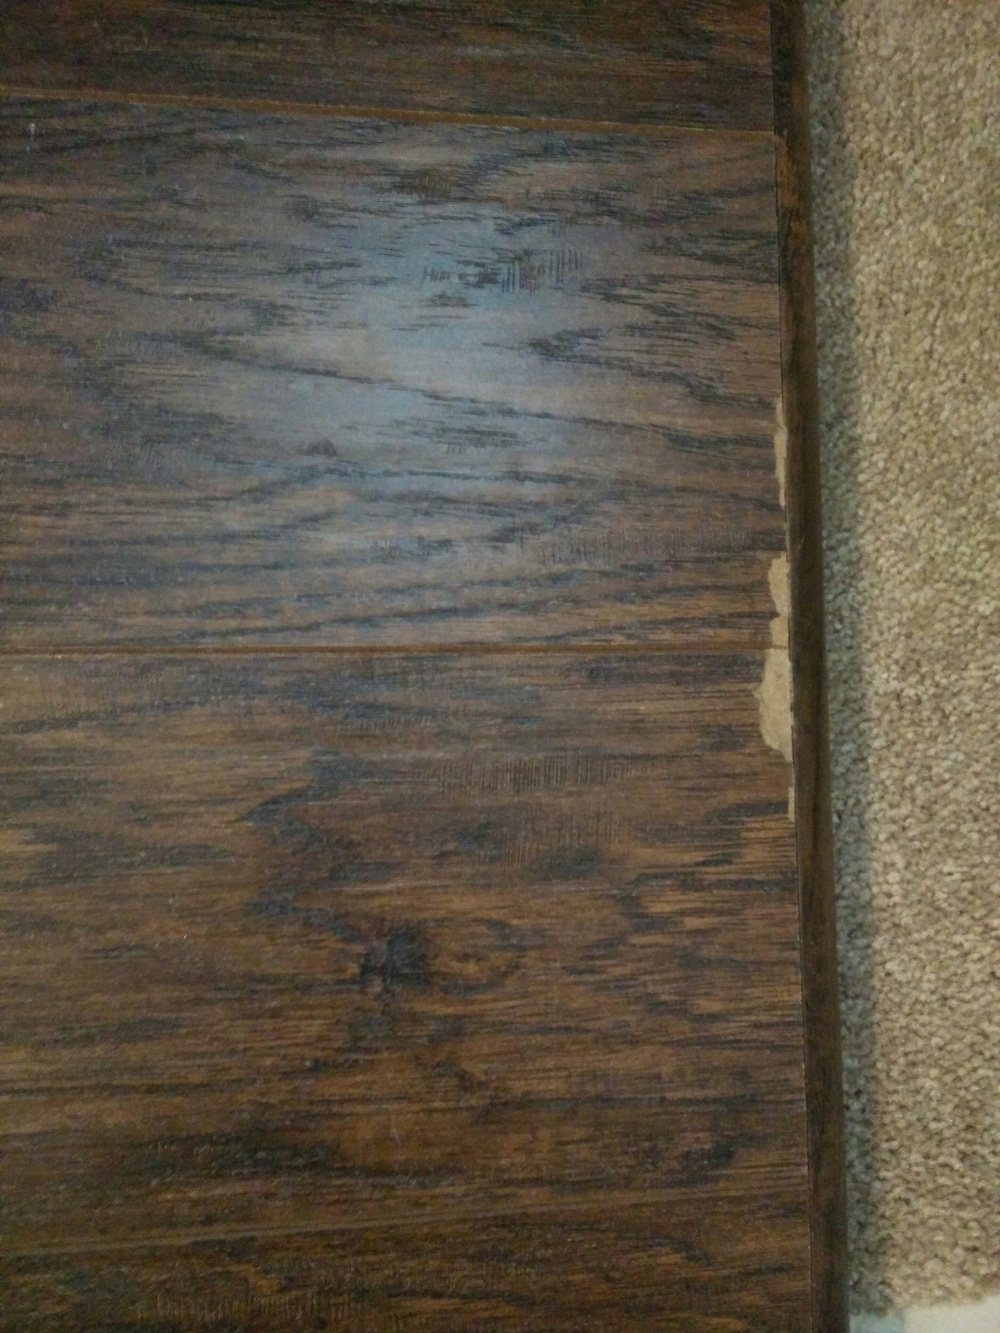
The other location which shows some wear was mostly due to damage sustained while I was building the chair-mat. The damage is a bit difficult to see in the original photo
but the surface of that damaged area eventually broke off.
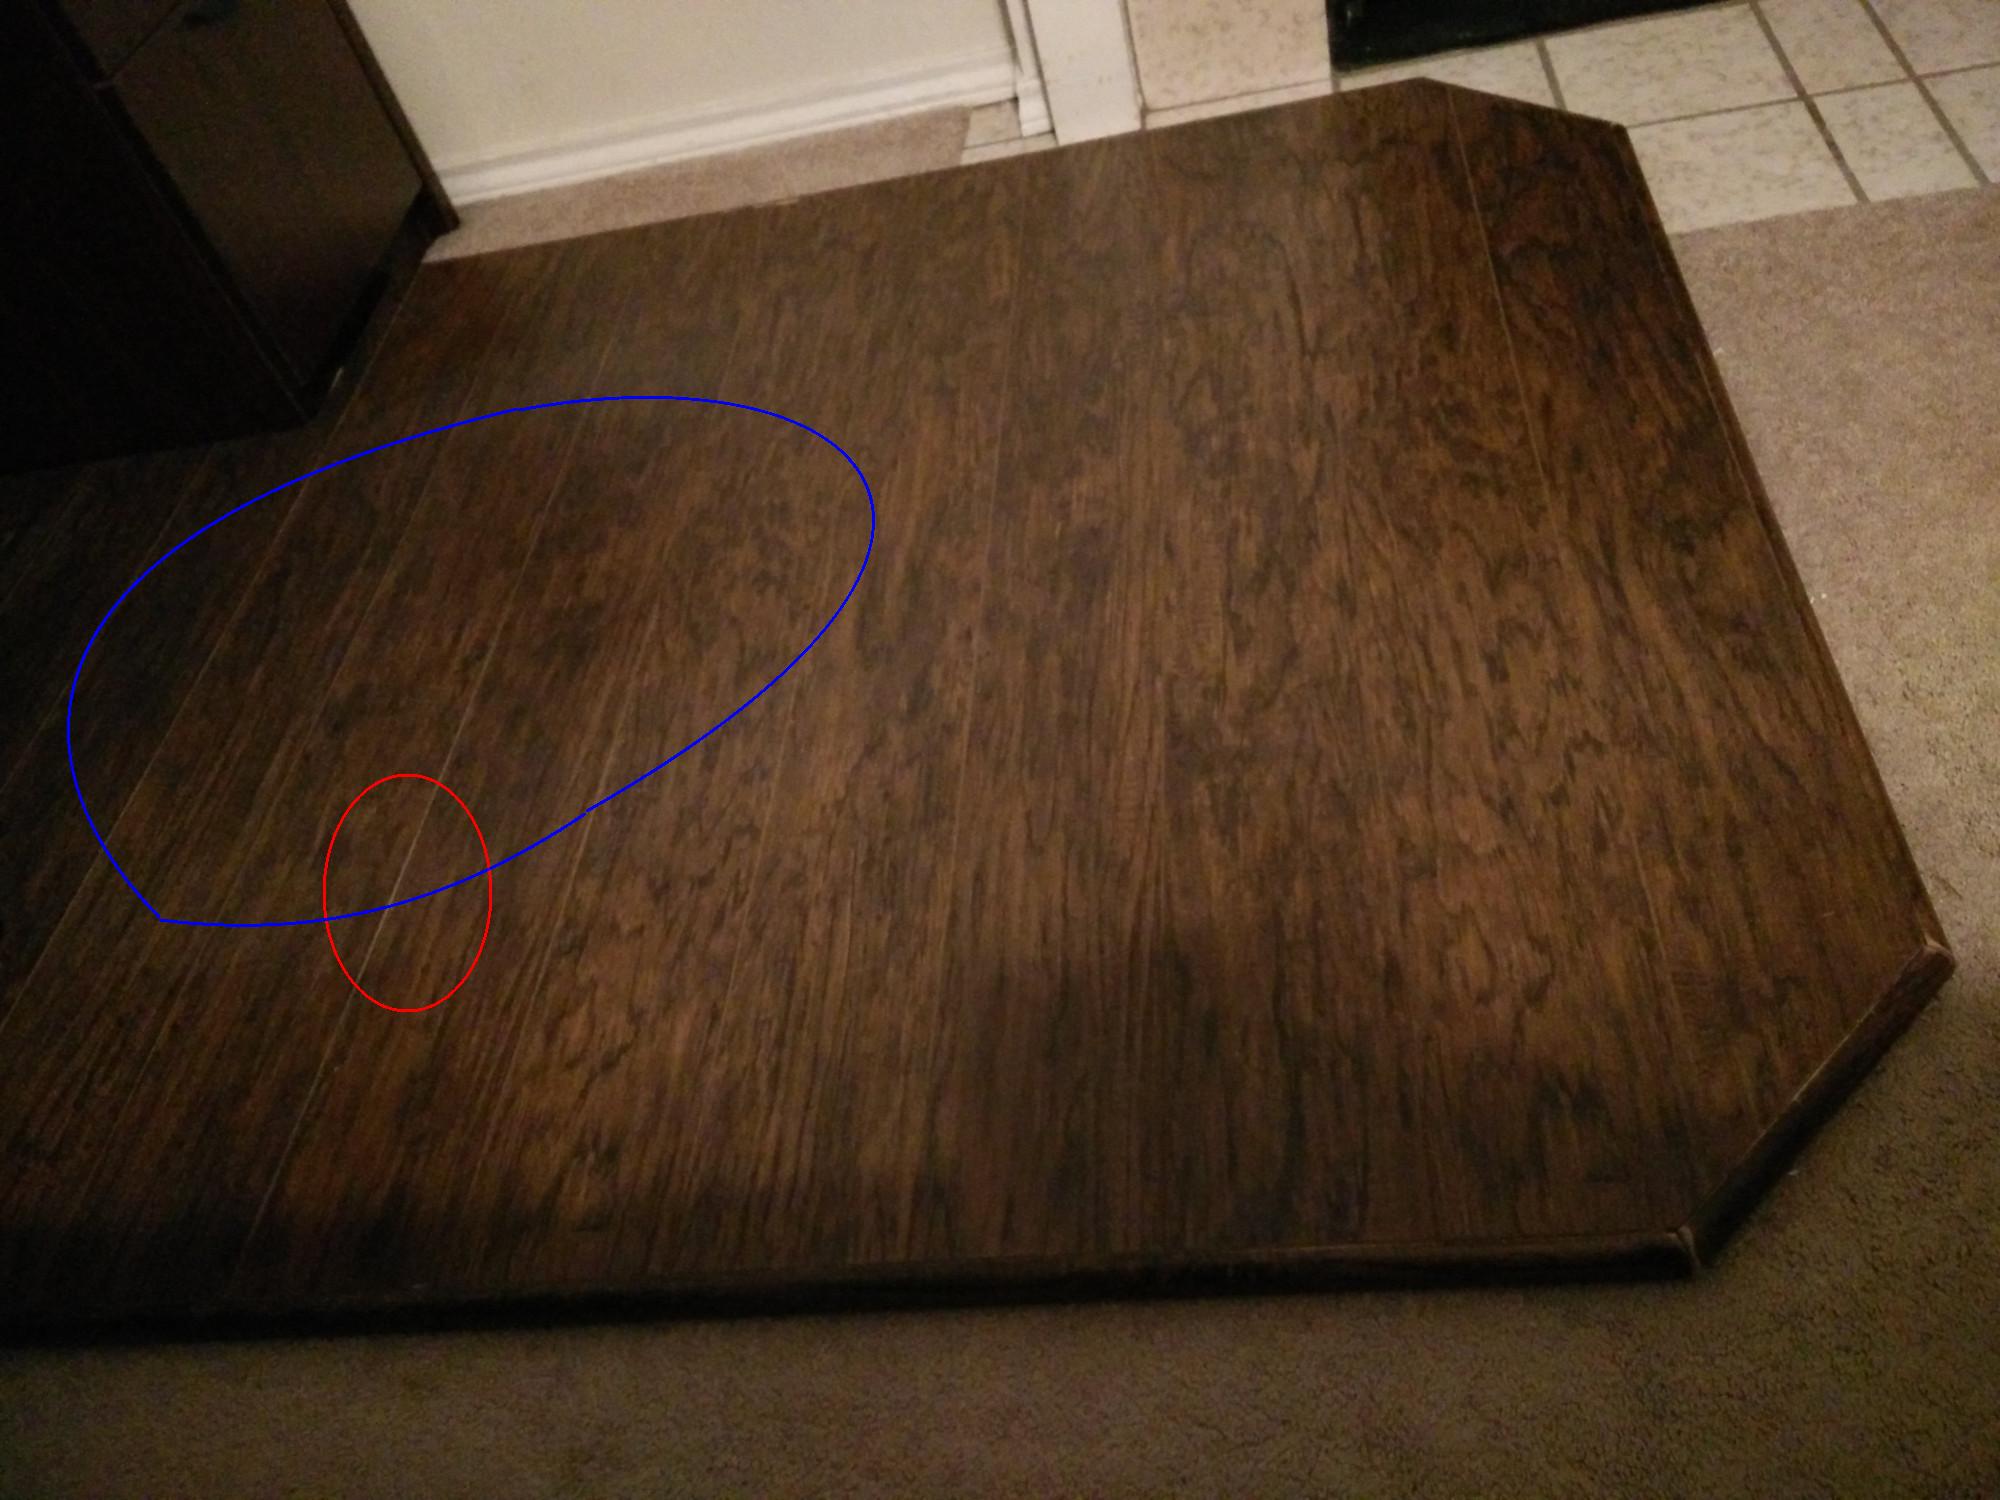
I tried to get a picture that would clearly show the wear from the wheels, but found it surprisingly difficult... though I should not have been surprised, given that until I started working on this write-up, I had not noticed any wear at all on the main flooring. Most of the color differences you can see in the picture are due to shadows or reflections, not wear.
But if you look carefully, you can see that the floor is just slightly lighter in a ring (marked in blue) centered where the chair sits most of the time. This is where the wheels most often travel; but there aren't divots that the wheels roll into and stay; it's still a solid, flat surface.
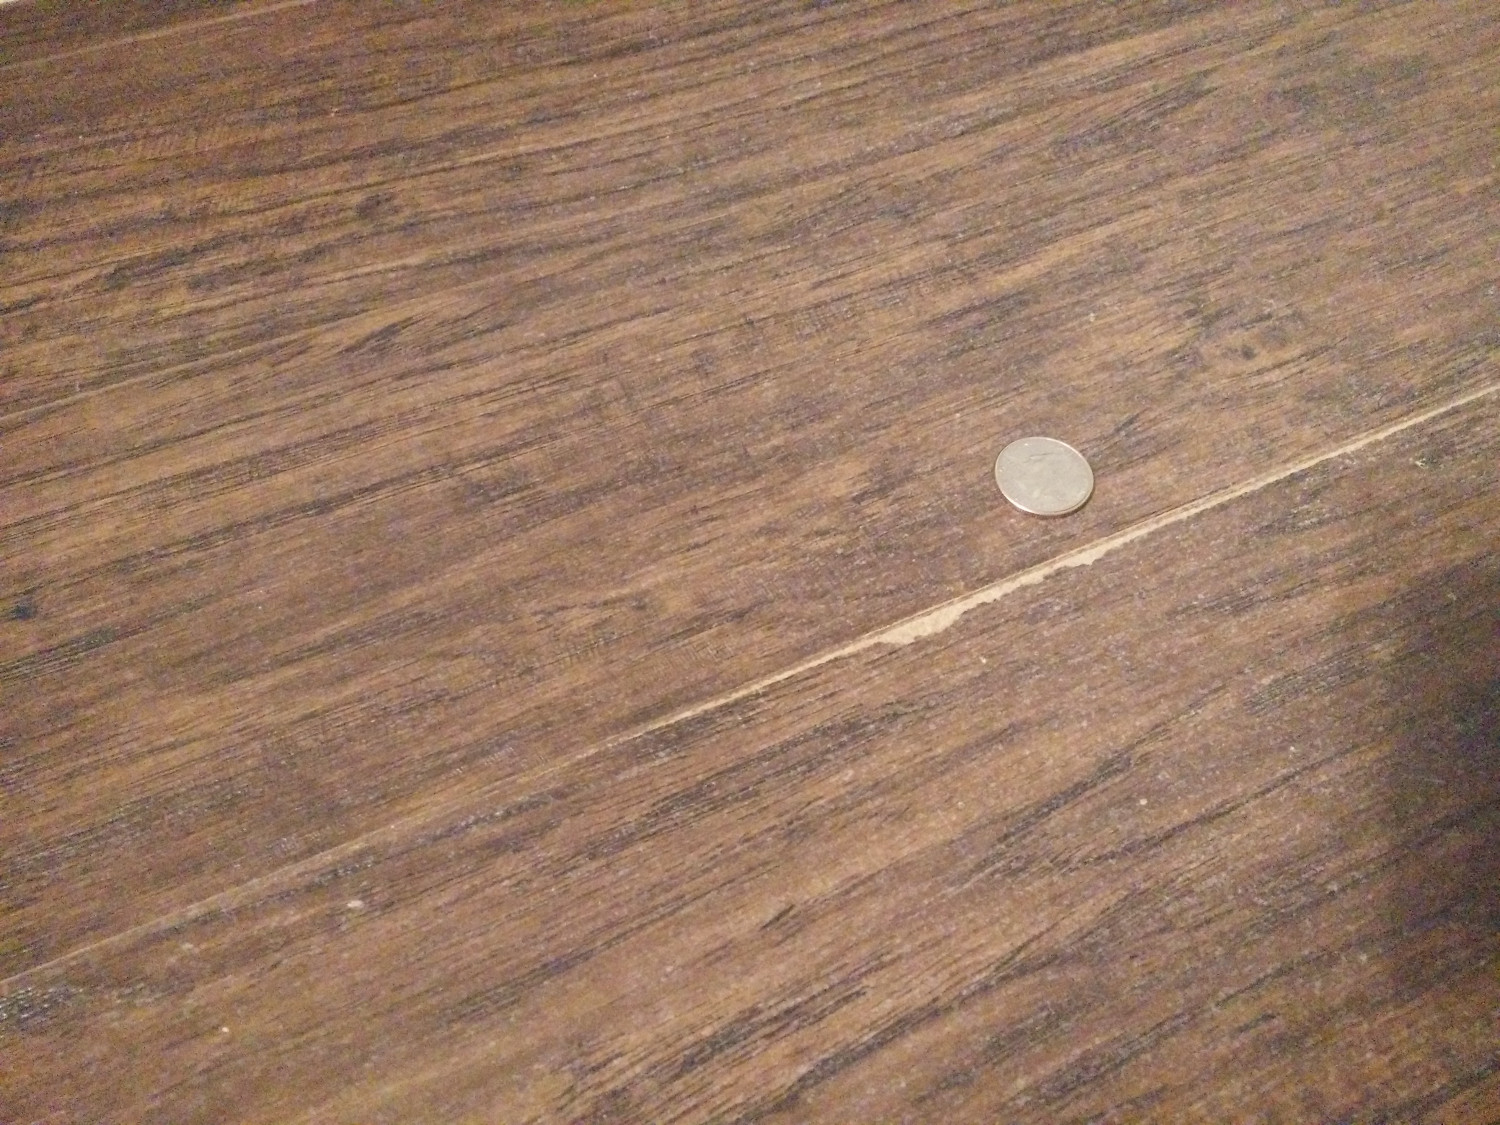
And there is one part of a seam that is showing significantly more wear than the rest of the floor (circled in red) which may need some attention. Here is a close-up taken a year-and-a-half after that showing that the wear has increased some, but not rapidly:
At some point, I managed to step on the quarter-round edging with all my weight one time too many, and it separated from main body of the mat. A bit of liquid nails put it back on and it has held up fine since.
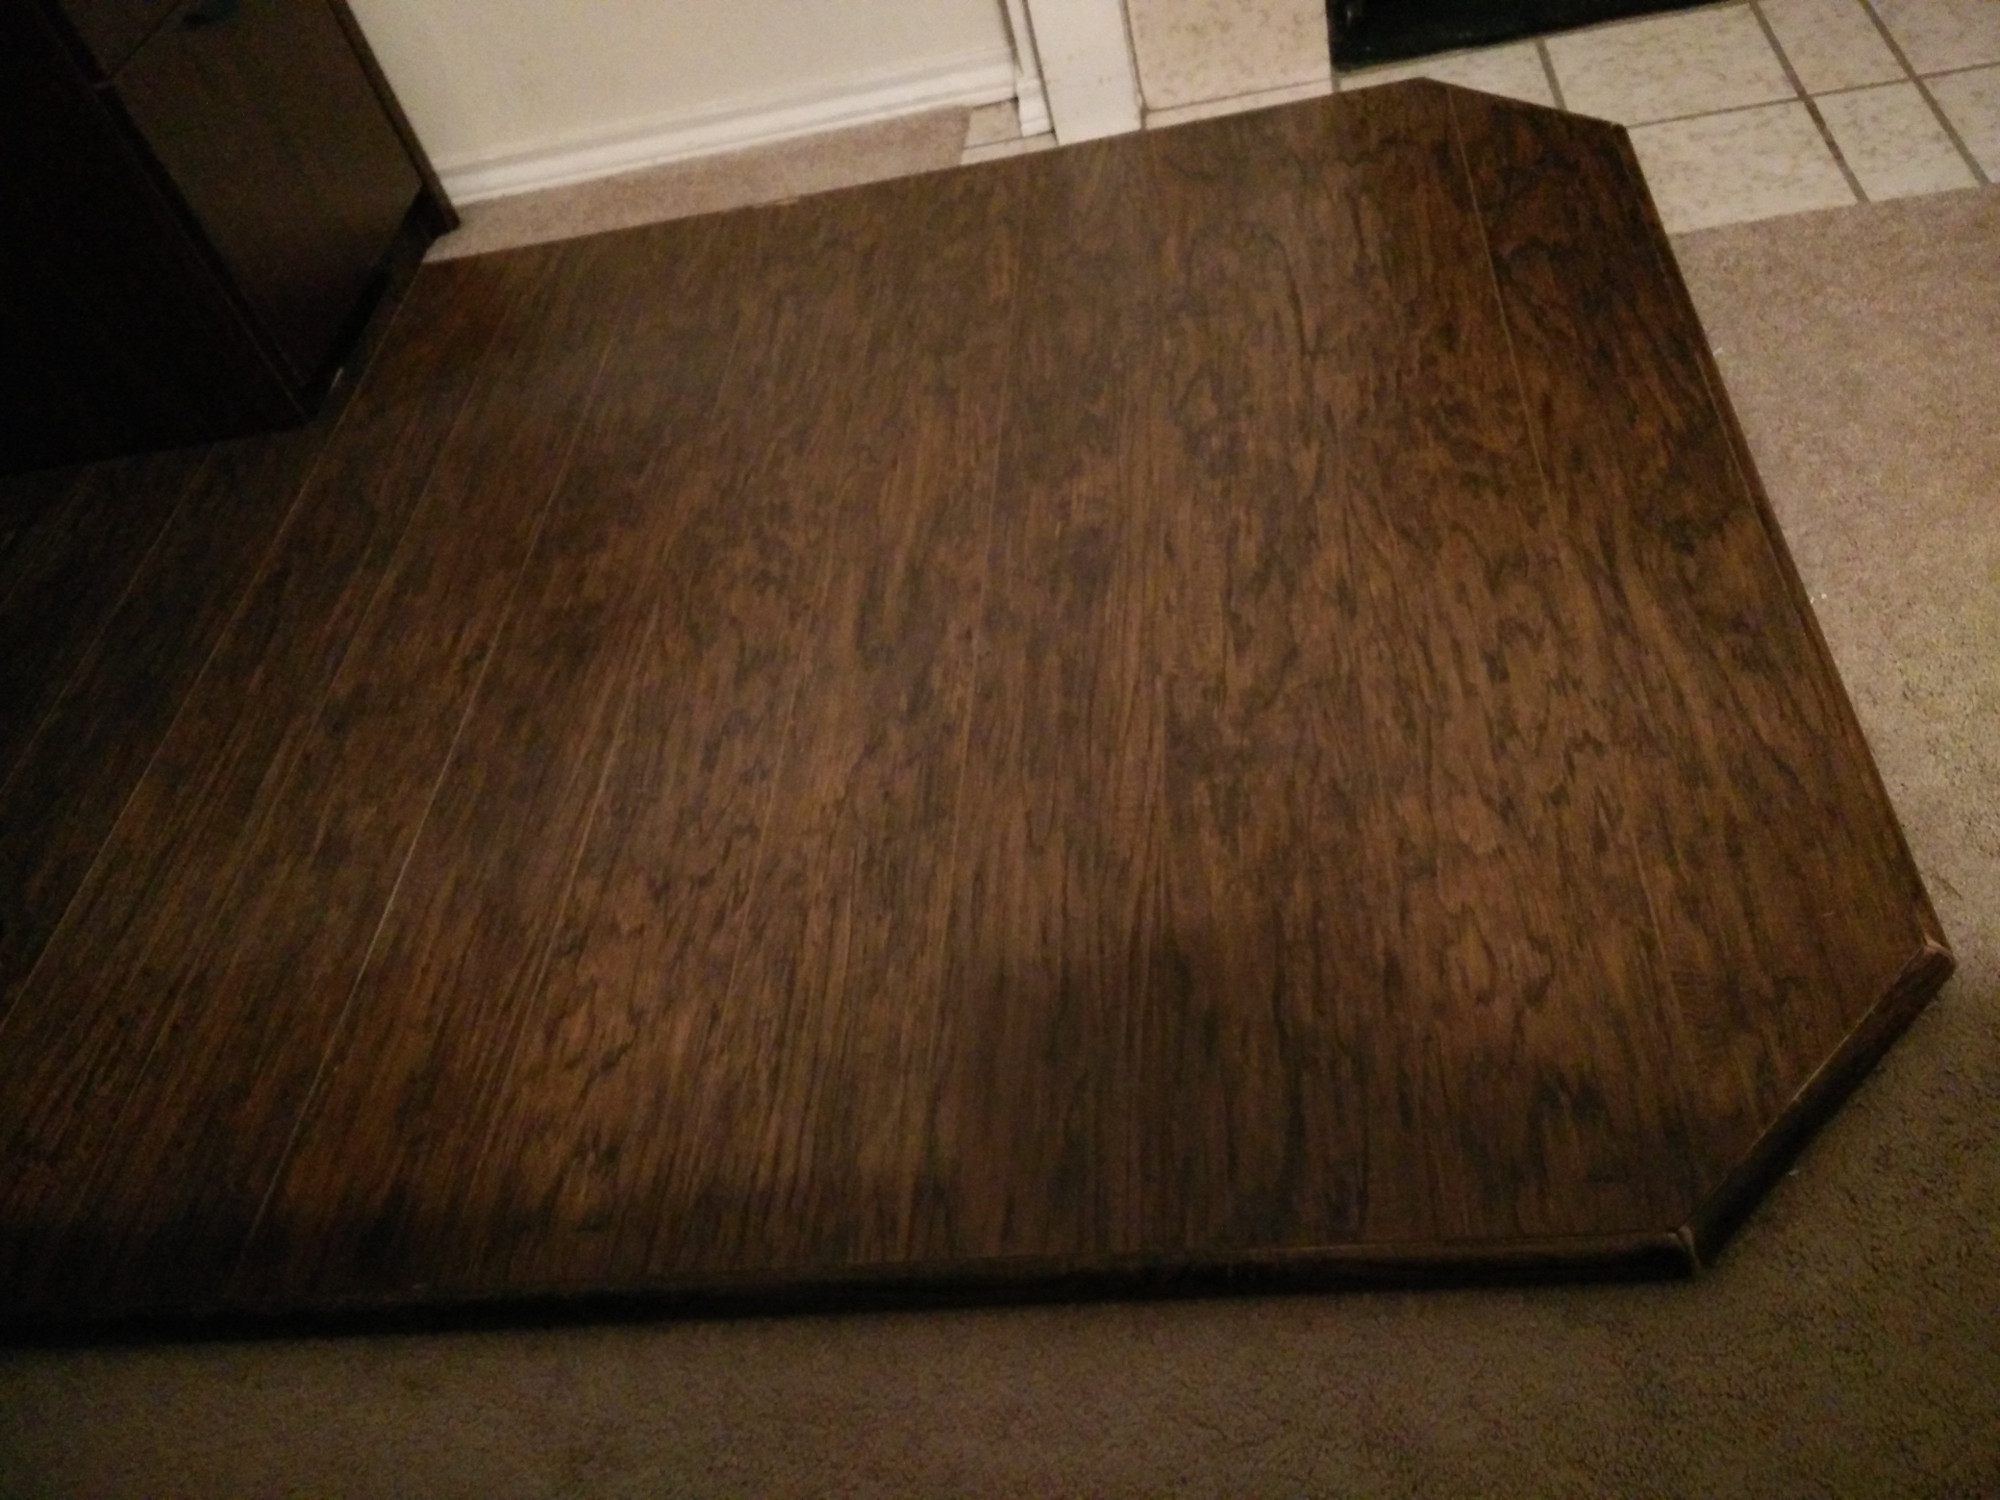
Looking at it overall after over 4 years of use, it has held up extremely well:
Conclusion
I'm happy with how this chair-mat has held up over the past 4+ years; when it eventually falls apart, I expect to build another much like it. Differences I may consider include using a thinner particle board so the weight is more manageable, being more generous with the liquid nails for the edge trim, and adding the nylon sliders on day one.
Tablesaw Dust Collector
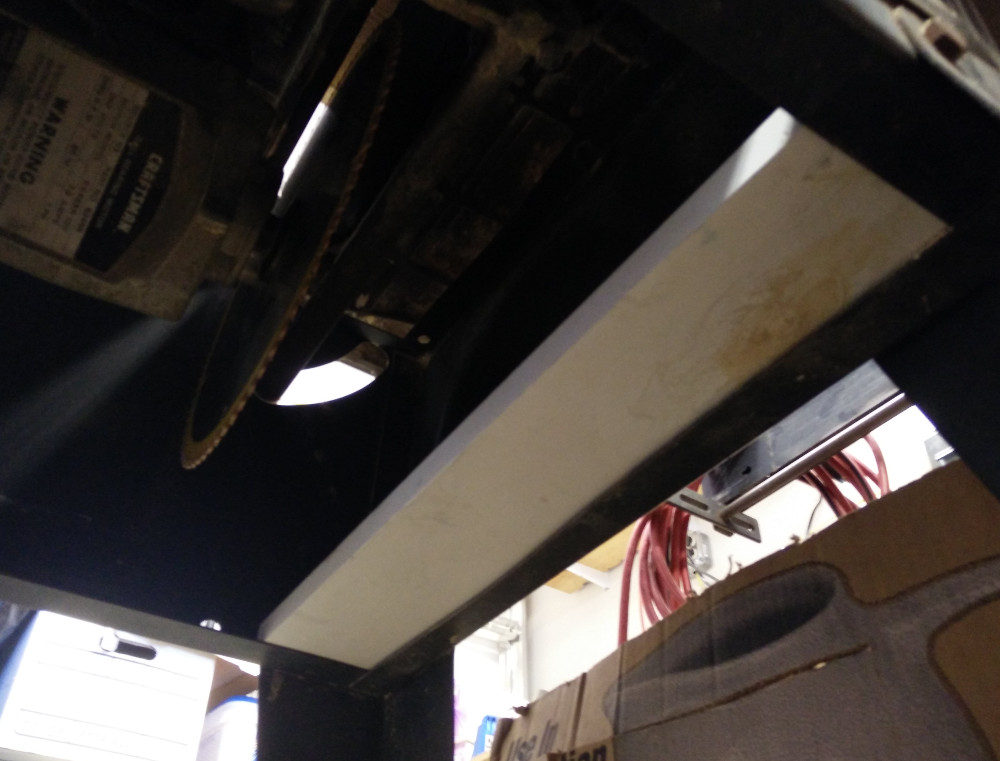
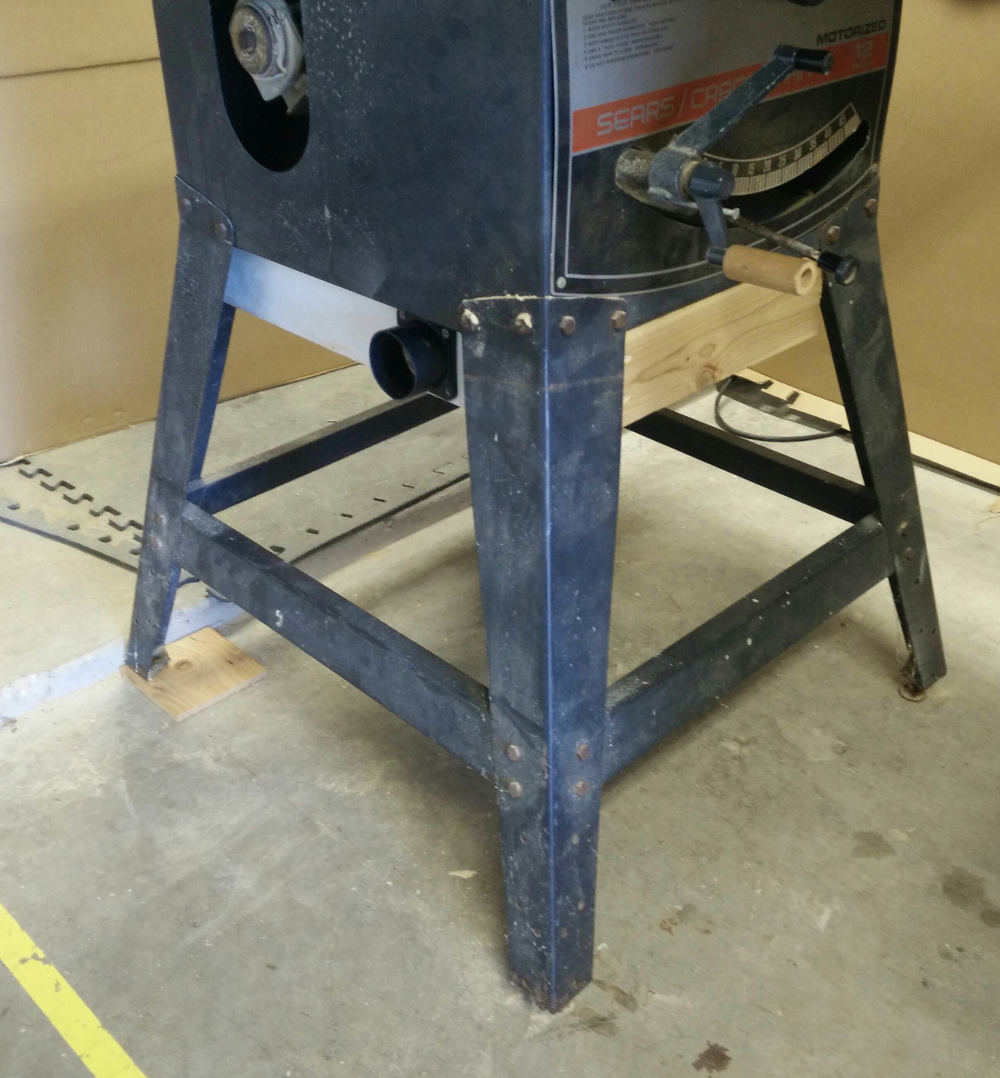
I have an ancient Craftsman tablesaw which had no dust collection system for it. The underside of the saw was simply open, and sawdust went everywhere. In order to get it under control, I cut a cardboard box to fit under the tablesaw. Since it was large enough to fill the space under the saw, it collected the sawdust quite well, but it was too large to pull out from under the saw's legs. That was my temporary solution for the past decade, but I had done some work on the tablesaw, and when I had put it back on its feet, I had not put the cardboard box in place. Time to get around to implementing a better solution.
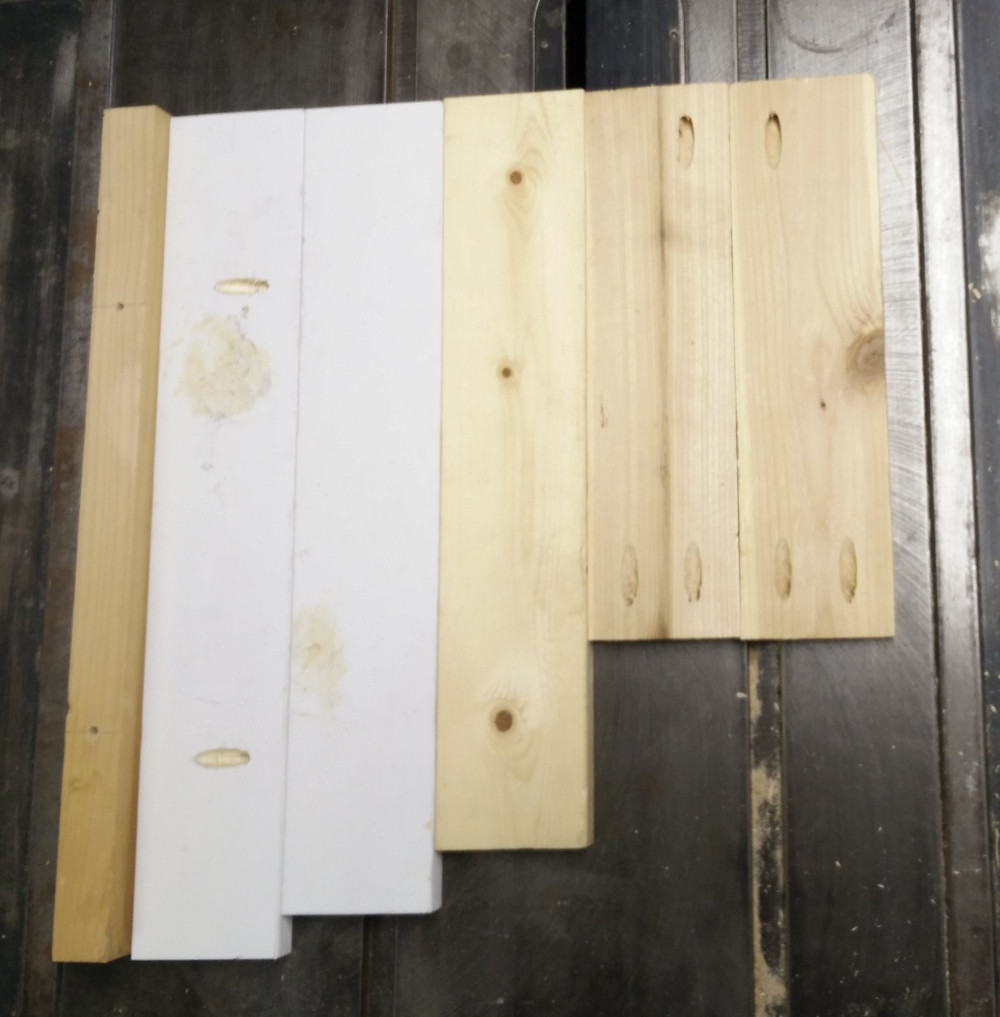
Using these (scrap) materials and some scrap plywood...
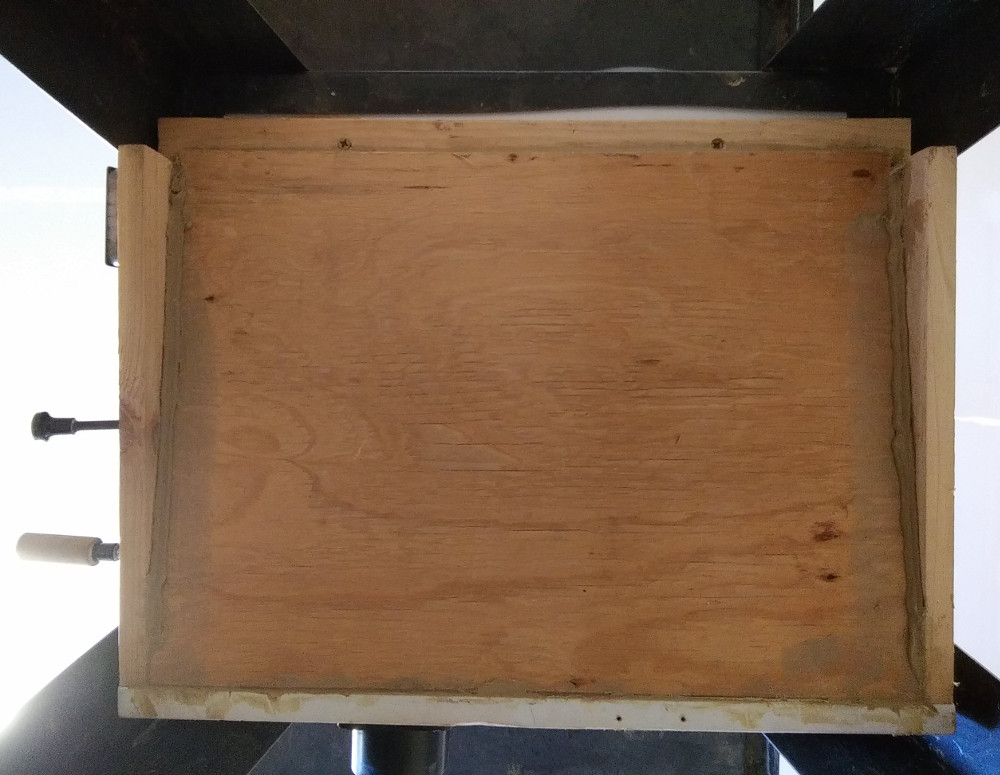
... I built a shallow box with a dust port.
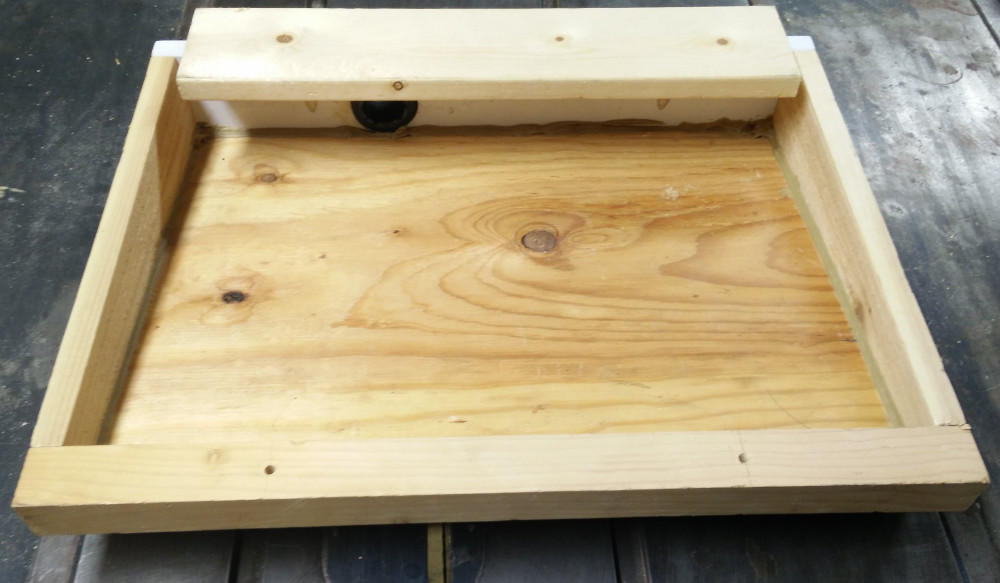
The top view:
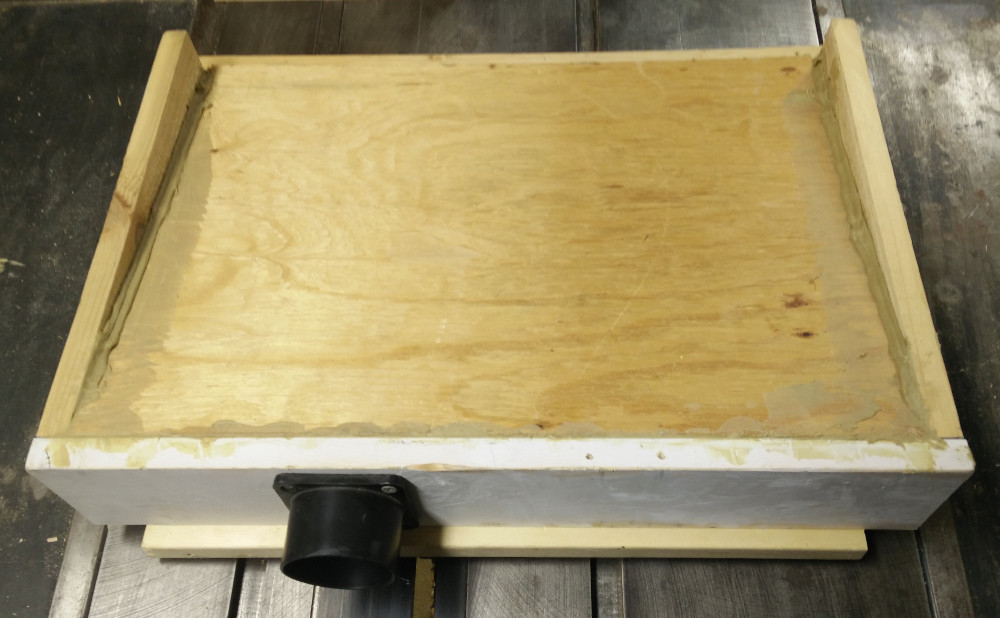
The bottom view:
I used pocket-hole screws for the frame of the box, tacked the plywood into place with a few nails, then used construction adhesive around the edges of the plywood to keep it in place and allowed that to dry.
The lip on the box rests on top of the sheet metal body on that end, and on the other end, I put a 1x4 inside the sheetmetal lip of the body of the tablesaw.
Screws inserted through the 2x2 board on the end screwed into this board so both ends of the box are supported. Installed, it looks like this from below:
The end result looks like this:
This will allow me to use some of the space under the tablesaw that used to be entirely filled with that cardboard box.
Lining a Truck Toolbox
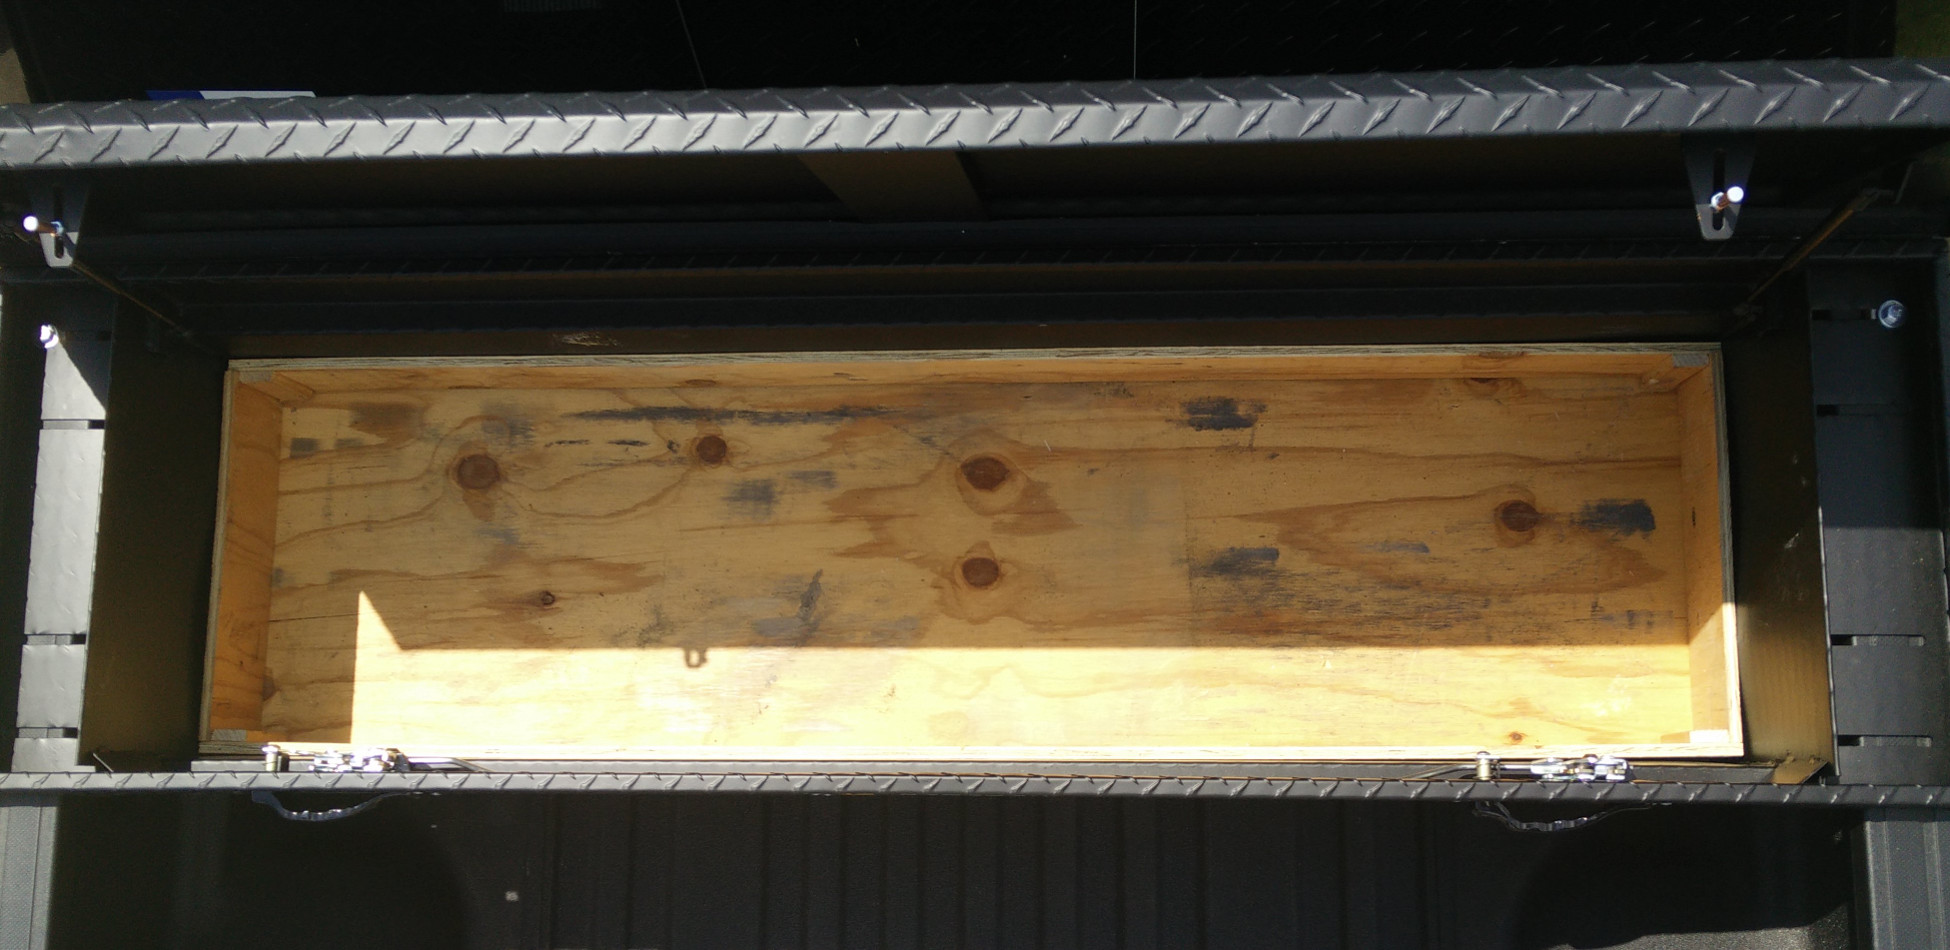
I bought a toolbox for my truck, but before I loaded it up with tools, I wanted to take steps to increase its expected serviceable life. One of the tools I carry is a hydraulic floor jack. This thing is heavy, and has a tendency to slide around. I didn't want it (and the other heavy, sliding-prone items it shares the box with) to hammer on the box. I grabbed some plywood I happened to have, and cut a section to fit the floor of the toolbox to protect the bottom. That left about 8-9" of plywood of the same length, so I cut that in half to make two ~4"-wide pieces. I nailed some scrap 2-by material to that to create a slot for end-caps, and made end-caps from some other scrap plywood I had lying around.
Each corner looks like this,
With the ends like this.
The end-caps hold the long walls vertical, and the 2-by bits nailed to the long walls keep the end-caps where they're supposed to be. So everything stays put, but it can all be disassembled and removed.
The end result looked like this:
Since the toolbox has seen a bit of actual use, you can see the dark gray places on the right half where the hydraulic floor jack's metal wheels have been sitting and sliding around. If you decide to build something like this, I'd recommend building the walls the full height on the inside of the toolbox; I noticed some scrapes where other tools have been rubbing on the inside walls. But for something thrown together quickly with materials already on hand, I'm satisfied with the result.
Making Stake Pocket Anchors
I bought a toolbox for my pickup truck, and needed to mount it to the bed rails securely. Using some J-hooks to bolt it to the metal inside the stake pockets did not work well enough; the loaded toolbox shifted from side to side while driving, scraping up the bed rail covers in the process. I needed a more secure mounting option for the toolbox that did not require drilling holes in my truck, and if I could avoid drilling holes in the toolbox, even better. Oh, and I needed to get it done immediately to avoid additional damage. While Magnum Manufacturing offers the stake pocket tie downs they use for their headache racks, I needed to solve the problem immediately, not wait for a well-made product to arrive.
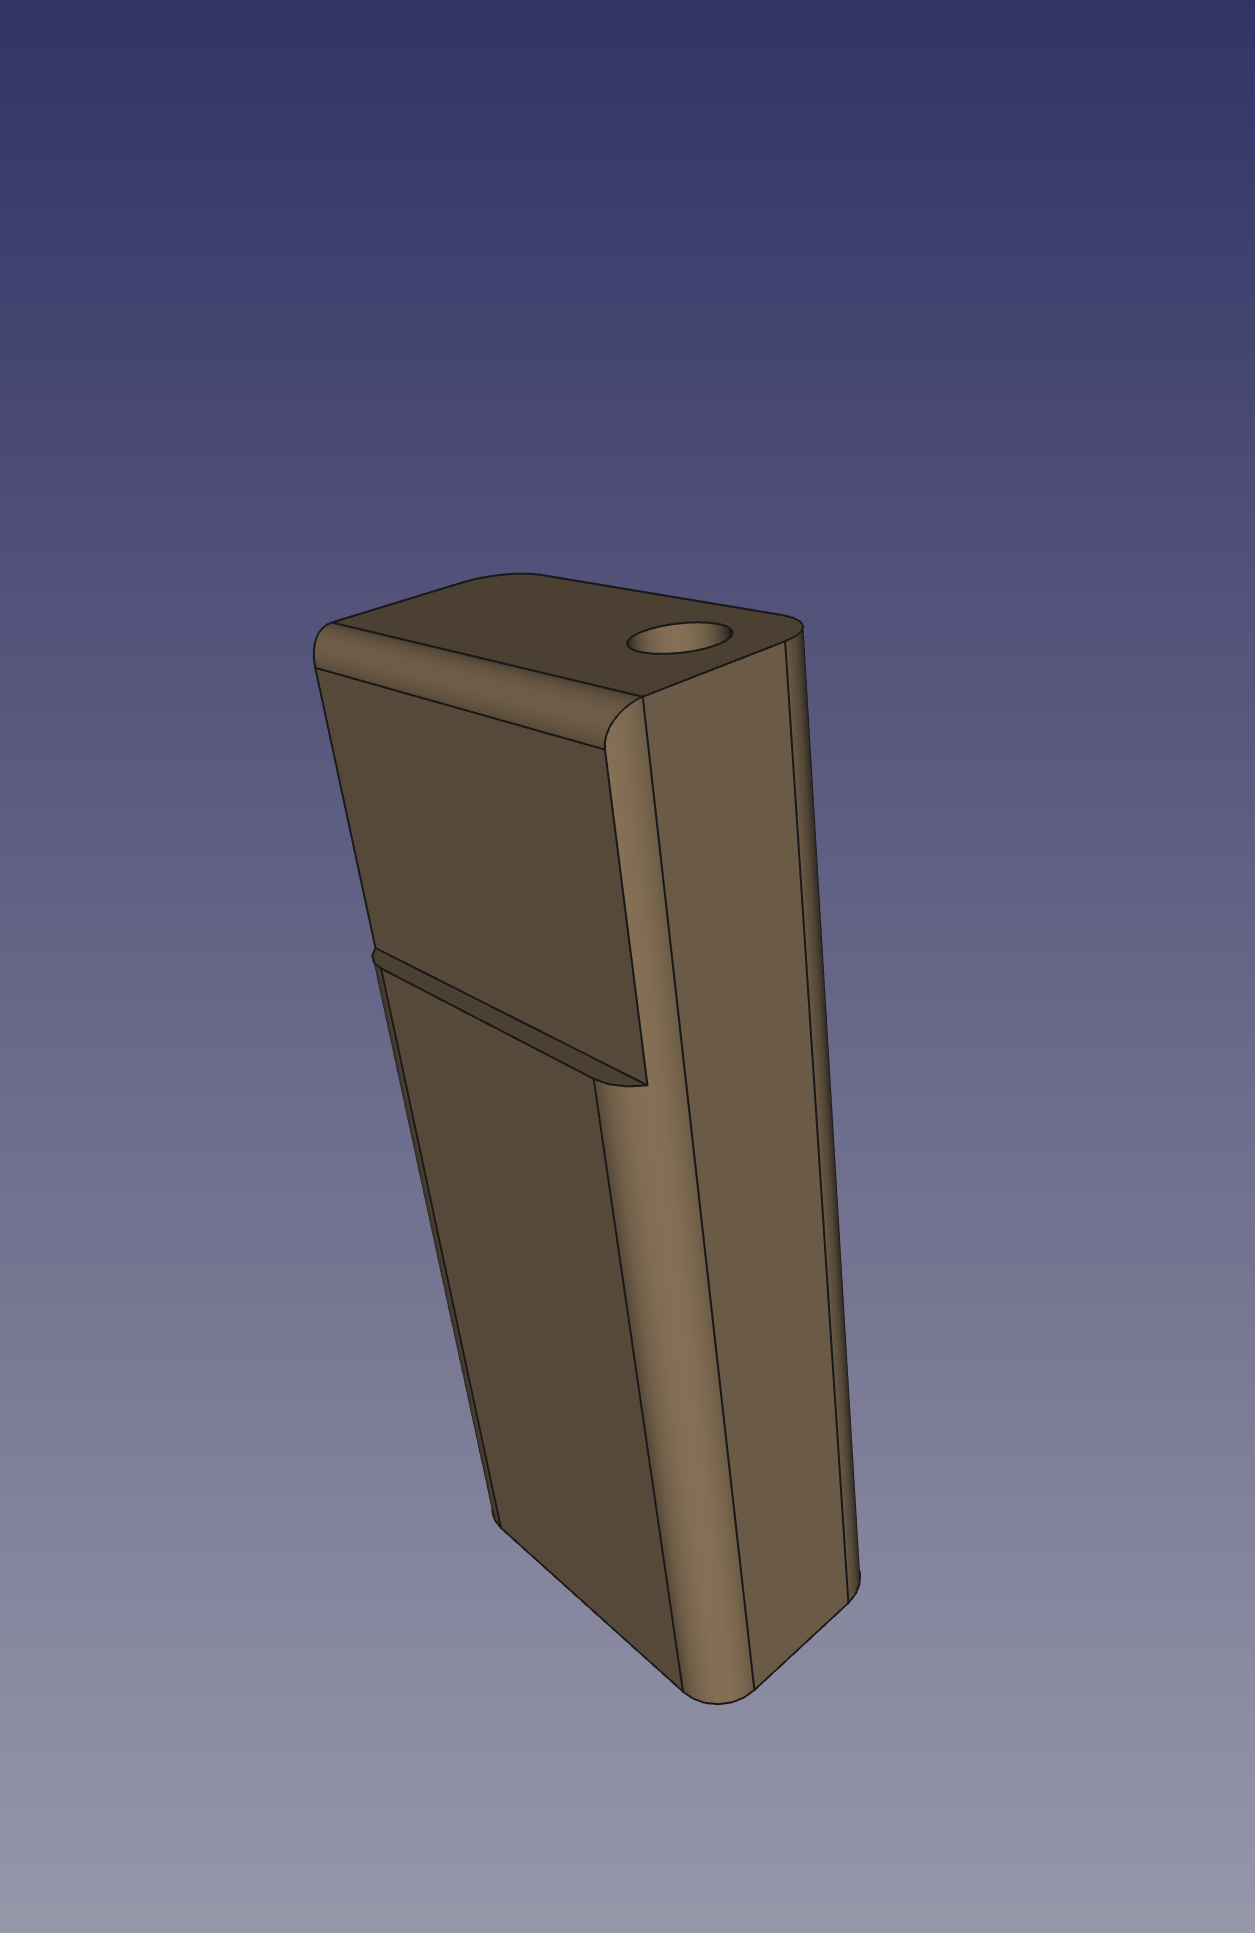
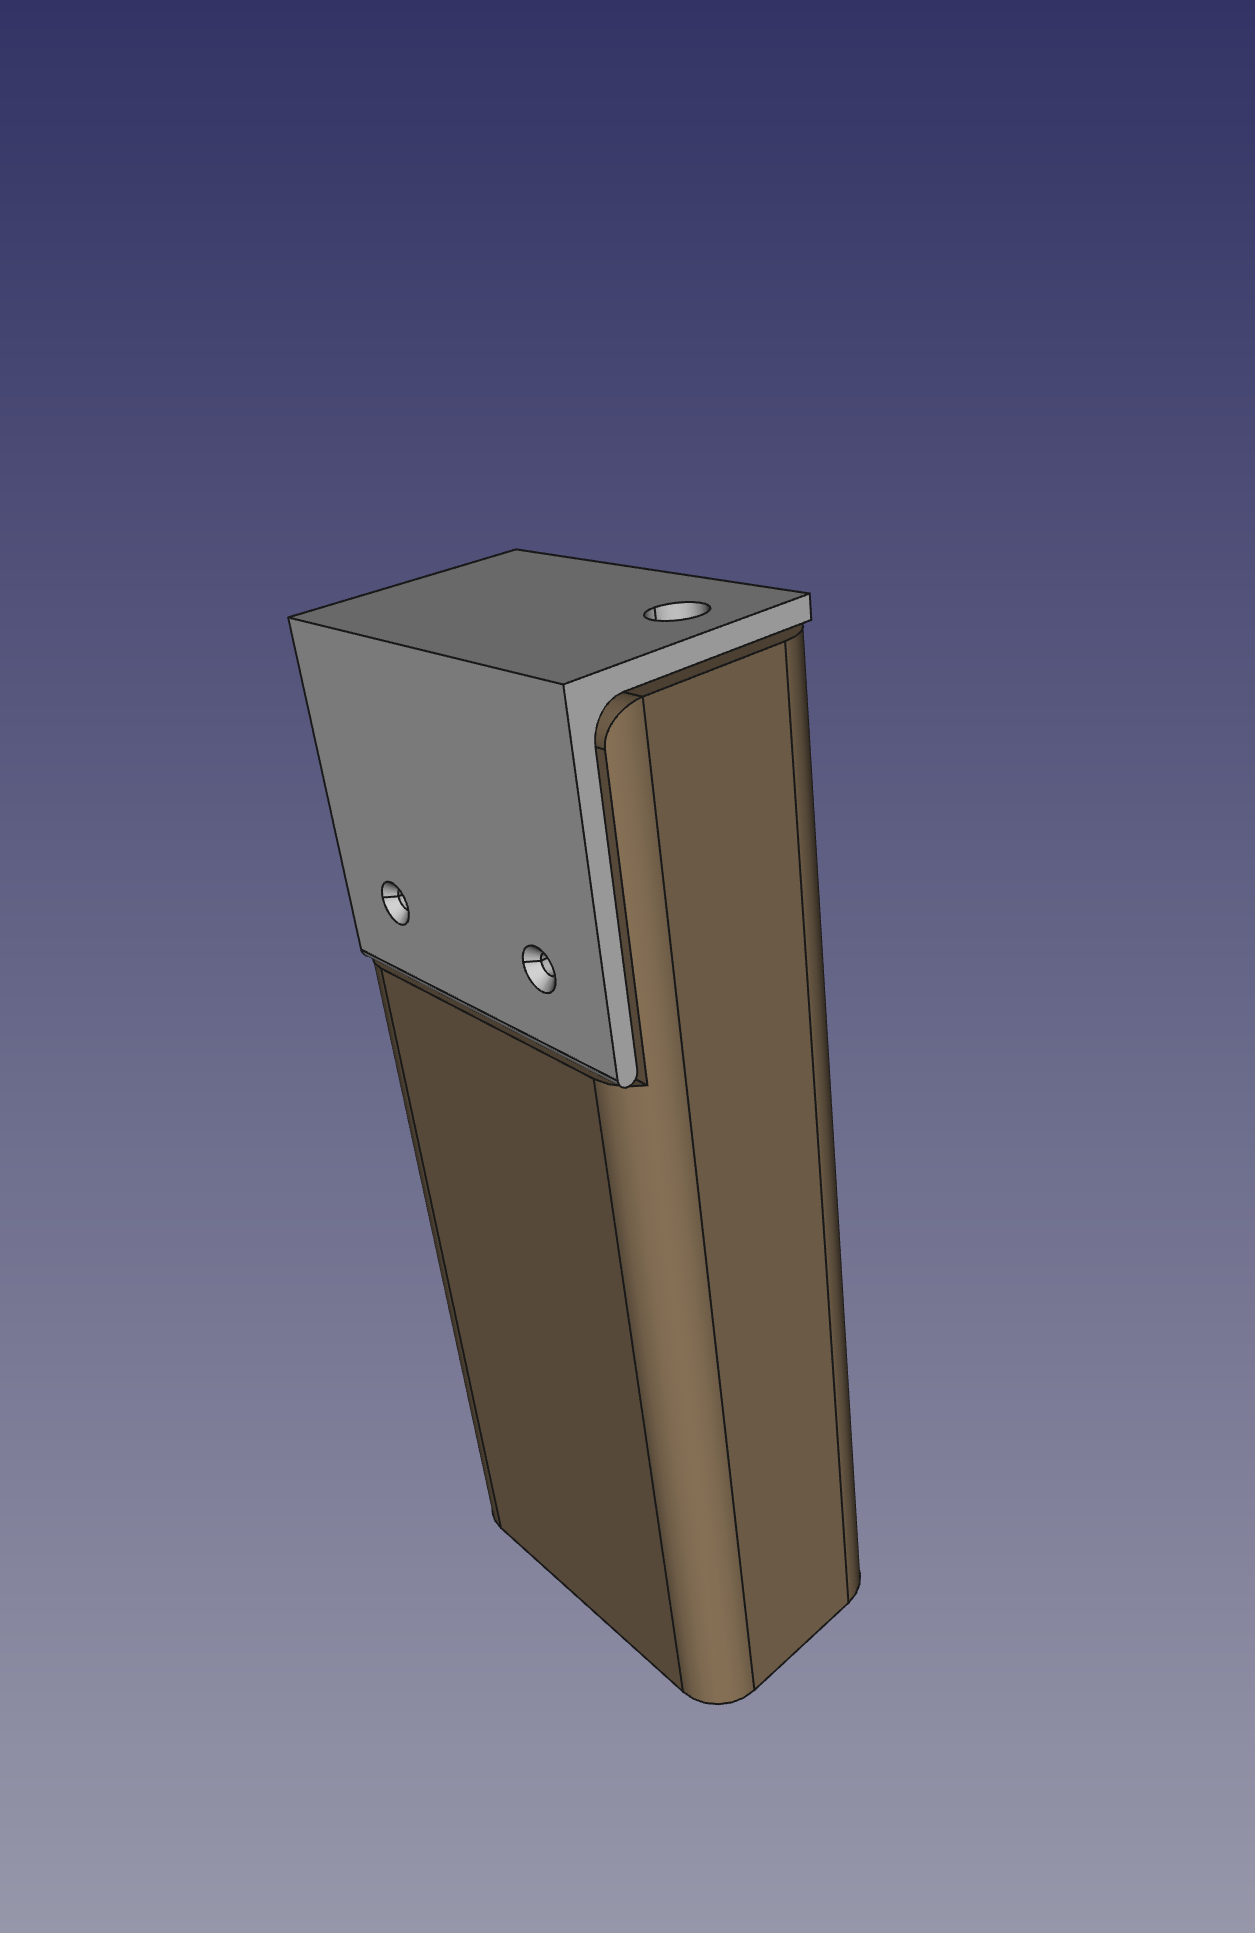
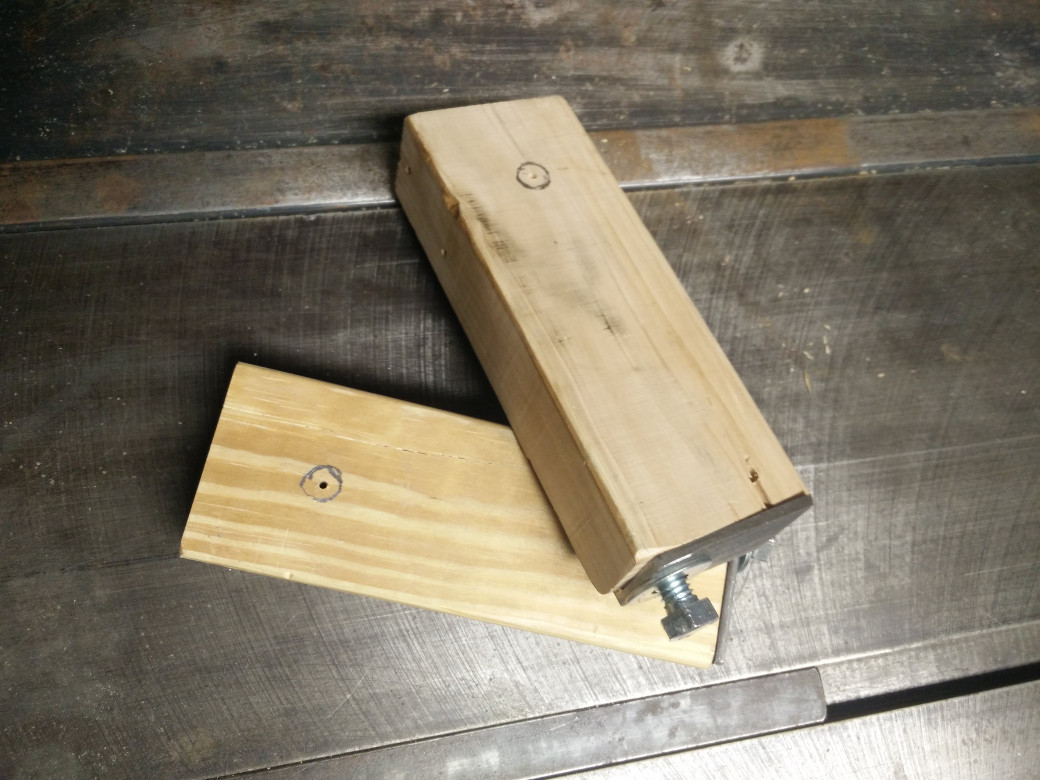
The concept is to have an assembly that fits into the stake pocket which I can bolt onto from the top, and fasten from the side. My solution was to cut some scrap 2x4 down to fill the stake pocket, and cut out space for a bracket, and a recess for the bolt.
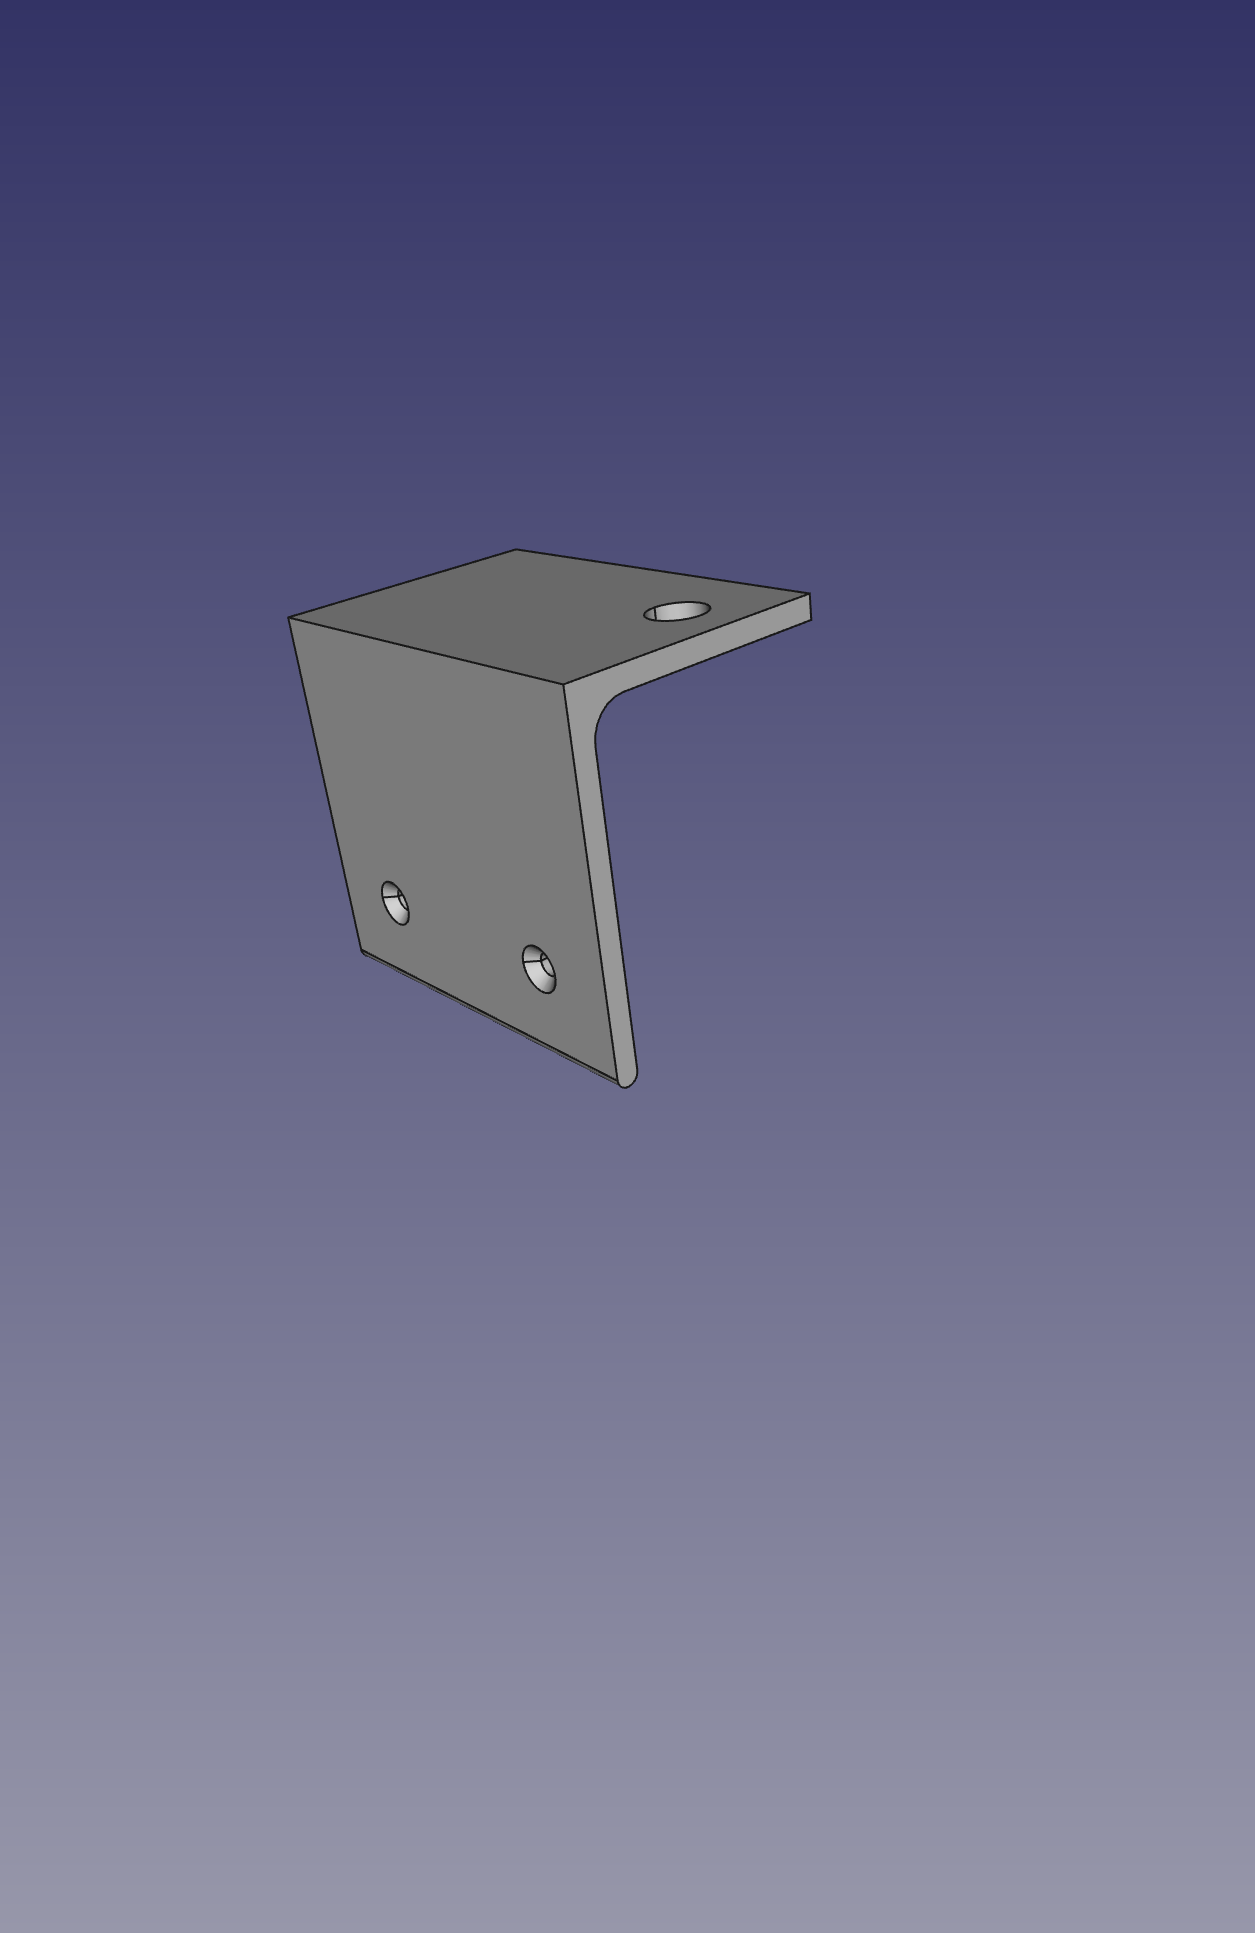
I fabricated the bracket from 1/8"-thick 2x2" angle iron; cutting it to size, drilling counter-sunk holes for the screws, and tapping a hole for a bolt on top.
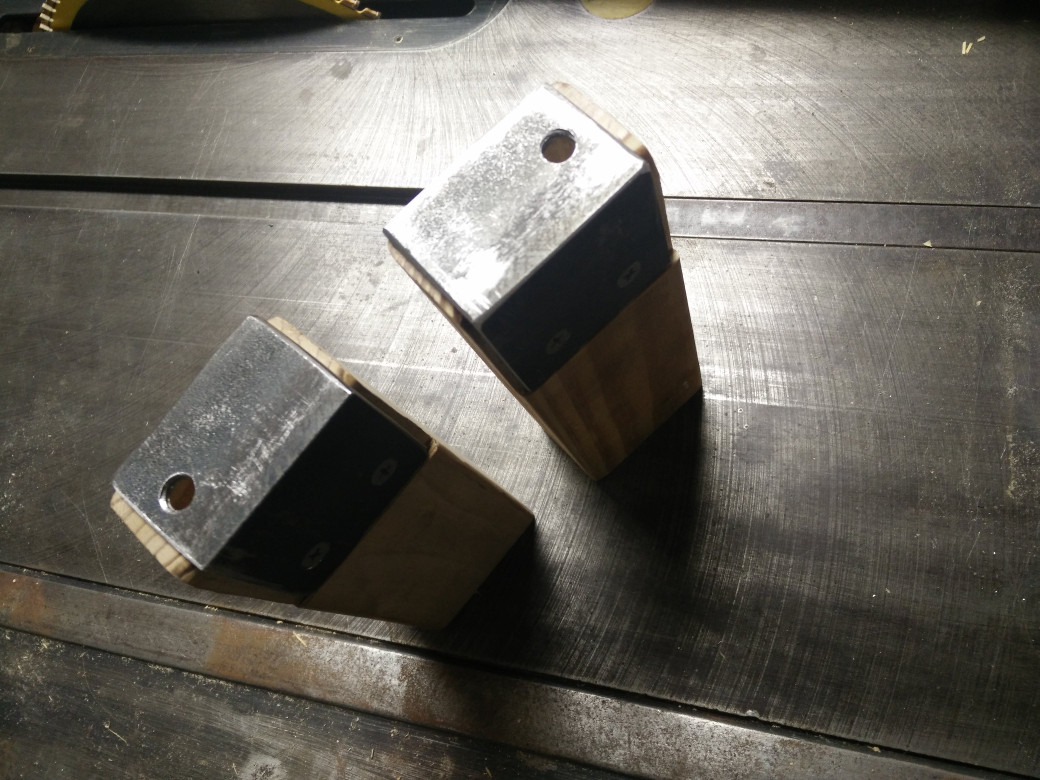
I drilled pilot holes in the wood block and assembled the anchors with exterior wood screws:
Given that I was in a hurry and making it up as I went along, the actual anchors looked a bit more like this:
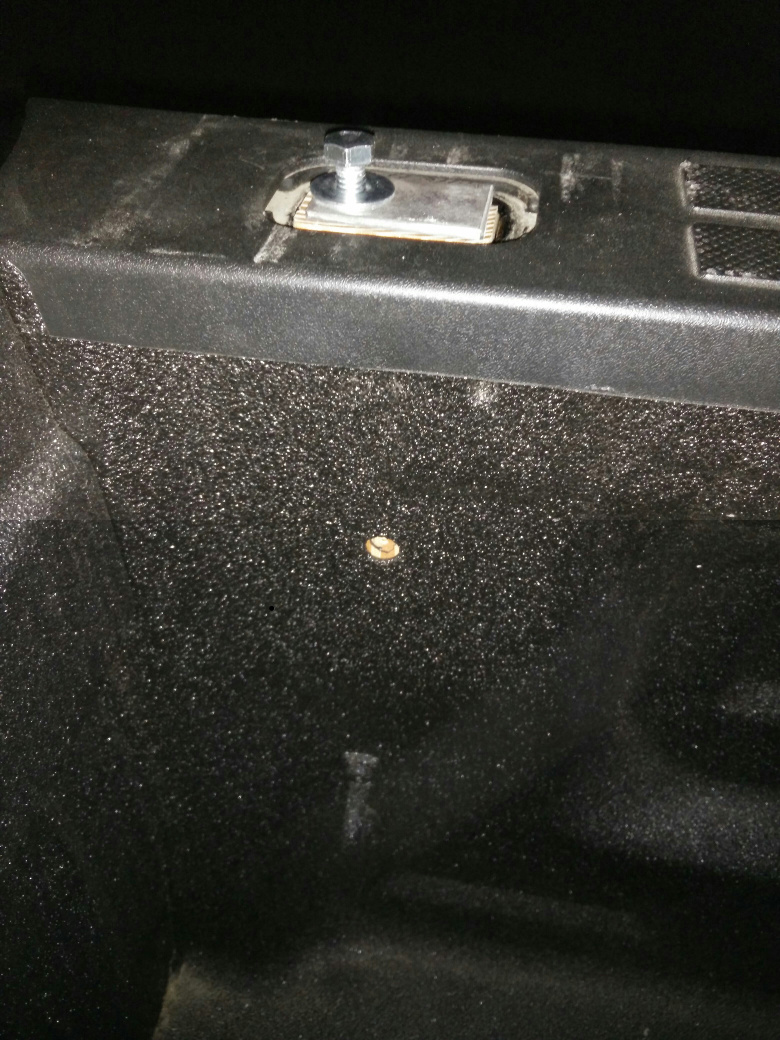
I dropped the anchors into the stake pockets and marked the location of the hole inside the truck bed, then drilled a pilot hole in the center of that.
Installing the anchors in the truck meant dropping the anchor in place
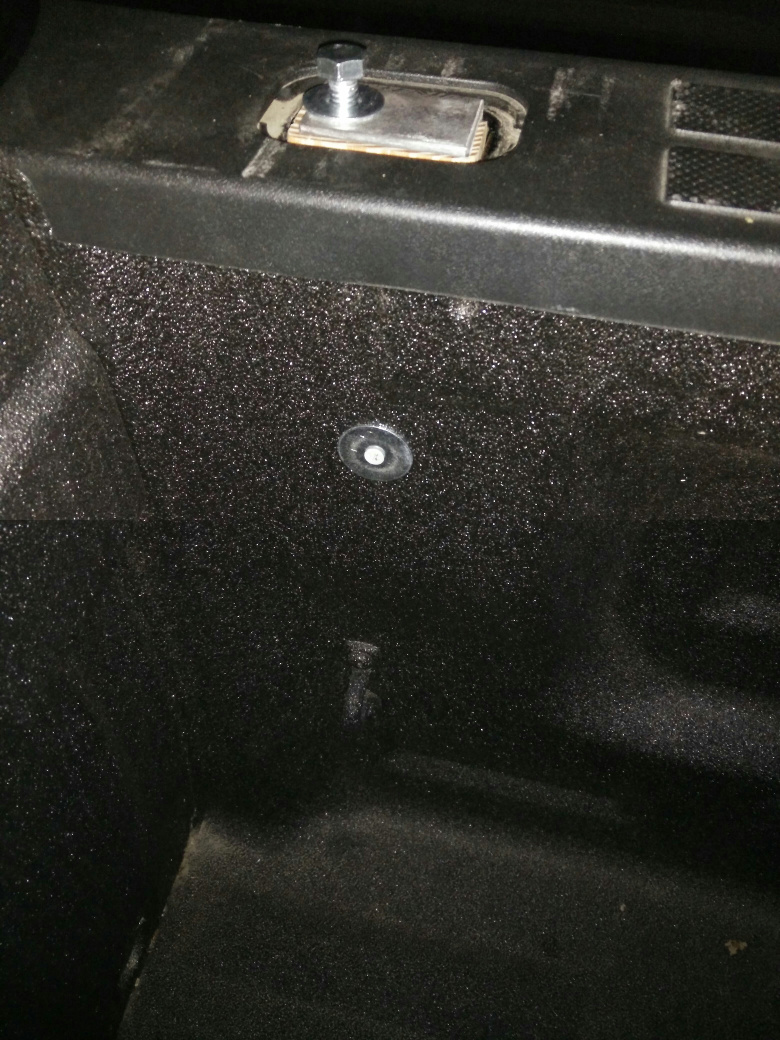
and securing it with an exterior wood screw and fender washer.
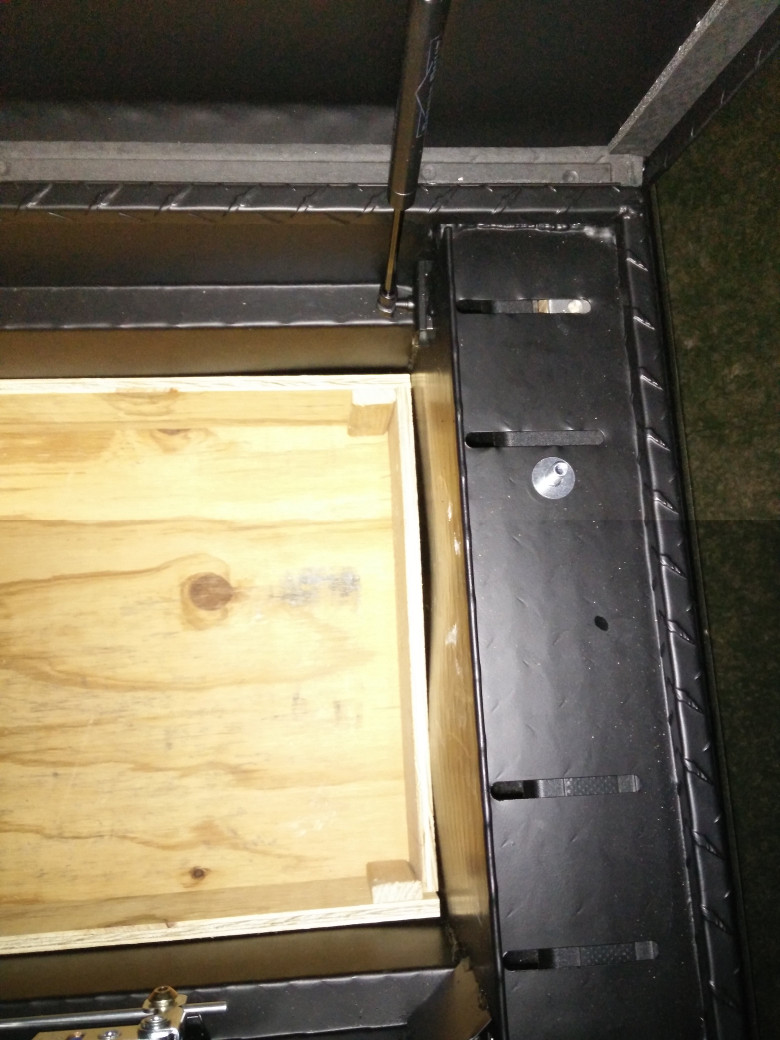
From there, it was a matter of lining up the toolbox slot with the bolt hole
and bolting it down.
Now, the toolbox is much more solidly anchored to the truck.
Making toy wooden swords
One of my sons bought an inexpensive wooden sword at a nearby Renaissance festival. And naturally, his older sister wanted one as well, but...it's gotta be a bigger one. Sibling rivalry? What's that?
Looking at the design of the sword, I could see it was pretty straight-forward to replicate, so I told her that if she bought a 6' 1x3 select pine board at the local hardware store, I'd turn it into a sword. Woodworking is fun! And educational!
The basic design is to cut a board for the cross-guard, 5 to 6 inches long. Then cut another piece to the length of the blade and hilt. I mounted the latter board on a 1x6 with a clamping set to get a straight tapered cut from the tip to where the cross-guard would be. I then put the tablesaw blade at about a 45 and gave it 4 cuts to provide some shape to the blade's cross-section and that look of having a pseudo-edge. My daughter had sketched what she wanted the hilt to look like, so I used a bandsaw to get a rough shape to the grip and pommel, then took that to the bench sander and shaped it generally "by eye". For the part of the grip where the cross-guard belongs, I was aiming for a shape that would fit into a slot cut with a 3/4" straight router bit. Once I had the size of that determined, I shaped the rest of the grip and pommel to have a cross-section no larger than that. Then I mounted the cross-guard in the mill and cut the slot into the center with a 3/4" router bit. Four passes on the tablesaw to take off the corners, and I had a cross-guard.
The two pieces looked like this:
The select pine is right at 3/4" thick, so the cross-guard slid over the hilt with a friction fit.
Of course, a 6-foot board was enough to make *two* swords, so I made an even longer, two-handed sword.
The dangerous duo:
While a proper template and a router would have yielded more precise results for the grips, overall I was pleased with how they turned out.

 rss
rss
