Welcome to retracile.net, my dusty little corner of the internet.
Read more AboutMe and peruse my Resume; or browse my Projects. Drop me an email to make a comment or ask a question.
Browse by time:
- January 2026 (1)
- December 2025 (1)
- November 2025 (1)
- October 2025 (1)
- September 2025 (1)
- August 2025 (1)
- July 2025 (1)
- June 2025 (1)
- May 2025 (1)
- April 2025 (1)
- March 2025 (1)
- February 2025 (1)
- January 2025 (1)
- December 2024 (1)
- October 2024 (1)
- September 2024 (1)
- August 2024 (1)
- July 2024 (1)
- June 2024 (1)
- May 2024 (1)
- April 2024 (1)
- March 2024 (1)
- February 2024 (1)
- January 2024 (1)
- November 2023 (1)
- October 2023 (1)
- September 2023 (1)
- August 2023 (1)
- July 2023 (1)
- June 2023 (1)
- May 2023 (1)
- April 2023 (1)
- March 2023 (1)
- February 2023 (1)
- January 2023 (1)
- December 2022 (1)
- November 2022 (1)
- October 2022 (1)
- September 2022 (1)
- August 2022 (1)
- July 2022 (1)
- May 2022 (1)
- March 2022 (1)
- February 2022 (1)
- January 2022 (1)
- December 2021 (1)
- November 2021 (1)
- October 2021 (1)
- September 2021 (1)
- August 2021 (1)
- July 2021 (2)
- February 2020 (1)
- December 2019 (1)
- October 2019 (2)
- August 2019 (1)
- July 2019 (1)
- June 2019 (1)
- May 2019 (1)
- April 2019 (1)
- March 2019 (1)
- February 2019 (2)
- November 2018 (1)
- August 2018 (1)
- October 2017 (1)
- September 2017 (1)
- August 2017 (1)
- July 2017 (1)
- June 2017 (1)
- May 2017 (1)
- April 2017 (1)
- March 2017 (2)
- January 2017 (1)
- December 2015 (1)
- November 2015 (2)
- September 2015 (1)
- July 2015 (2)
- January 2015 (2)
- December 2014 (1)
- September 2014 (1)
- August 2014 (1)
- July 2014 (1)
- May 2014 (3)
- April 2014 (1)
- October 2013 (1)
- September 2013 (1)
- June 2013 (2)
- May 2013 (1)
- December 2012 (1)
- August 2012 (2)
- January 2012 (1)
- December 2011 (1)
- August 2011 (2)
- June 2011 (1)
- February 2011 (1)
- January 2011 (1)
- November 2010 (1)
- April 2010 (1)
- December 2009 (2)
- November 2009 (2)
- October 2009 (3)
- July 2009 (1)
- June 2009 (1)
- May 2009 (1)
- April 2009 (1)
- February 2009 (2)
- November 2008 (1)
- May 2008 (1)
- March 2008 (2)
Browse by category:
- rss 3d-printing (4)
- rss android (6)
- rss aqemu (1)
- rss bash (2)
- rss book (1)
- rss bug (2)
- rss cellphone (2)
- rss centos (1)
- rss computer (2)
- rss construction (2)
- rss corsair-gaming-k70-rgb (5)
- rss corsair-gaming-k95-rgb (4)
- rss creality (1)
- rss diff (1)
- rss electrical (3)
- rss email (1)
- rss ender-3-pro (1)
- rss fedora (2)
- rss flashlight (1)
- rss food (1)
- rss history (9)
- rss kde (2)
- rss keyboard (5)
- rss kmail (1)
- rss ldglite (2)
- rss ldraw (40)
- rss ldraw-parts-library (31)
- rss ldview (4)
- rss lego (52)
- rss leocad (6)
- rss linux (52)
- rss lpub4 (4)
- rss macos (1)
- rss math (1)
- rss metal-working (3)
- rss mindstorms (4)
- rss music (9)
- rss numbers (1)
- rss office (2)
- rss openSCAD (2)
- rss openid (1)
- rss openscad (1)
- rss playset (1)
- rss programming (7)
- rss python (17)
- rss quick-grid-zones (3)
- rss router (1)
- rss rubik's-cube (2)
- rss sabaton (9)
- rss security (3)
- rss sewing (1)
- rss software (15)
- rss subversion (1)
- rss trac (2)
- rss truck (2)
- rss vim (9)
- rss weapons (2)
- rss windows (1)
- rss wood-working (6)
Cooling fan Lego assembly
I have a SeaWit 4-port HDMI KVM switch (similar to this one on Amazon) that I suspected might be overheating. I didn't have any fans blowing across it, and it was in a stack of other electronic devices, so I'm not sure blame attaches. Still, I needed some way to get some air across it.
For this type of application, I prefer a blower fan design rather than a propeller fan.
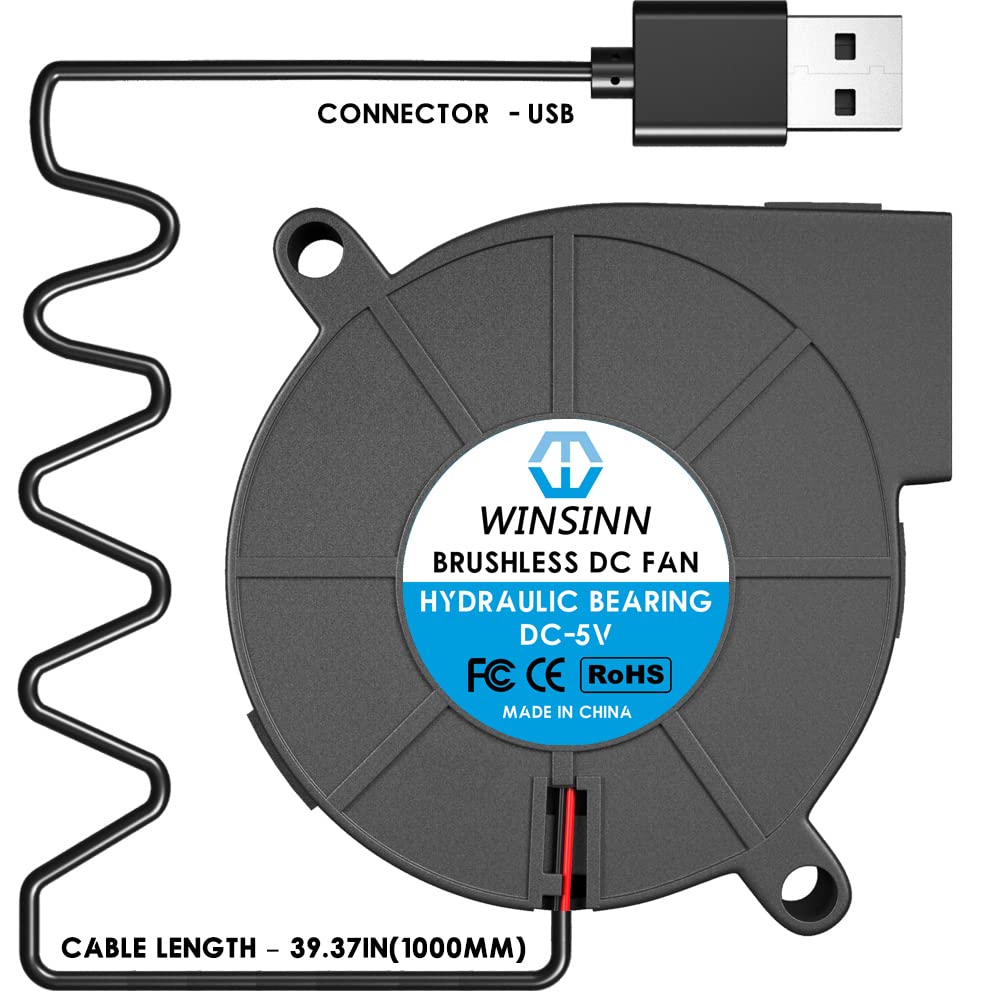
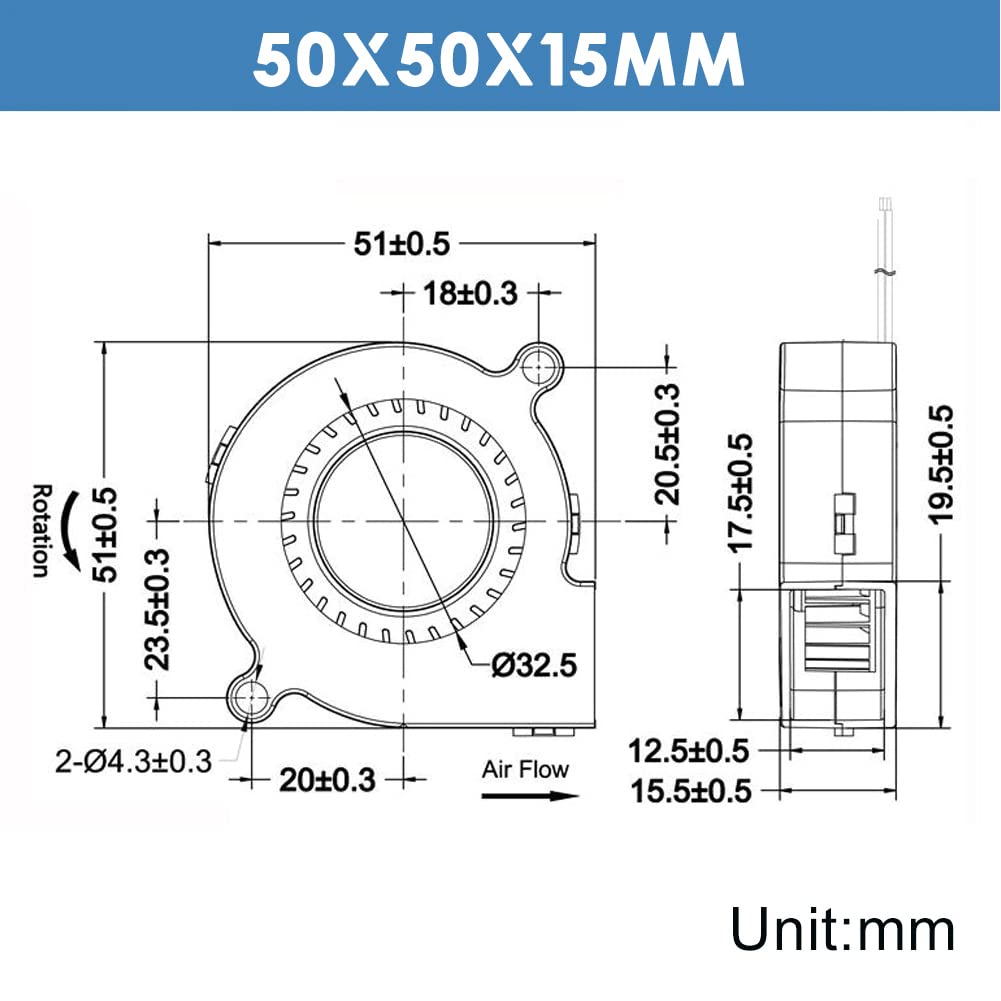
I found a four-pack of small, inexpensive USB-powered 5V 50mm x 50mm x 15mm fans on Amazon.
The KVM switch wasn't designed with fan mounting holes or anything, so I needed some sort of frame assembly to hold them. So of course I reached for my mechanical engineering rapid prototyping kit, better known as my Lego collection.
The mounting holes of those are a snug fit for a Technic pin with friction, which can then be used to mount them to a Lego assembly.
The distance between the mounting holes does not quite align with Lego dimensions, but a Technic beam provides the needed adjustment.
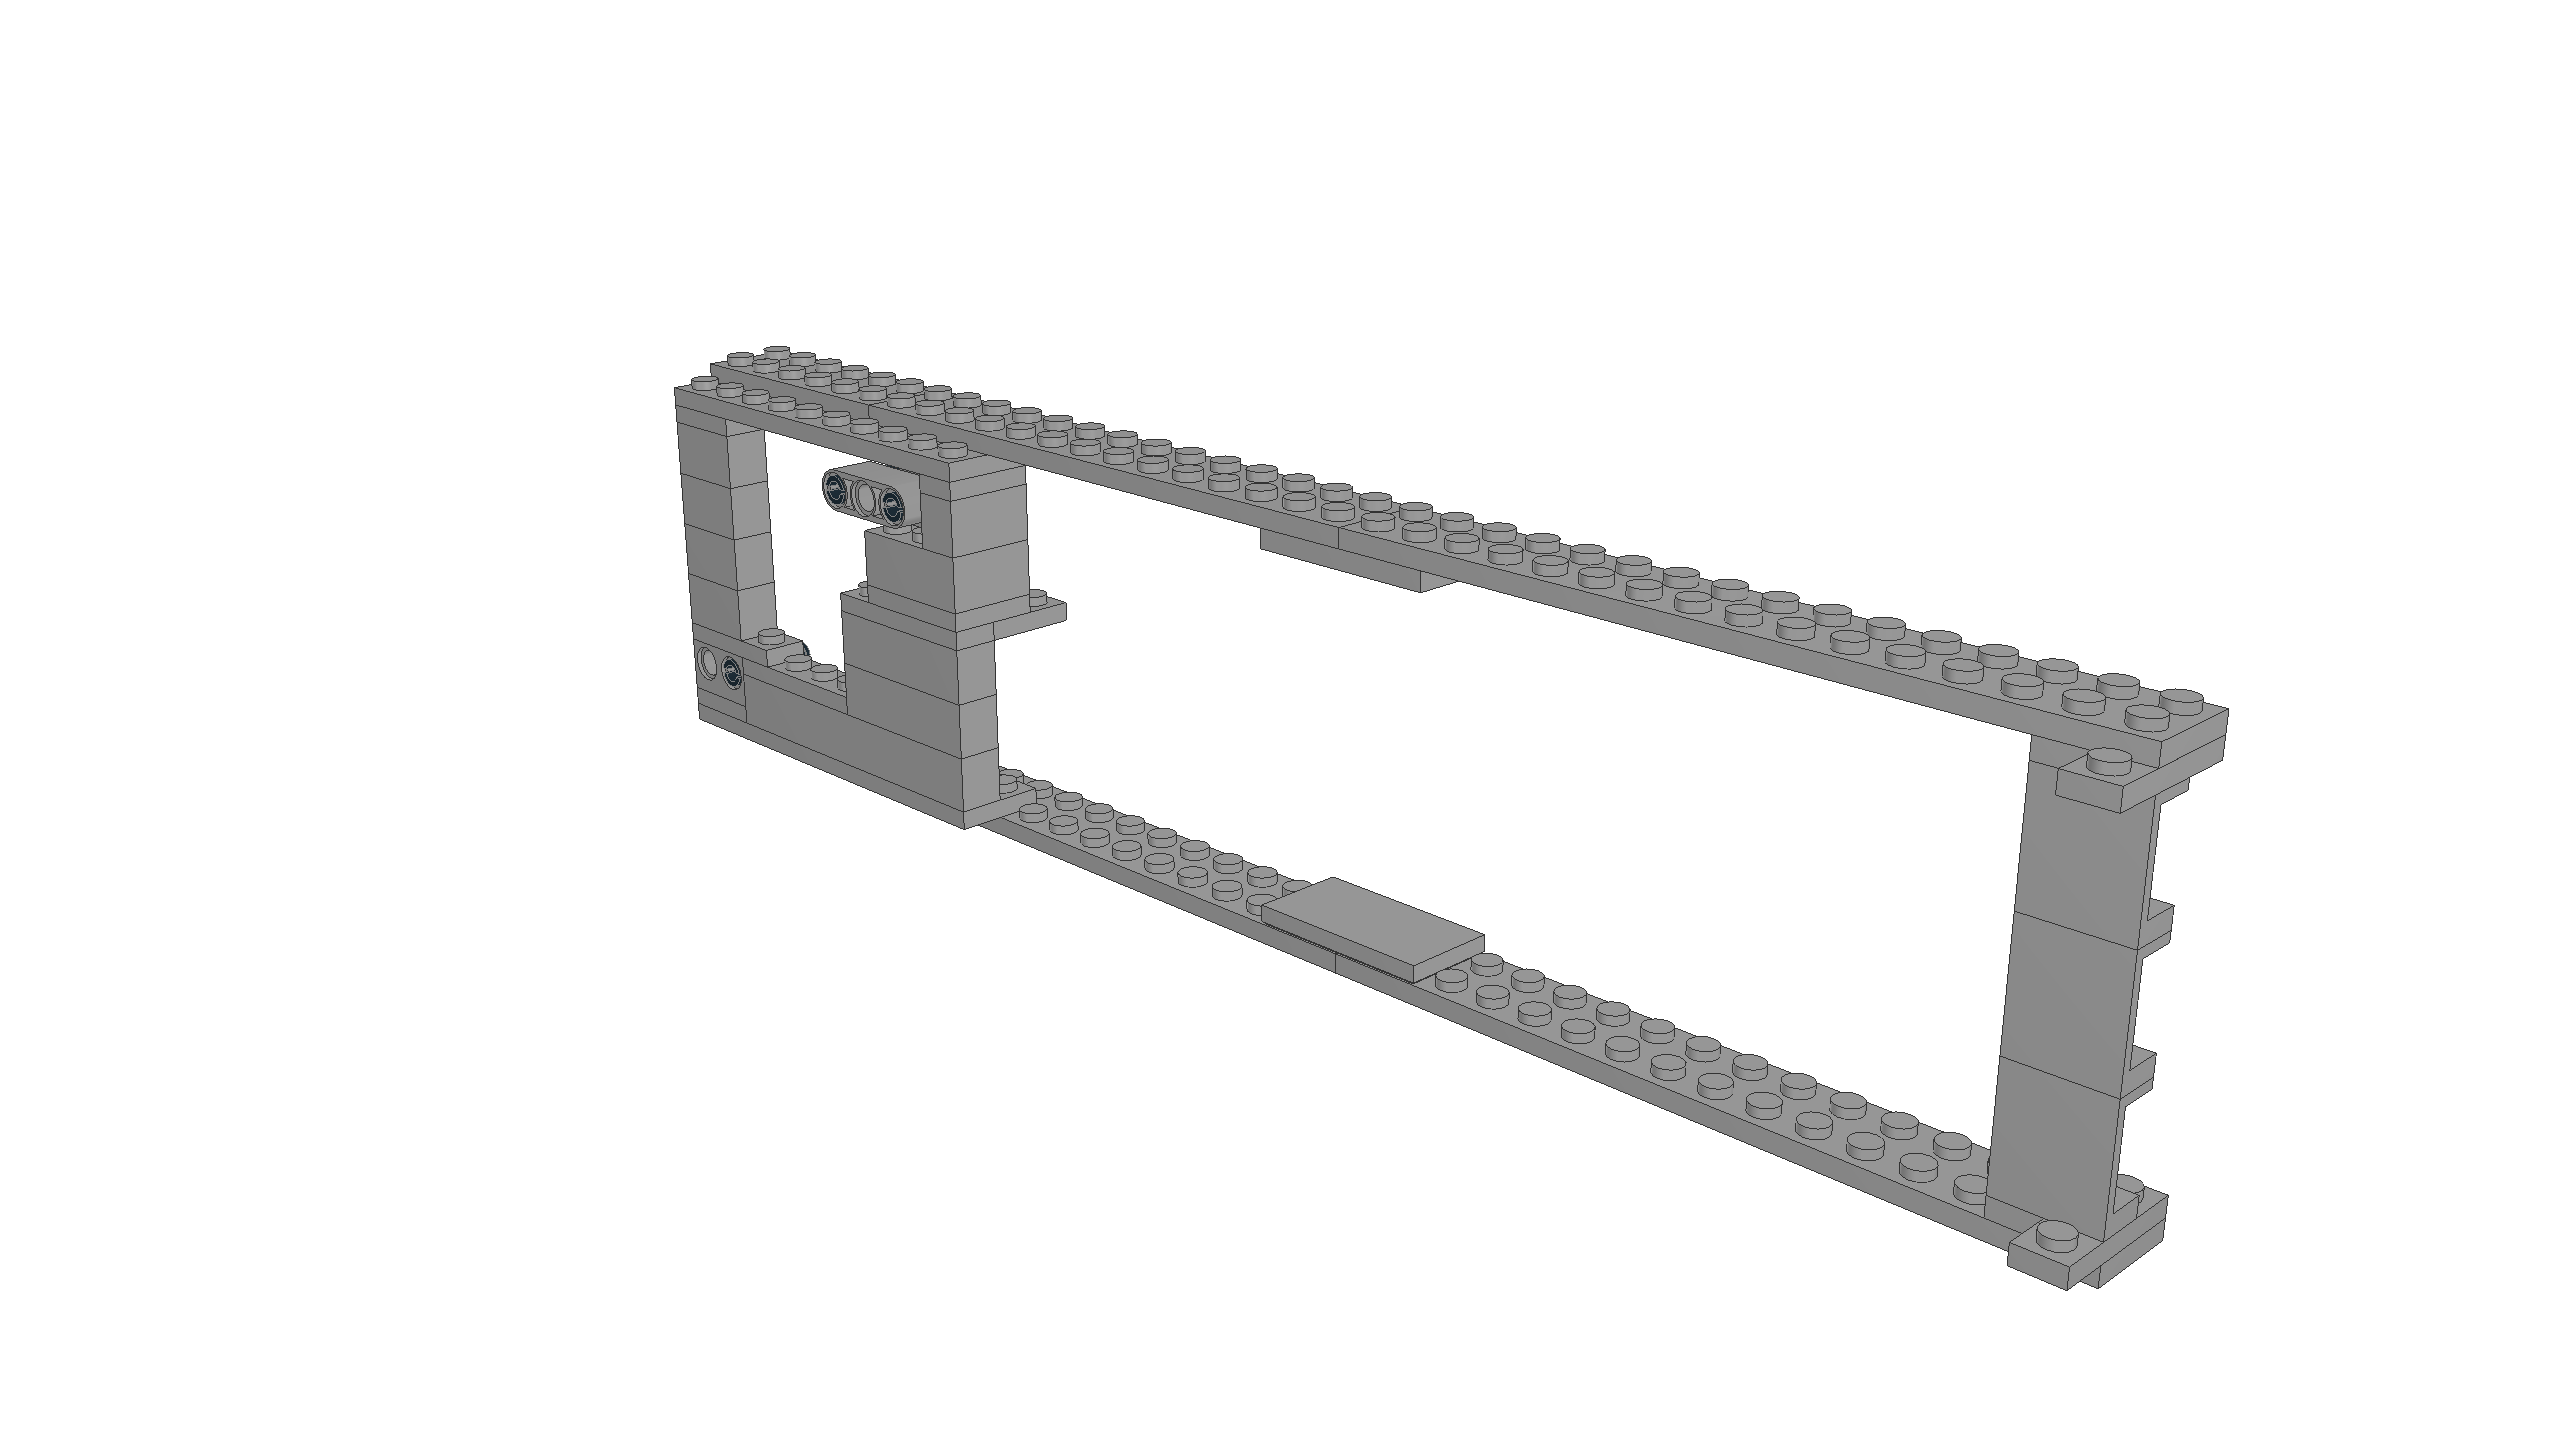
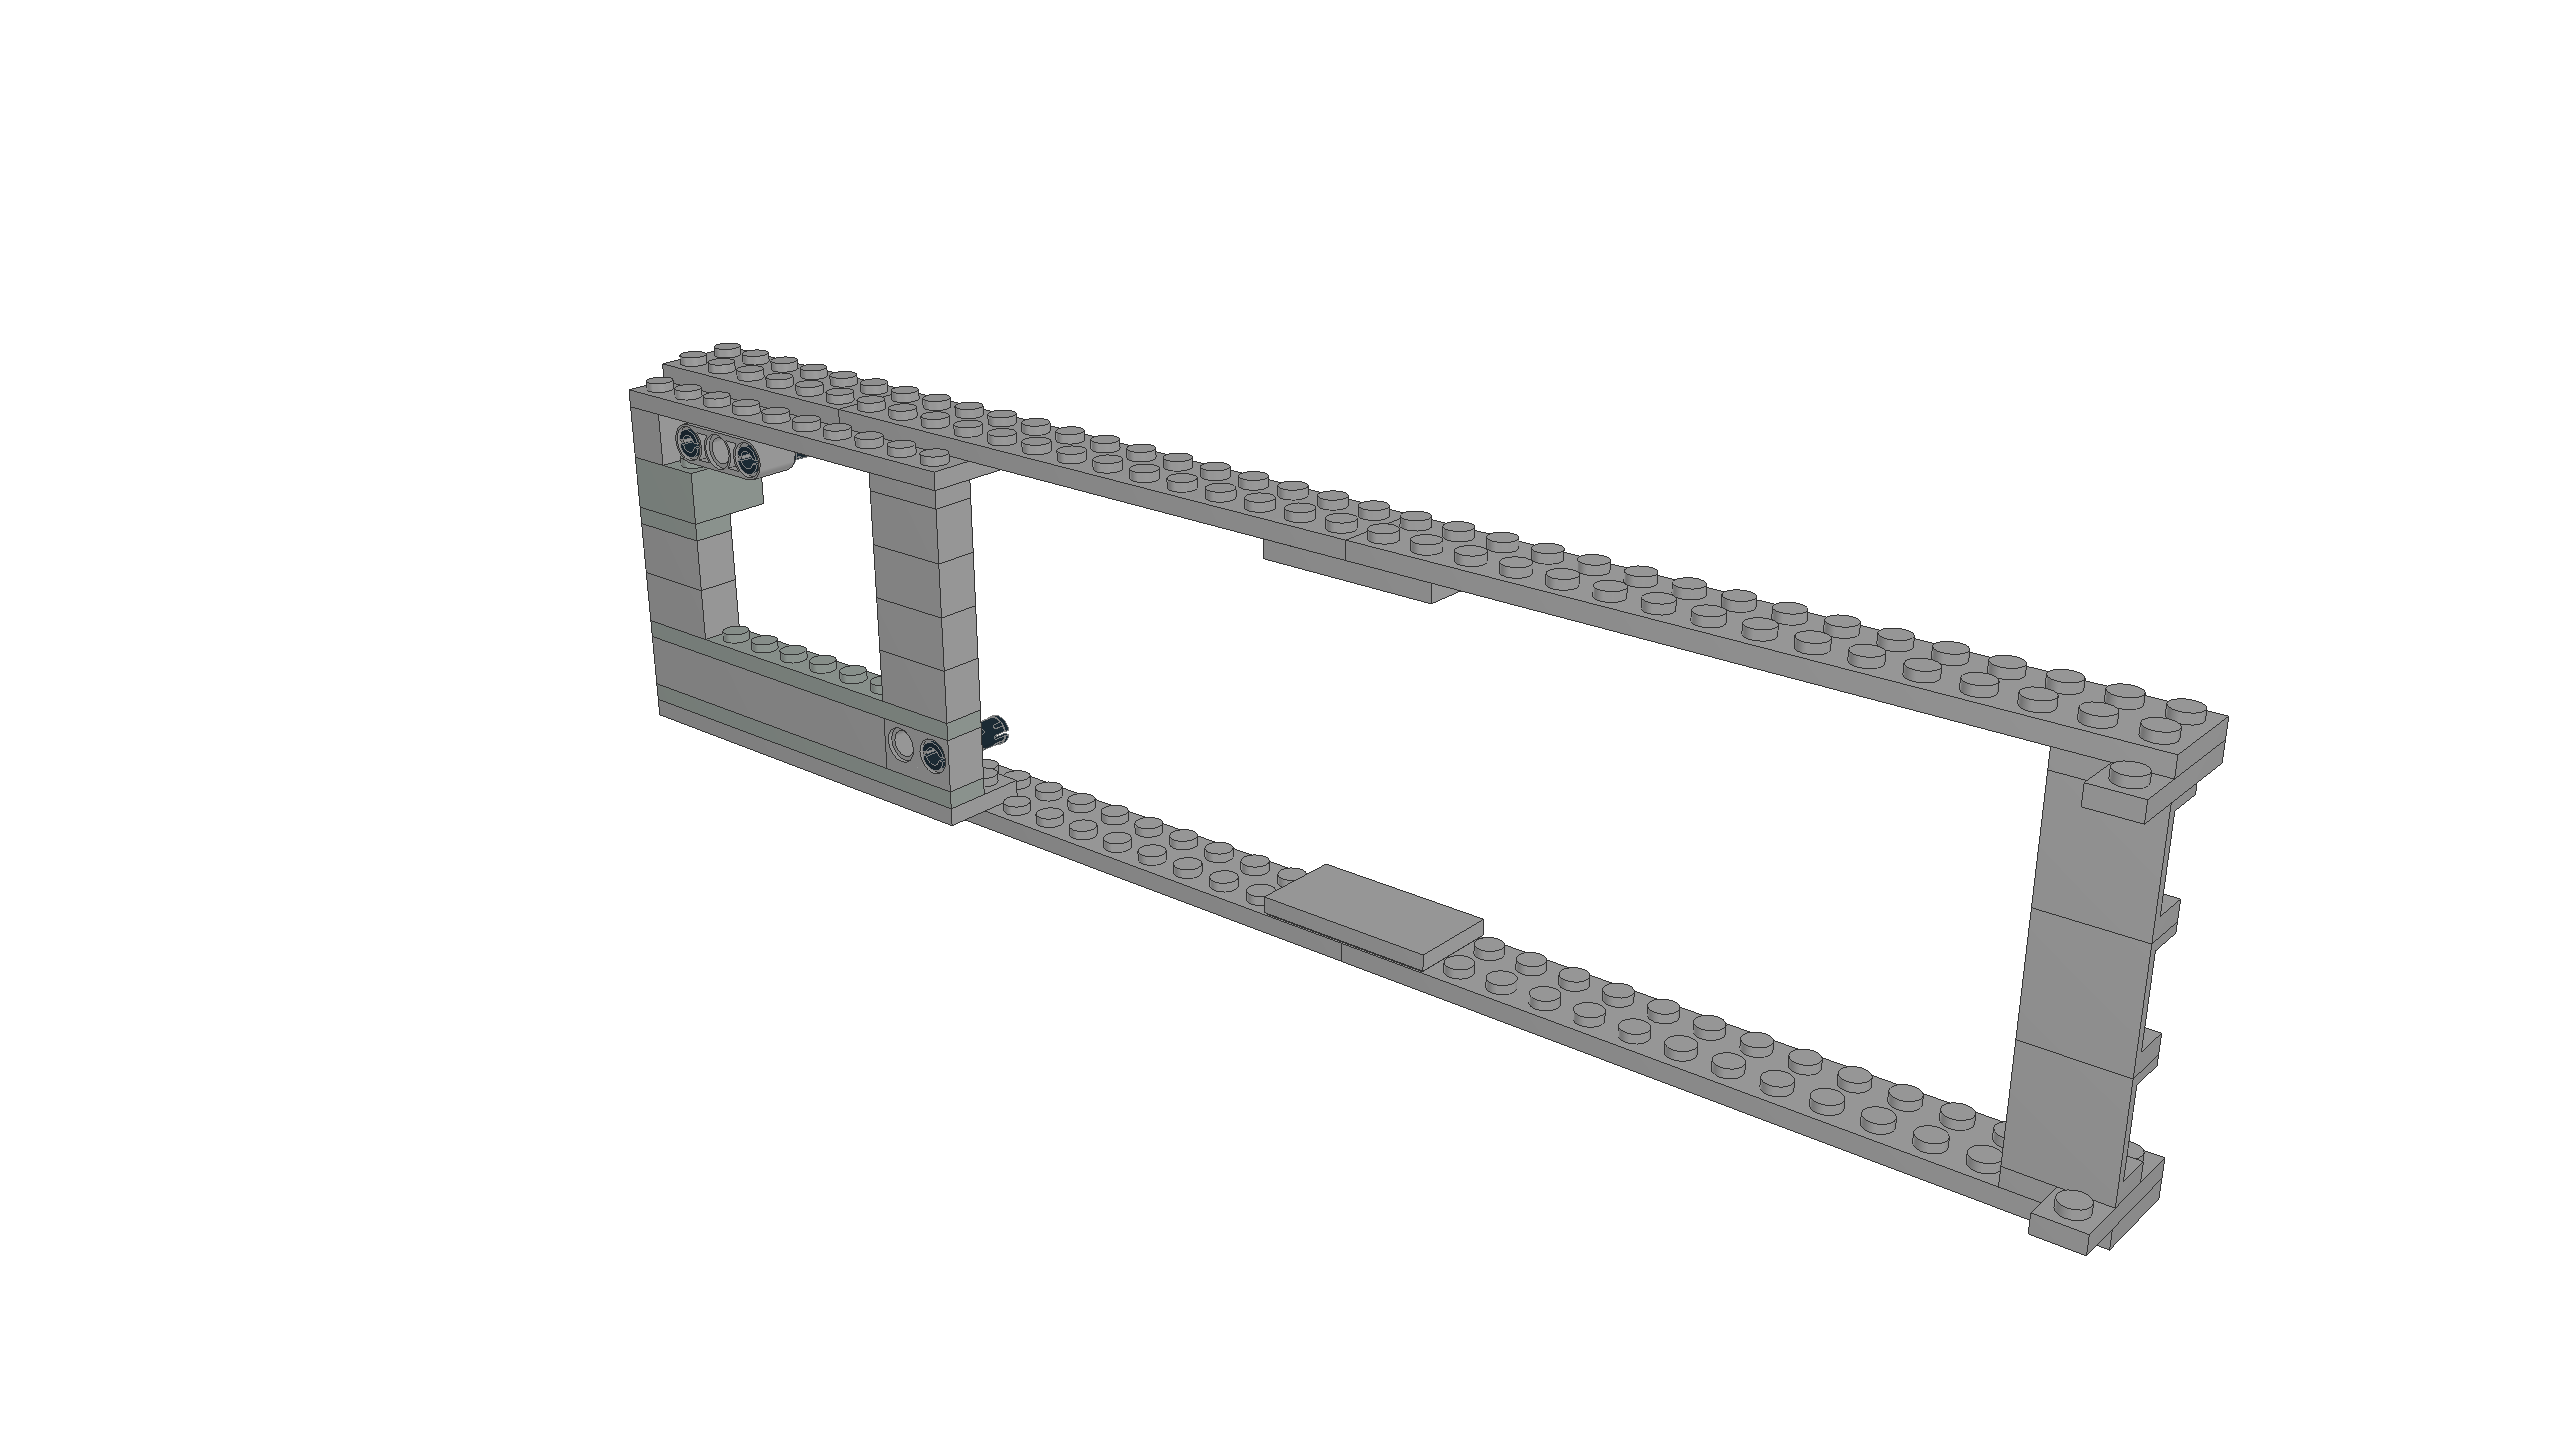
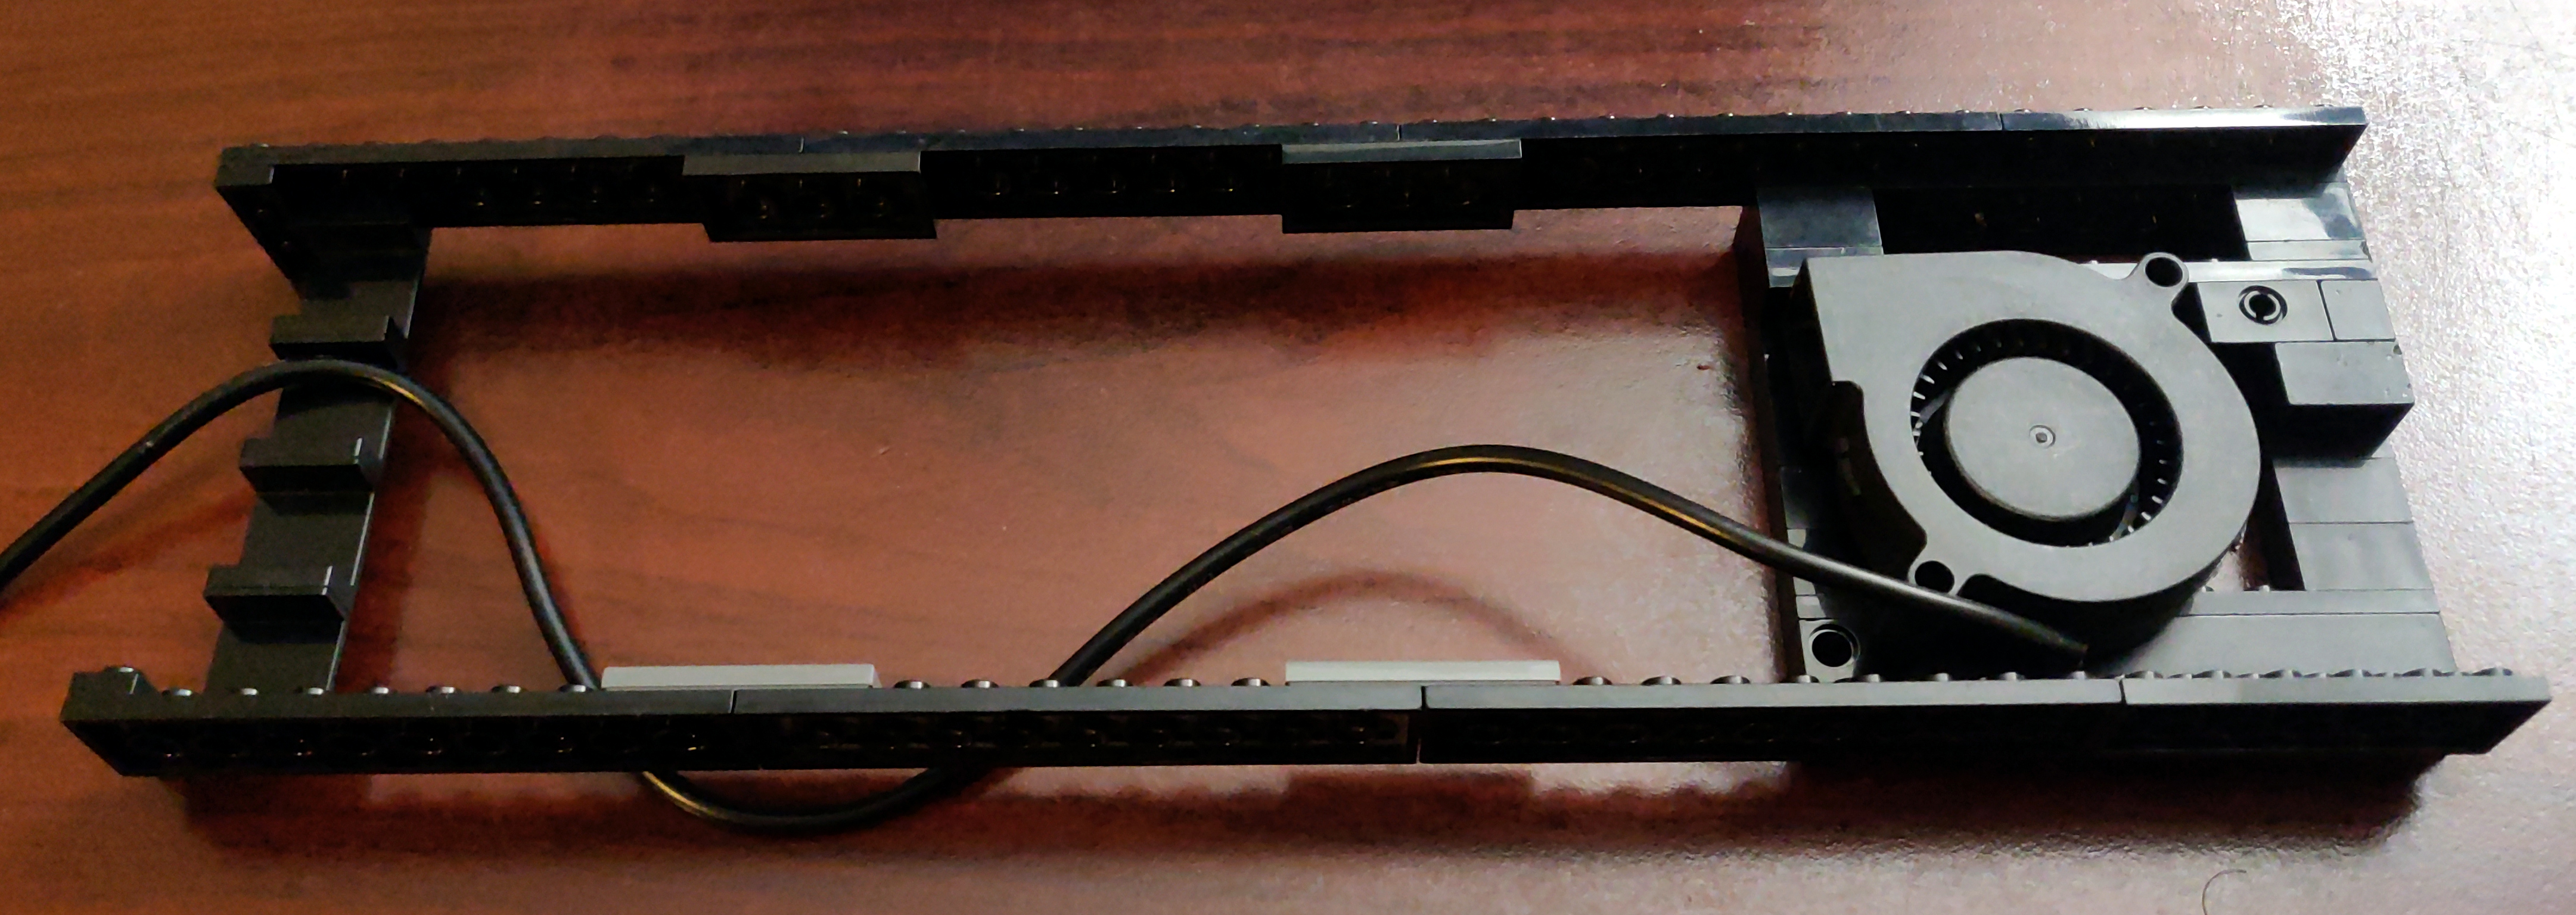
I developed two assembly types. If the fan is positioned to draw air from below (so that small random objects don't fall into the fan blades), then the fan can be above (type 1) or below (type 2) the supporting structure.
Type 1: Fan above supporting structure
model file and building instructions
The physical build, with the fan installed:
Type 2: Fan below supporting structure
model file and building instructions
The physical build, with the fan installed:
Note that for this build, I adjusted the width of the structure by tacking on a couple extra bricks to the top. It's a trivial change, but made for a better fit around the KVM switch's feet.
This seems to work for cooling the KVM switch, and while two fans is probably overkill, having two assembly types does give me some flexibility.
- Posted: 3 years ago (Updated: 3 years ago)
- Categories: computer lego
- Comments (0)

 rss
rss
