 rss
rss
Rubik's Cube + Lego + SNOT = Awesome
Rubik's Cubes are pretty neat little puzzles. But the stickers on the faces can peel off, or wind up damaged. So you need to replace them. Well, you can buy very nice replacement tiles from Cubesmith, or you can do what "Gurragu" did and glue 2x2 Lego plates onto the cube.
But wouldn't it be cool to use Lego pieces to create a bandaged cube? Well, Andreas Nortmann did just that. While that gets you cool functionality, it's also not nearly as nice looking as the cube with the 2x2 plates.
So, Rubik's Cube + Lego = Cool.
But what if you want the best of both worlds?
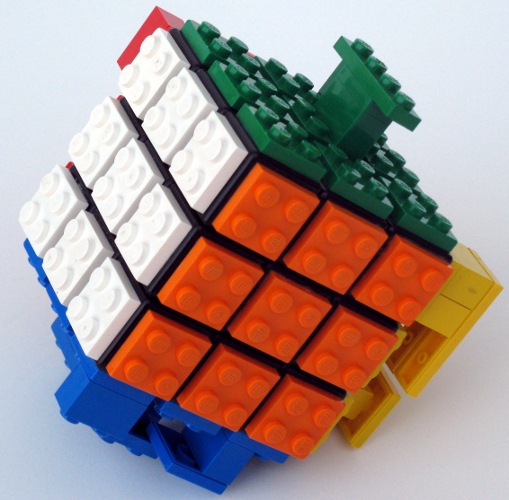
Well, let's apply a building technique called SNOT ("Studs Not On Top"). Doing some testing, I found that using 2x2 plates on a standard size 3x3x3 Rubik's cube, if I spaced them one plate height apart, they would line up just right. So I built a jig to hold nine 2x2 plates in the right configuration and hold the jig square against the cube.

I added nine plates of a color to the bottom of the jig. Then I applied glue to the bottoms of the plates, placed the jig on the top of the cube, placed a weight on top of that, and let it sit for an hour or two. I then disassembled the jig so I didn't have to stress the glue bond too much. Still, I usually had to make a second attempt at glueing some of the plates on each side. (Apparently, I need to work on my Glue-Fu.)
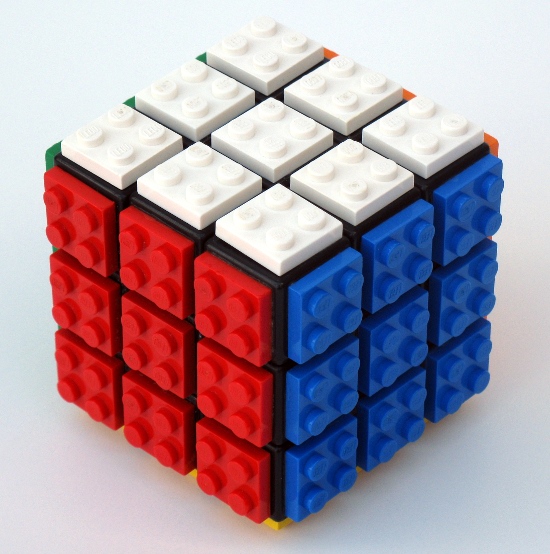
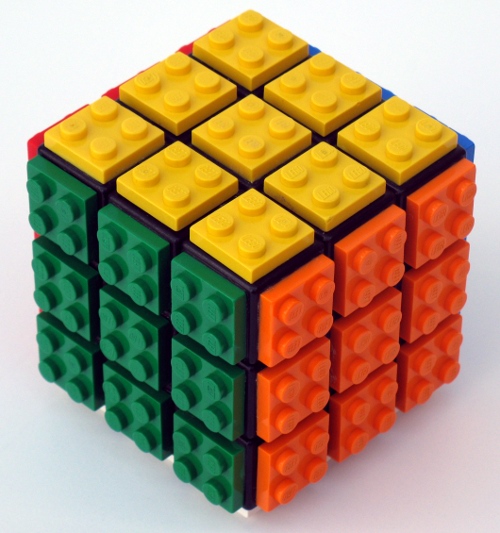
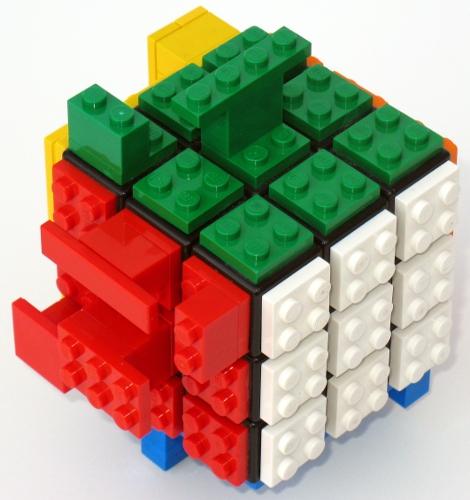
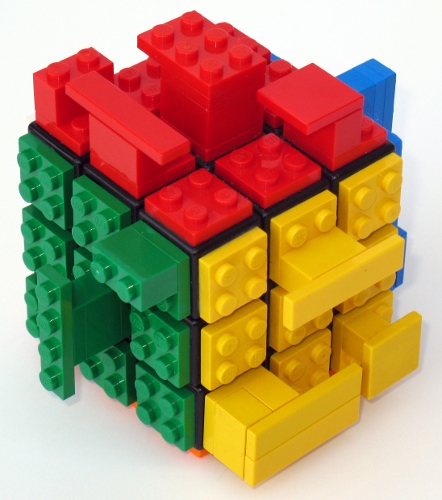
Once done, I had a cube that looked like this:


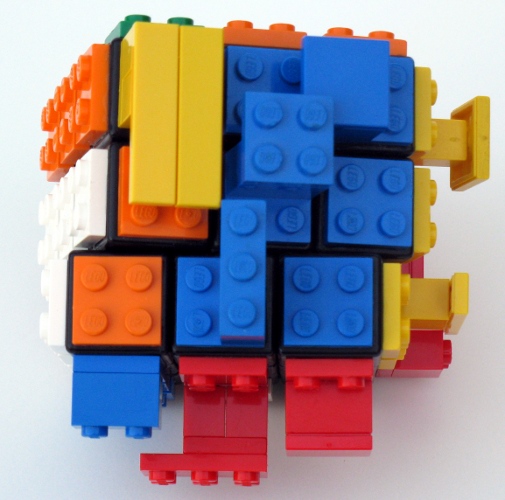
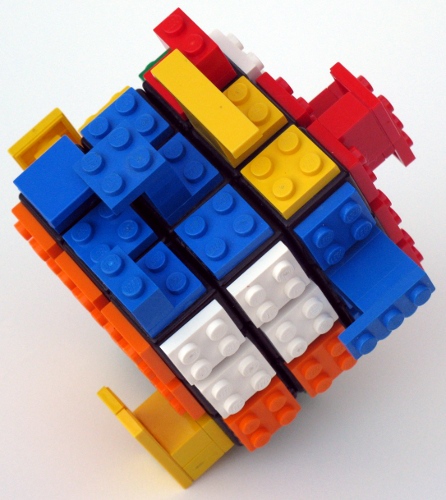
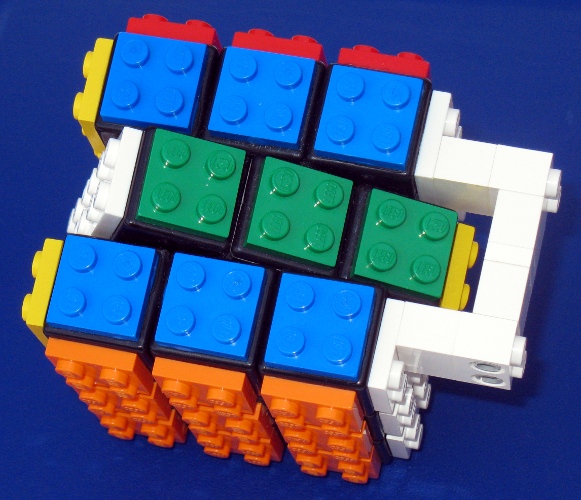
But would also allow bandaging like this:


Since this is Lego, you can rebuild the bandages any which way, while still having the option of ripping the bandages off and solving the cube normally. (This is a little rough on the fingers while cubing, at least initially. After a while my hands got used to it, and I think the edges of the Lego plates have rounded out slightly.)
So, Rubik's Cube + Lego + SNOT = Very Cool, right? Well....
How about something new?
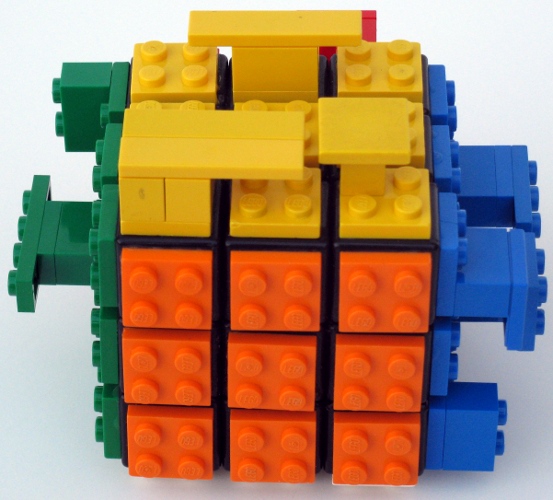
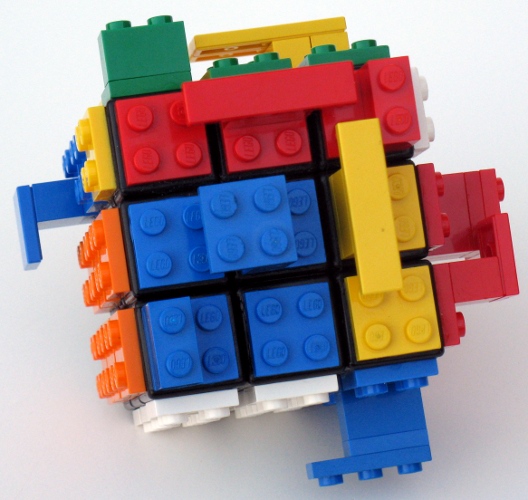
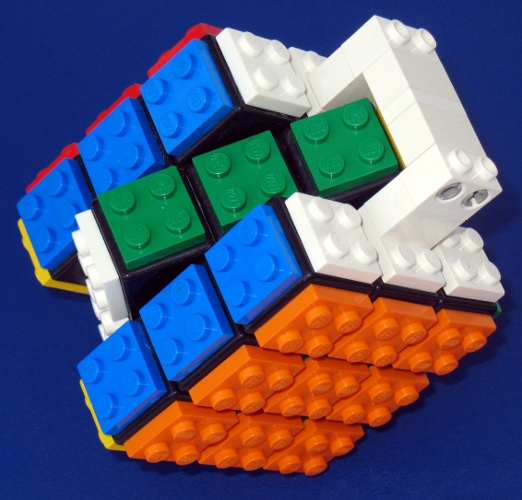
You don't have to stick to bandaging adjacent tiles; you could bandage two corners together while allowing the center slice to rotate between them by building a bridge with enough clearance.

Bandage the two opposite edges on a face for a similar effect.

Or you could bandage two opposite center tiles together so that the top and bottom slices can't rotate in respect to each other, but everything else works.

So, Rubik's Cube + Lego + SNOT = Super Cool, right? Well...
Can't we do something completely new? Bandaging is old hat, after all.
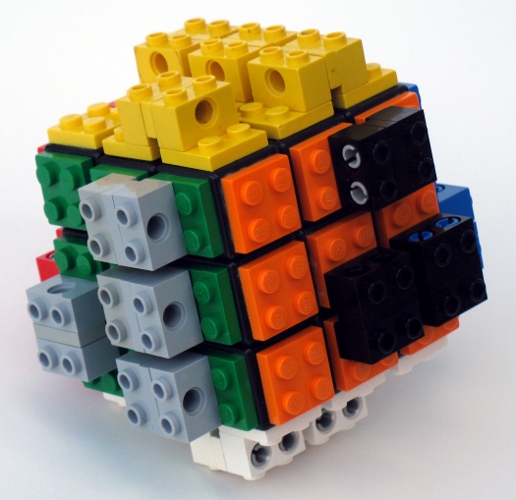
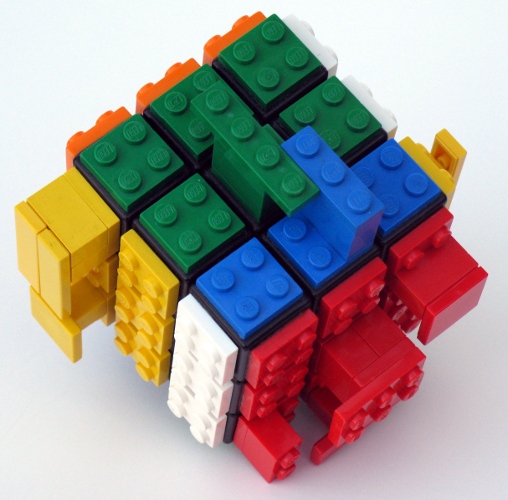
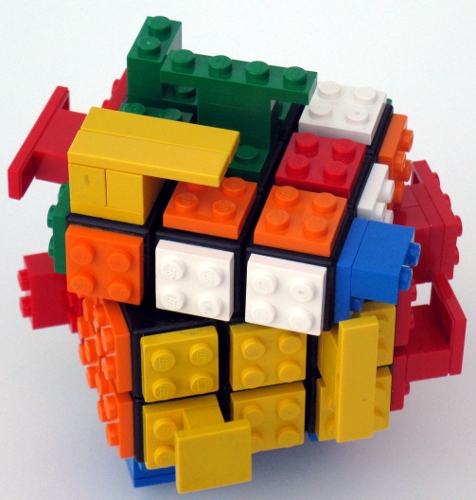
Well, sure. Let's make it a little more interesting by making some faces interfere with some other faces if they try to rotate past each other, but only in certain orientations, and don't interfere with some of the other faces. Adding a brick with an overhanging tile to edge and corner pieces, you can allow a slice to rotate, but prevent rotation beyond some tiles.
A brick and a plate topped with an overhanging plate on center cube tiles will allow corners and edges that aren't built up to rotate under them, but will prevent built up edges from passing. And topping the edges and corners with tiles instead of plates matters; those tiles can come up underneath and meet the plates overhanging from the center tile, but not rotate past them.


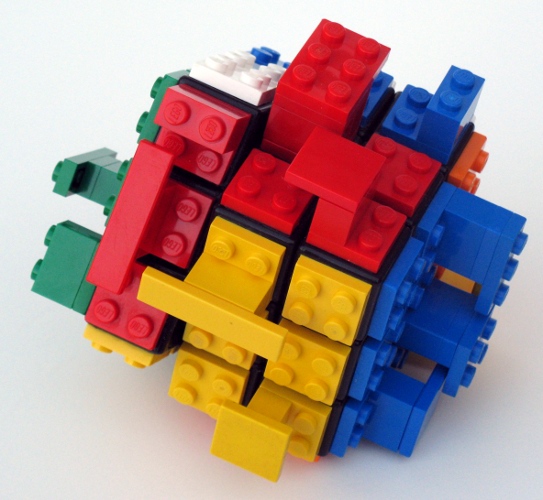
Overhangs don't have to be limited to a single stud; you could have some plates or tiles overhang by two studs so they won't rotate past a tile that has anything on it. A two-stud overhang will interfere with a one-stud overhang on the opposite side of the face, but not a 1/2-stud overhang. There are many, many possibilities opened up by this kind of build; but I'll leave further exploration to those who enjoy the esoteric edges of Rubik's cube.
(You do have to be careful while trying to solve a cube modified in this way: if you make an illegal rotation, the plate or tile preventing the rotation may just pop off instead of stopping the turn.)
So, Rubik's Cube + Lego + SNOT = Awesome.
I did run into one unfortunate issue while making this cube. It appears that the vapours from the glue turned the surfaces of the jig white in some places, as you can see in the photo of the jig. And I managed to get glue on the jig at some point. So there were a few casualties in this effort: some black 1x2 technic bricks with two holes, black 1x1 technic bricks, and black 1x2 plates.
Also on flickr.
Attachments (21)
- lego-red-white-blue.jpg (149.9 KB) - added by retracile 16 years ago.
- jig-bottom.jpg (85.2 KB) - added by retracile 16 years ago.
- lego-yellow-green-orange.jpg (124.9 KB) - added by retracile 16 years ago.
- bandaged-red-white-blue.jpg (101.3 KB) - added by retracile 16 years ago.
- bandaged-green-orange-yellow.jpg (110.0 KB) - added by retracile 16 years ago.
- bandaged-opposite-centers.jpg (132.0 KB) - added by retracile 16 years ago.
- interlock-yellow-orange.jpg (119.2 KB) - added by retracile 16 years ago.
- interlock-green-white-orange.jpg (125.7 KB) - added by retracile 16 years ago.
- interlock-interference-1.jpg (120.5 KB) - added by retracile 16 years ago.
- interlock-interference-2.jpg (104.9 KB) - added by retracile 16 years ago.
- interlock-mixed-1.jpg (116.0 KB) - added by retracile 16 years ago.
- interlock-mixed-2.jpg (116.3 KB) - added by retracile 16 years ago.
- interlock-mixed-3.jpg (109.7 KB) - added by retracile 16 years ago.
- interlock-mixed-4.jpg (111.4 KB) - added by retracile 16 years ago.
- interlock-mixed-5.jpg (120.3 KB) - added by retracile 16 years ago.
- interlock-red-green-white.jpg (105.8 KB) - added by retracile 16 years ago.
- interlock-red-yellow-blue.jpg (113.6 KB) - added by retracile 16 years ago.
- interlock-red-yellow-green.jpg (99.8 KB) - added by retracile 16 years ago.
- interlock-red-yellow-green-2.jpg (100.7 KB) - added by retracile 16 years ago.
- bandaged-corners.jpg (161.5 KB) - added by retracile 16 years ago.
- bandaged-edges.jpg (129.9 KB) - added by retracile 16 years ago.
Comments
No comments.